🕒 Arduino UTC Digital Clock with DS3231 & LCD
Generate ready-to-upload Arduino code for a DS3231 RTC + 16x2 LCD digital clock with UTC offset, 12/24h format, and PWM backlight control.
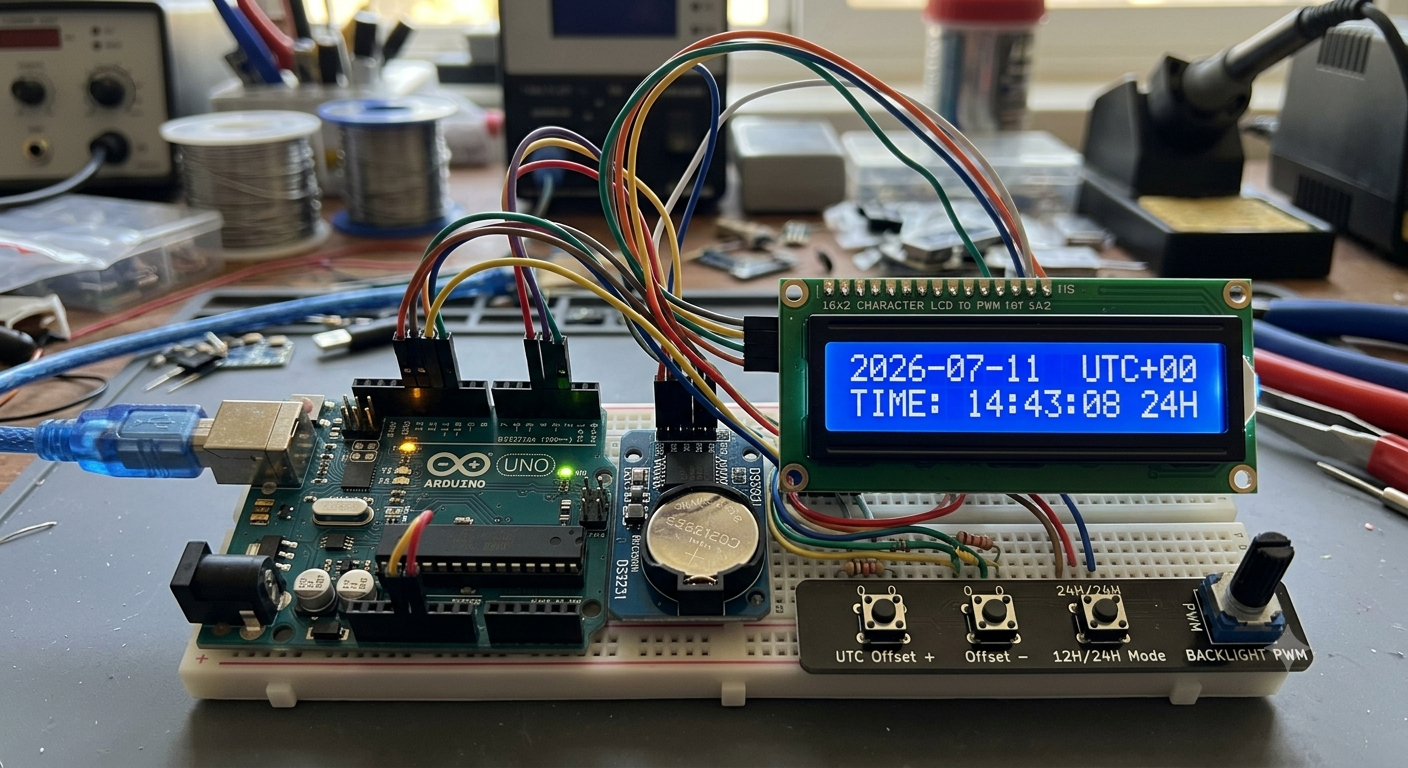
This project generates a complete, production-ready Arduino sketch for building an accurate digital clock using the popular DS3231 RTC module and a 16×2 character LCD.
Unlike software-based timers, the DS3231 provides precise timekeeping with battery backup. The generated code applies your chosen UTC offset (hours + minutes) so the display always shows correct local time. You can instantly switch between 12-hour (with AM/PM) and 24-hour formats, and control LCD backlight brightness via PWM for power saving or comfortable viewing.
Hardware required: Arduino Uno or Nano, DS3231 RTC breakout board, 16x2 LCD (HD44780), jumper wires, and optional 10kΩ potentiometer for contrast adjustment.
Excellent beginner-to-intermediate project for learning I2C communication, LCD interfacing, PWM, and real-time programming.
/*
  ==========================================================
   Arduino Digital Clock with UTC
   Generated by techlogics.net
   https://techlogics.net/electronics/arduino-digital-clock.php
  ==========================================================

   CAUTION: Review this code fully before uploading to any
   hardware. Verify all pin connections and power requirements
   match YOUR specific components. We are not responsible for
   damage to hardware, fire, or injury resulting from incorrect
   wiring, faulty components, or misuse of this code.

   Generated on: 18 Oct 2026
  ==========================================================
*/

/*
  Digital Clock with UTC Timezone — generated by techlogics.net
  Board: Arduino Uno/Nano + DS3231 RTC + 16x2 LCD
*/

#include <Wire.h>
#include <RTClib.h>
#include <LiquidCrystal.h>

// === User configuration (replaced automatically) ===
const int   UTC_OFFSET_HOURS   = 5;
const int   UTC_OFFSET_MINUTES = 30;
const bool  USE_24_HOUR_FORMAT = true;
const int   BACKLIGHT_PIN      = 6;
const int   LCD_BRIGHTNESS     = 200;

// LCD wiring: RS, EN, D4, D5, D6, D7
LiquidCrystal lcd(7, 8, 9, 10, 11, 12);
RTC_DS3231 rtc;

void setupBacklight() {
  pinMode(BACKLIGHT_PIN, OUTPUT);
  analogWrite(BACKLIGHT_PIN, LCD_BRIGHTNESS);
}

void setup() {
  Serial.begin(9600);
  lcd.begin(16, 2);
  setupBacklight();

  if (!rtc.begin()) {
    Serial.println("ERROR: Could not find DS3231 RTC");
    lcd.print("RTC Error!");
    while (1);
  }
}

void loop() {
  DateTime now = rtc.now();

  // Apply UTC offset
  int adjHour = now.hour() + UTC_OFFSET_HOURS;
  int adjMin  = now.minute() + UTC_OFFSET_MINUTES;
  int adjSec  = now.second();

  // Normalize minutes
  if (adjMin >= 60) {
    adjMin -= 60;
    adjHour += 1;
  }
  if (adjMin < 0) {
    adjMin += 60;
    adjHour -= 1;
  }

  // Normalize hours (wrap 0-23)
  if (adjHour >= 24) adjHour -= 24;
  if (adjHour < 0)   adjHour += 24;

  // === LINE 0: Time ===
  lcd.setCursor(0, 0);
  if (USE_24_HOUR_FORMAT) {
    if (adjHour < 10) lcd.print("0");
    lcd.print(adjHour);
    lcd.print(":");
    if (adjMin < 10) lcd.print("0");
    lcd.print(adjMin);
    lcd.print(":");
    if (adjSec < 10) lcd.print("0");
    lcd.print(adjSec);
    lcd.print("        ");
  } else {
    int displayHour = adjHour % 12;
    if (displayHour == 0) displayHour = 12;
    if (displayHour < 10) lcd.print("0");
    lcd.print(displayHour);
    lcd.print(":");
    if (adjMin < 10) lcd.print("0");
    lcd.print(adjMin);
    lcd.print(":");
    if (adjSec < 10) lcd.print("0");
    lcd.print(adjSec);
    lcd.print(adjHour >= 12 ? " PM" : " AM");
  }

  // === LINE 1: Date + branding ===
  lcd.setCursor(0, 1);
  if (now.day() < 10) lcd.print("0");
  lcd.print(now.day());
  lcd.print("/");
  if (now.month() < 10) lcd.print("0");
  lcd.print(now.month());
  lcd.print("/");
  lcd.print(now.year() % 100);
  lcd.print("  techlogics");

  delay(500);
}

/*
  ==========================================================
   End of generated code — techlogics.net
   Found this useful? Visit https://techlogics.net/electronics/arduino-digital-clock.php
   for more free CCTV, networking, electronics & finance tools.

   Questions or issues? https://techlogics.net/contact.php
  ==========================================================
*/
1. Wire the DS3231 RTC to Arduino I2C (SDA=A4, SCL=A5) and connect the 16x2 LCD to pins 7-12 as shown in the generated code.
2. Connect the LCD backlight to your chosen BACKLIGHT_PIN (use a PWM pin) and GND.
3. Configure your local UTC offset (hours + minutes), choose 12 or 24-hour format, and set backlight pin + brightness.
4. Click Generate Code, then Copy or Download the Arduino sketch.
5. Open the .ino file in Arduino IDE, select your board (Uno/Nano), and upload.
6. Power on the board — the LCD will show accurate local time with running seconds and date.