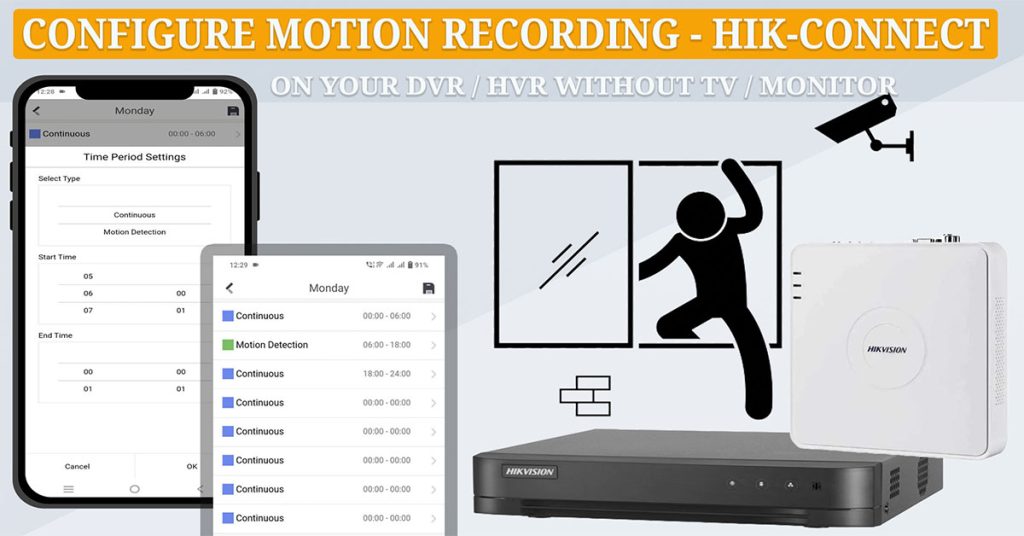
In this detailed guide, we’ll walk you through the process of configuring motion detection or continuous recording on your Hikvision DVR or HVR using the Hik-Connect mobile app. This is especially useful when you don’t have access to a TV or monitor to carry out the configuration, making it possible to manage your CCTV system directly from your smartphone.
What You’ll Need
Before you begin, ensure that:
- Your Hikvision DVR or HVR is properly connected to your network.
- Your mobile phone is connected to the same local network (LAN or WiFi) as the DVR/HVR.
- You have the Hik-Connect mobile app installed on your smartphone (available for both iOS and Android).
Step-by-Step Configuration Guide
1. Add Your DVR to the Hik-Connect App
- Launch the Hik-Connect App:
Open the Hik-Connect app on your smartphone. - Access the Device Tab:
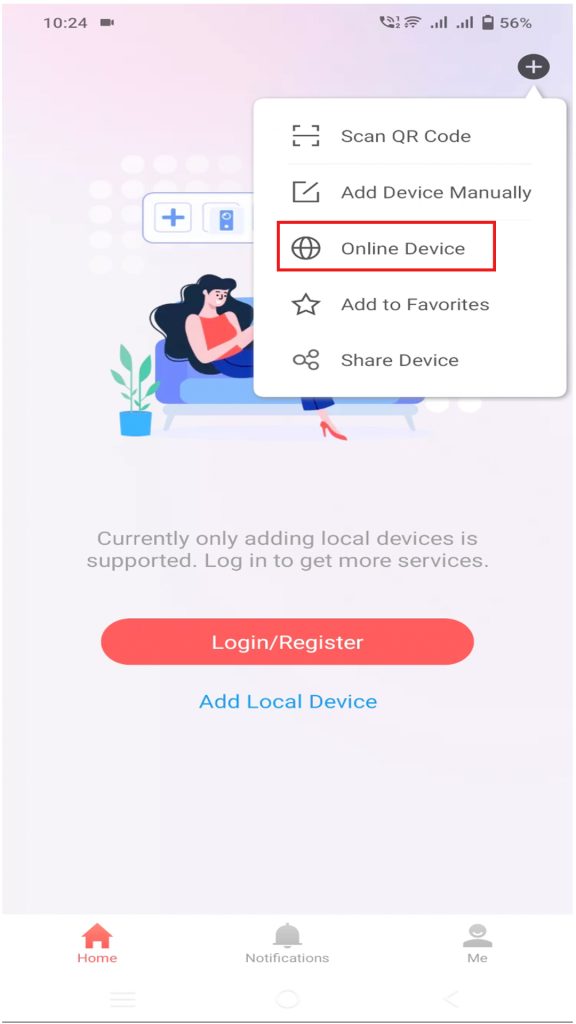
Once the app is open, tap on the Device tab at the bottom of the screen. - Add Your DVR:
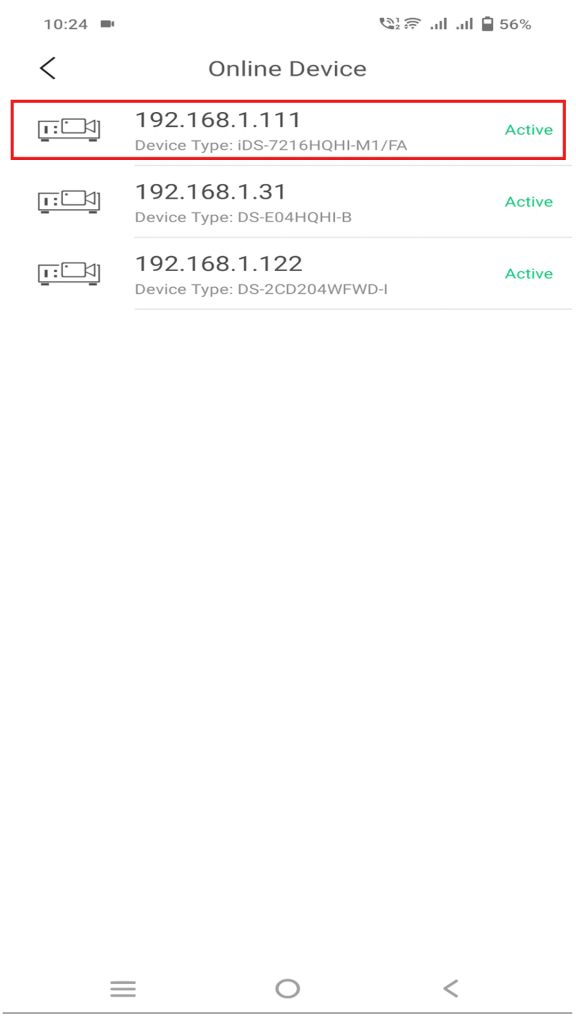
Tap the + icon located at the top-right of the screen and select Online Device from the menu options. The app will search for devices connected to your local network. - Select Your DVR:
The app will display the IP address of your DVR or HVR if it’s properly connected to the network. Locate your DVR from the list of detected devices and tap on it. - Enter Device Credentials:
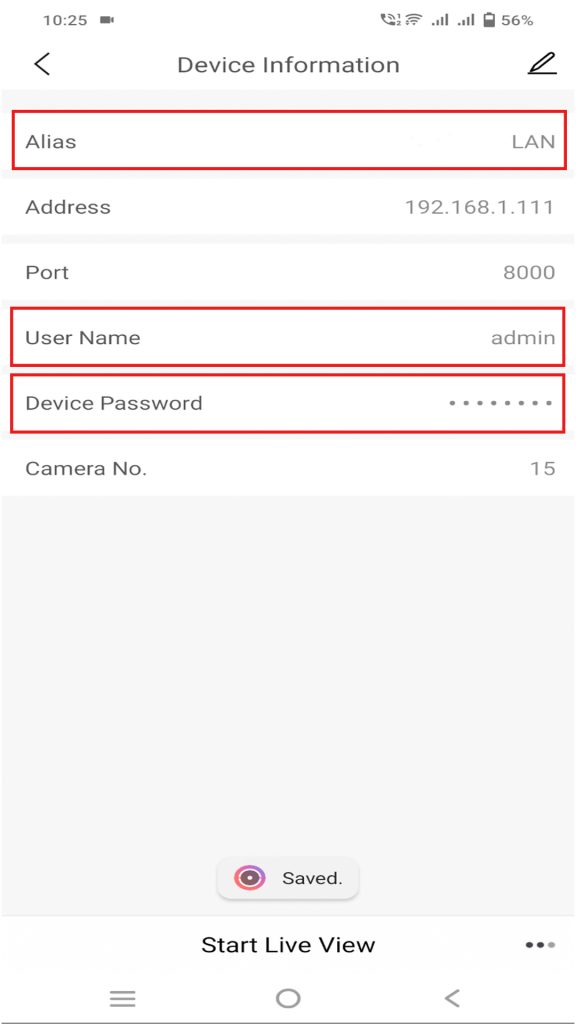
You’ll be prompted to enter your DVR’s login credentials. These are typically:- Alias Name: Choose a name that helps you easily identify your DVR (e.g., “Home DVR” or “Office DVR”).
- Admin Username: This is usually set to admin by default unless changed during initial setup.
- Admin Password: Enter the password you set for your DVR. If it hasn’t been changed, use the default password.
- Save the Settings:
After entering the correct credentials, tap Save. Your DVR will now be linked to your Hik-Connect app.
2. Access DVR Settings for Recording Configuration
- Go to Live View:
Once your DVR is added, you will be taken to the Live View section where you can see real-time footage from your cameras. - Access Camera Settings:
To configure the recording settings, tap the three dots (settings) at the top-right corner of the screen, then tap Device Information. - Navigate to Remote Configuration:
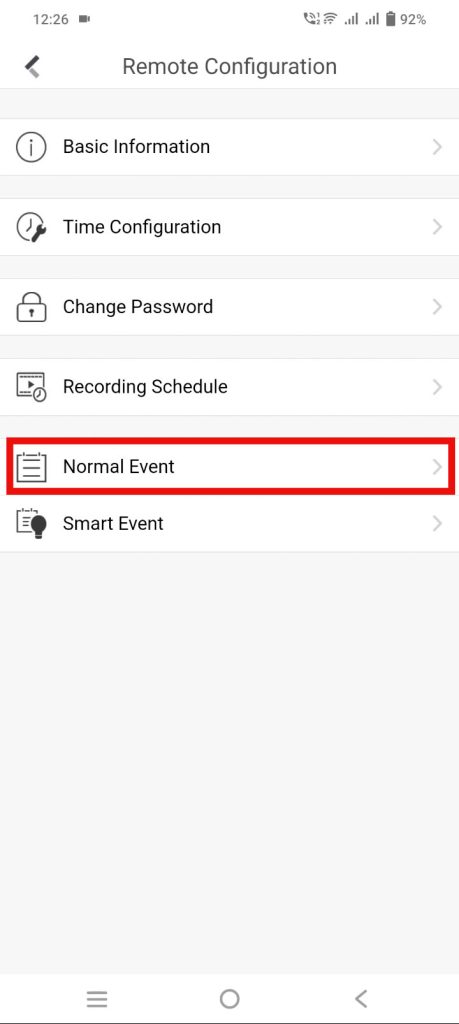
On the Device Information page, tap the three dots at the bottom-right corner and select Remote Configuration to access the DVR’s configuration menu.


3. Configure Recording Schedule (Motion Detection and Continuous Recording)
Once you’re in the DVR’s configuration page, you’ll need to configure how the DVR records footage. Here’s how to set up Motion Detection and Continuous Recording for your cameras.
Enable Motion Detection for Cameras
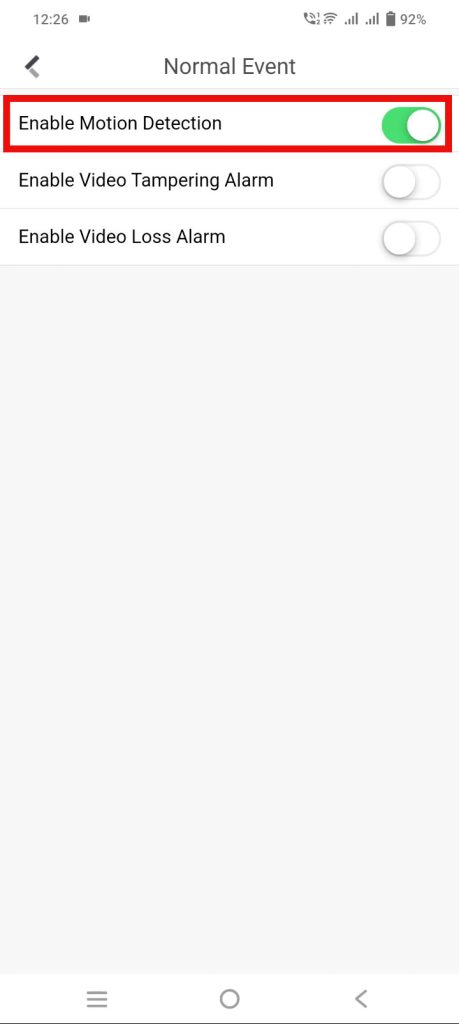
- Enable Motion Detection:
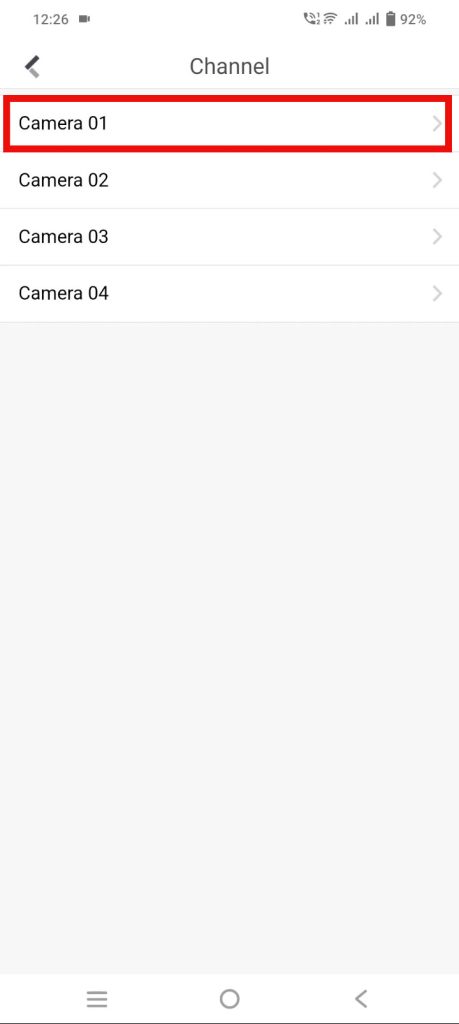
Under Normal Event, you’ll see a list of cameras connected to your DVR. Select the camera for which you want to enable motion detection. Toggle on the Enable Motion Detection option for that camera. Repeat this process for all cameras you wish to activate motion detection.
Set Up the Recording Schedule
Now that motion detection is enabled for the cameras, you can configure the recording schedule for continuous or motion-triggered recording.
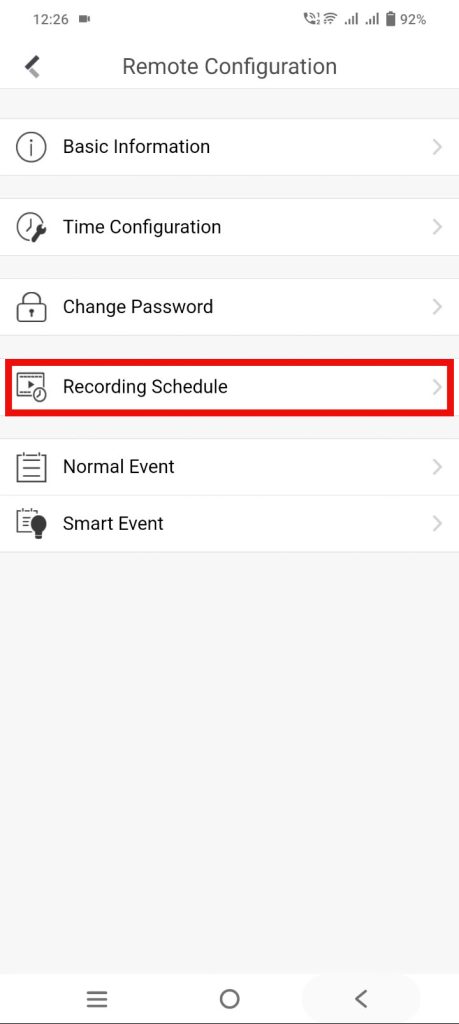
- Go to Recording Schedule:
In the Remote Configuration section, locate the Recording Schedule option. This is where you define when the cameras will record continuously or only when motion is detected. - Set Continuous Recording for Specific Times:
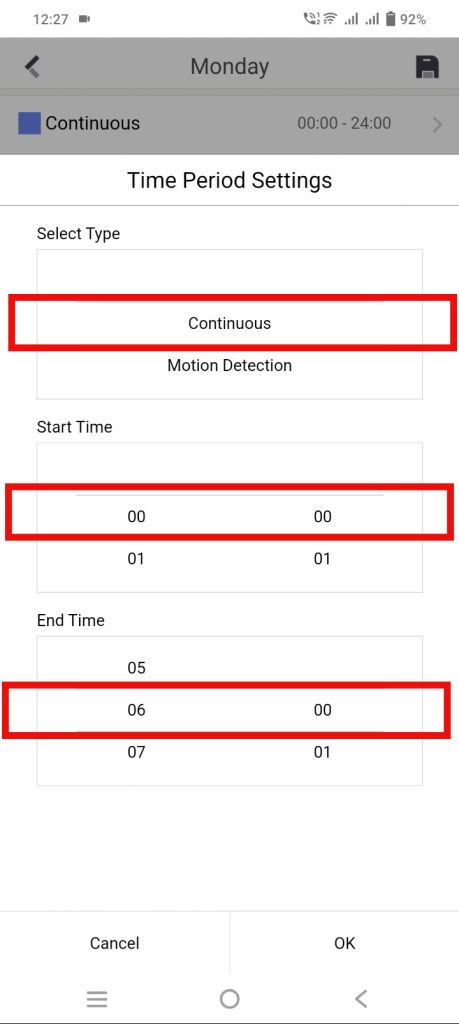
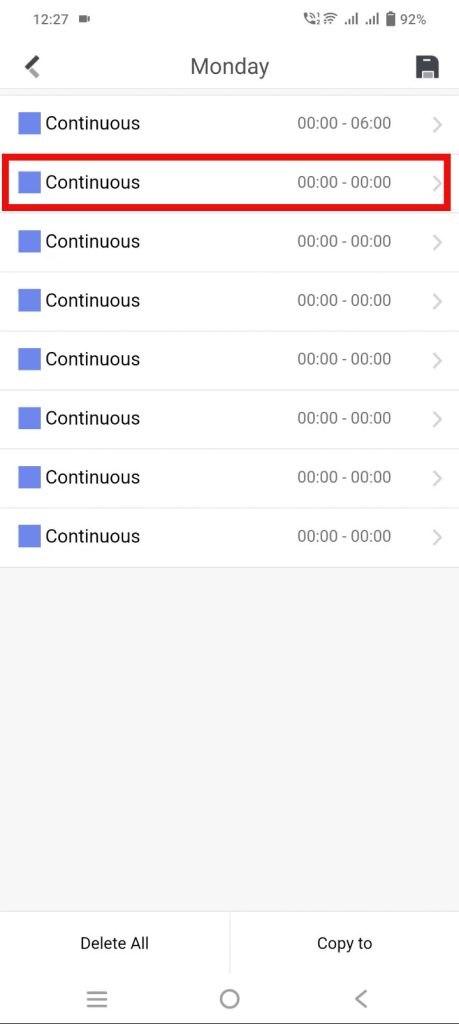
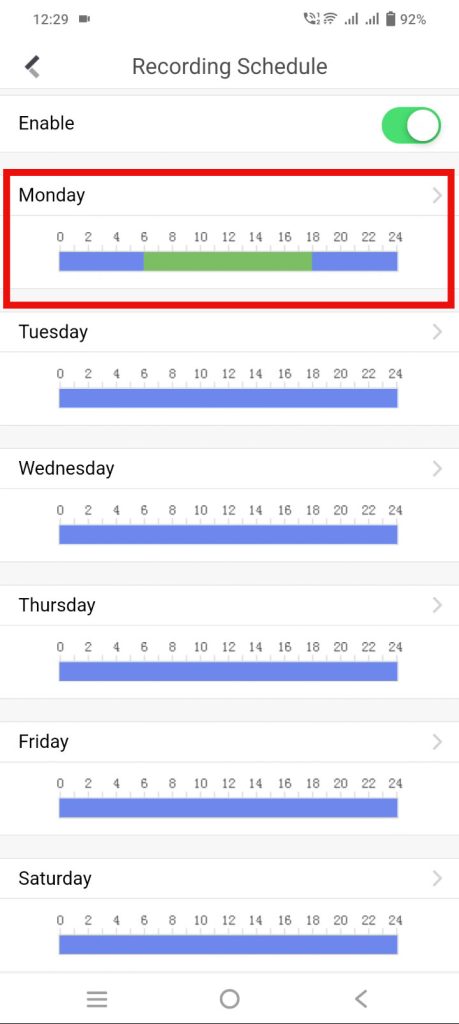
On the recording schedule, you will see a timeline with time slots for each day of the week. For example:- Continuous Recording: This is represented by a blue bar on the schedule. You can configure cameras to record continuously during certain hours.
- Configure Motion Detection Recording:
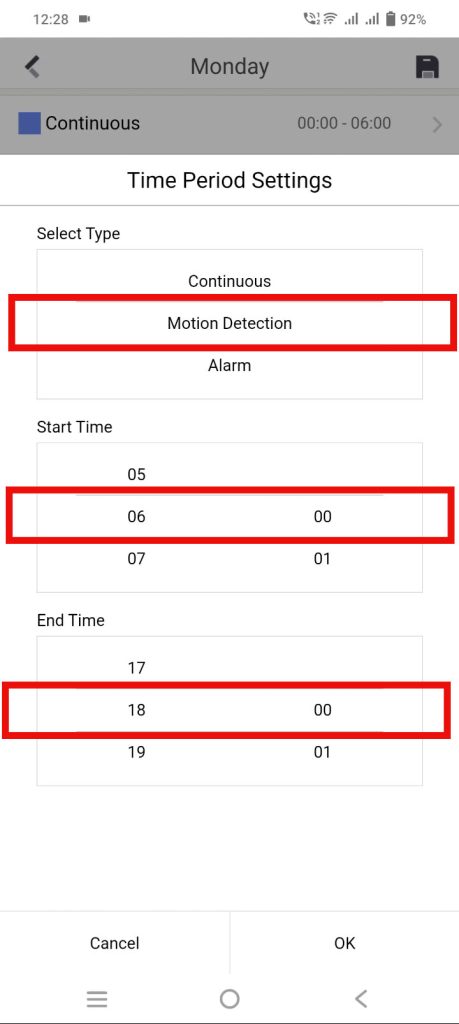
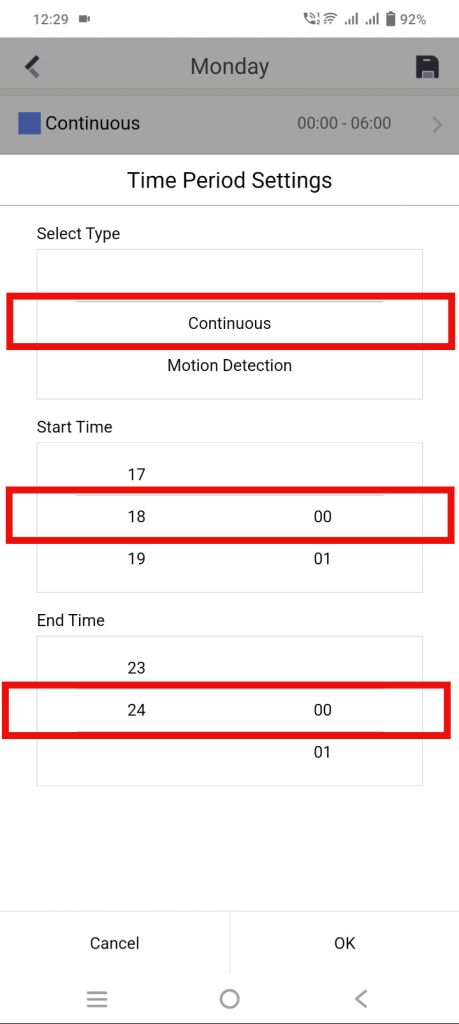
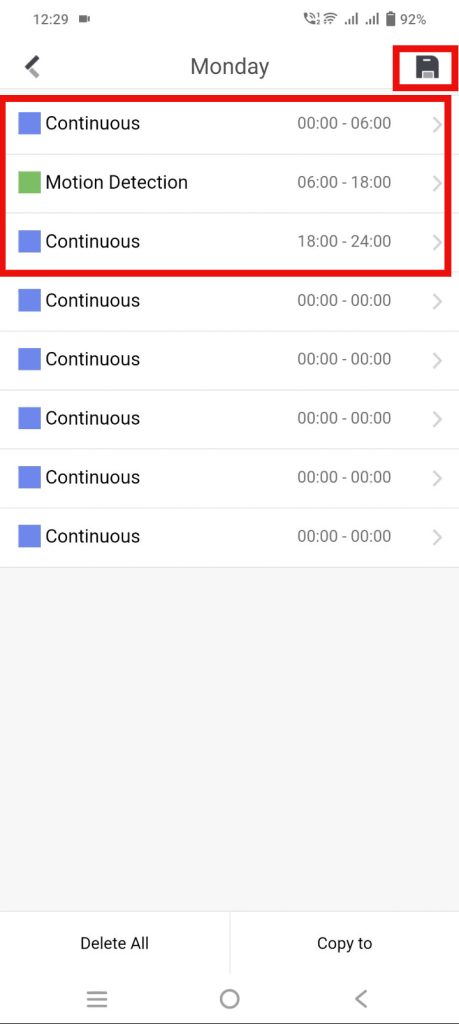
To set up motion detection during certain hours, for example from 6 AM to 6 PM, select the Motion Detectionoption for that time slot. This will ensure the camera only records when it detects movement. The motion detection recording is represented by a green bar on the timeline. - Complete the Day’s Schedule:
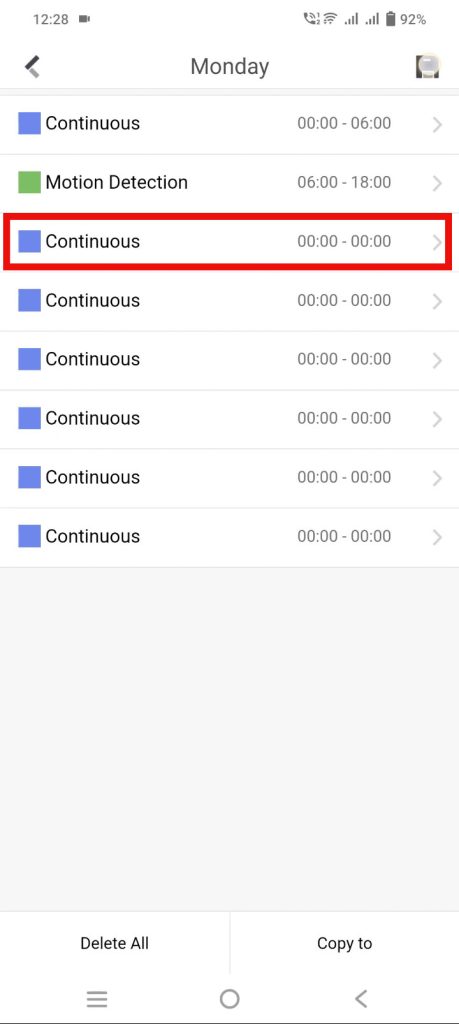
Continue filling out the remaining time slots for the day. In this example:- Set the camera to continuous recording again from 6 PM to midnight (00:00).
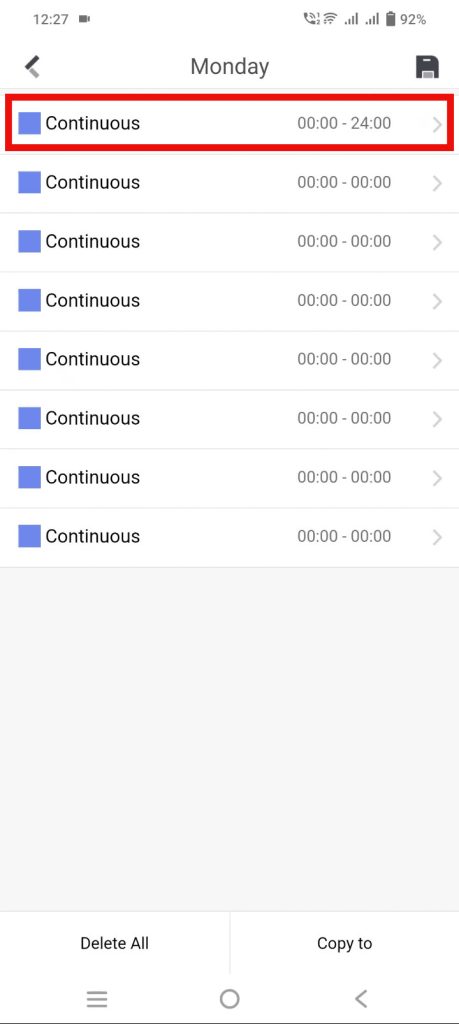
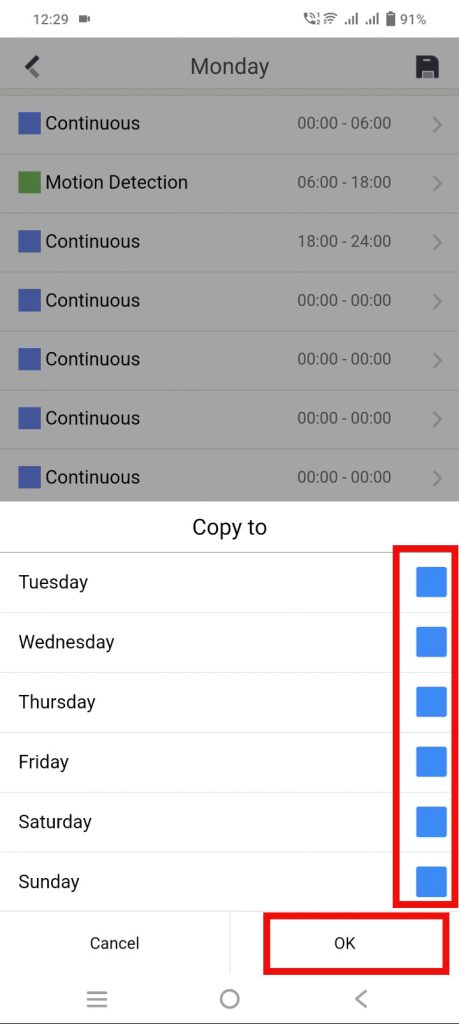
Example of a Recording Schedule for Monday:
- 12:00 AM to 6:00 AM: Continuous Recording (Blue Bar)
- 6:00 AM to 6:00 PM: Motion Detection (Green Bar)
- 6:00 PM to 12:00 AM: Continuous Recording (Blue Bar)
4. Apply the Schedule to Other Days
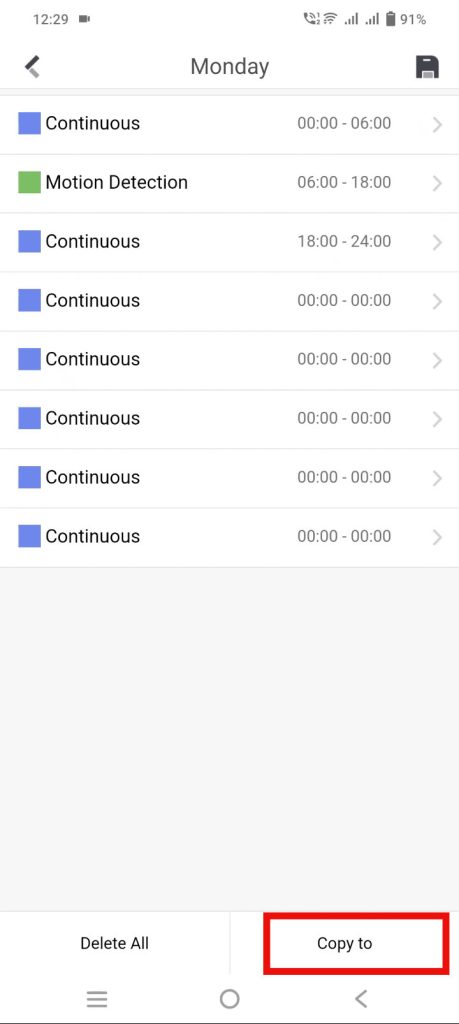
- Copy Schedule to Other Days:
If you want to apply the same schedule to other days (e.g., for Tuesday to Saturday), tap Copy To and select the days. Once you’ve selected the desired days, tap Save. - Modify Sunday’s Schedule (if necessary):
If you want Sunday to have a different configuration (e.g., 24/7 motion detection), go to Sunday on the schedule and adjust the recording type accordingly. For motion detection all day, select Motion Detection for the entire day (00:00 to 24:00).
5. Configure Other Cameras (Optional)
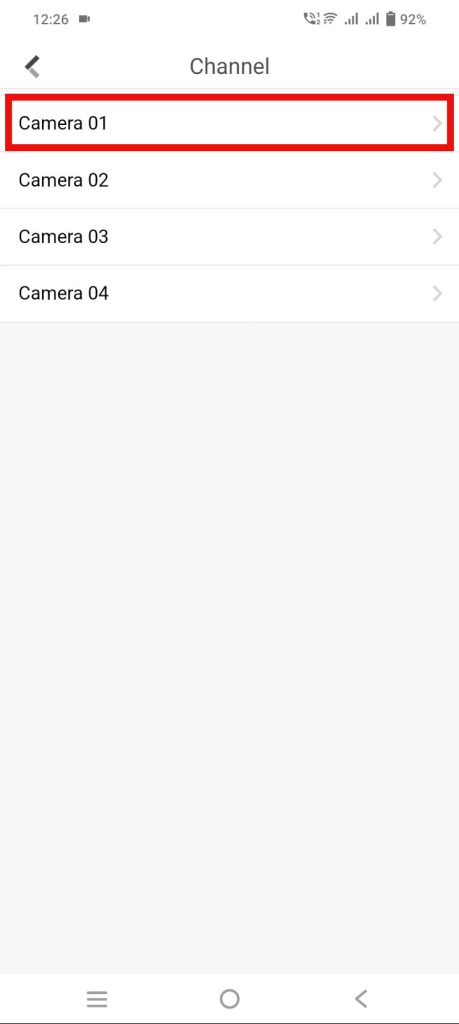
Repeat the process for other cameras connected to your DVR. For example:
- For Camera Channel 2, you can set it up to record motion detection 24/7 (as shown in the example for Camera 1). Adjust the schedule according to your needs and Save the configuration.
6. Verify the Recording Schedule
Once you’ve set up the recording schedule, you can check if it’s working correctly:
- Playback the Footage:
Open the Playback section in the Hik-Connect app. You will see a timeline with different-colored bars representing each recording type.- Orange Bar: Motion Detection-based recording.
- Blue Bar: Continuous recording.
- Empty Space: No recording during that time.
By reviewing the timeline, you can easily confirm that the cameras are recording according to the set schedule.
Conclusion
Configuring your Hikvision DVR or HVR to record based on motion detection or continuously using the Hik-Connect app is a simple and efficient process. With just your smartphone and the app, you can manage your DVR’s settings without needing a TV or monitor. Whether you want to record continuously for certain hours or only when motion is detected, the flexibility of the Hik-Connect app makes it easy to customize your CCTV system’s recording behavior to suit your needs.
For further guidance, don’t forget to check out the other segments in our video series, where we dive deeper into Hikvision devices and configurations.
If you found this tutorial helpful, please like, share, and subscribe to our channel for more insightful videos on configuring your Hikvision DVR and other security systems. Your support is highly appreciated!
