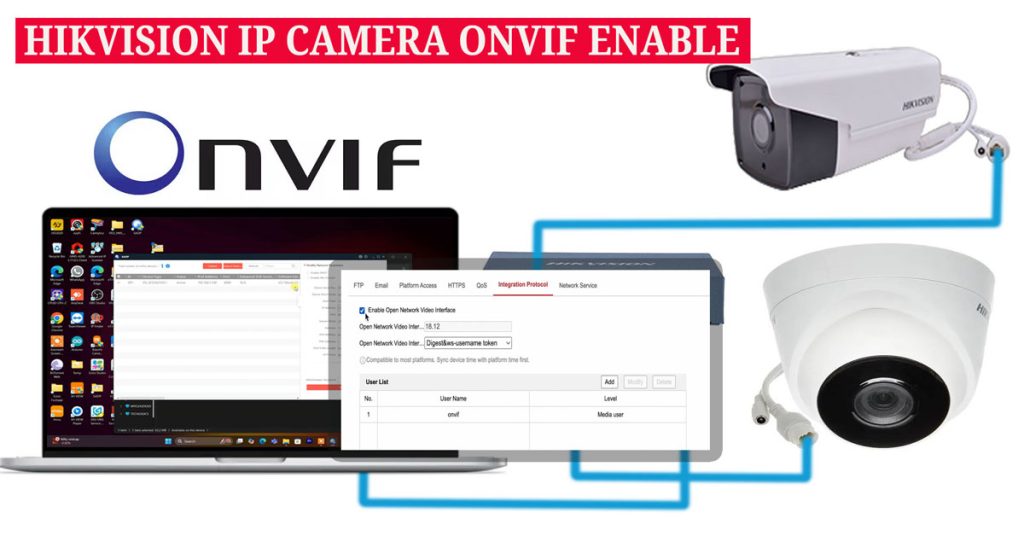
Enabling the ONVIF (Open Network Video Interface Forum) protocol on your Hikvision IP camera can significantly expand its functionality, allowing seamless integration with third-party streaming devices and applications that support ONVIF. In this step-by-step guide, we’ll walk you through the configuration process to help you set up ONVIF on the latest Hikvision IP cameras for external platform compatibility.
Step 1: Network Preparation
Before you begin, ensure that both your Hikvision IP camera and your computer are connected to the same network. This network alignment is essential for smooth configuration and access to the camera’s settings.
If this is your first time using the camera or you need to locate its IP address, download the SADP tool from Hikvision. This tool helps you discover connected devices and their IP addresses on your local network.
Step 2: Activating Your Hikvision Camera
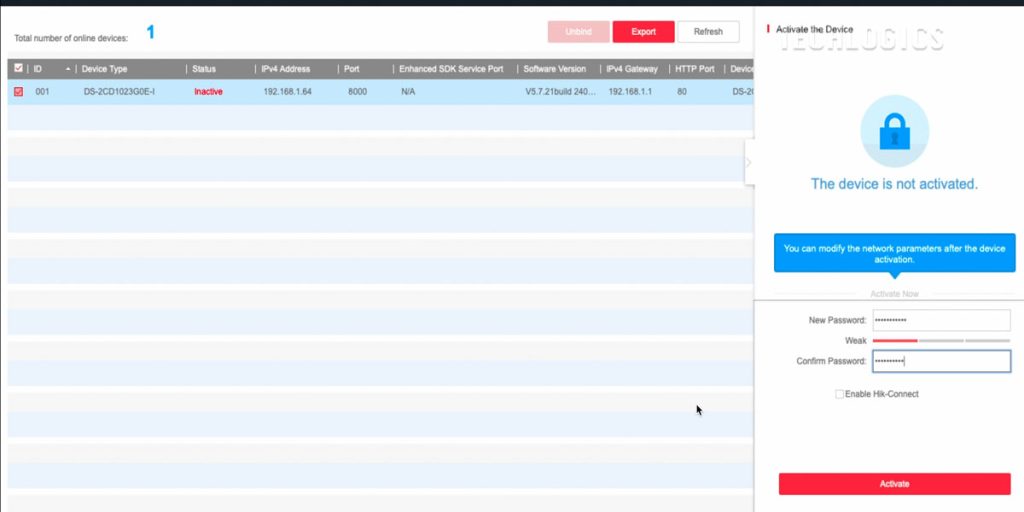
When setting up a new camera, you’ll need to activate it by creating a custom password. Follow these steps:
- Open the SADP tool and select your camera.
- Enter a custom password in the fields provided and click the Activate button.
- A pop-up may appear prompting you to set security questions and register your email address. This step is optional but can be useful for password recovery.
Note: The default IP address for Hikvision cameras is often set to
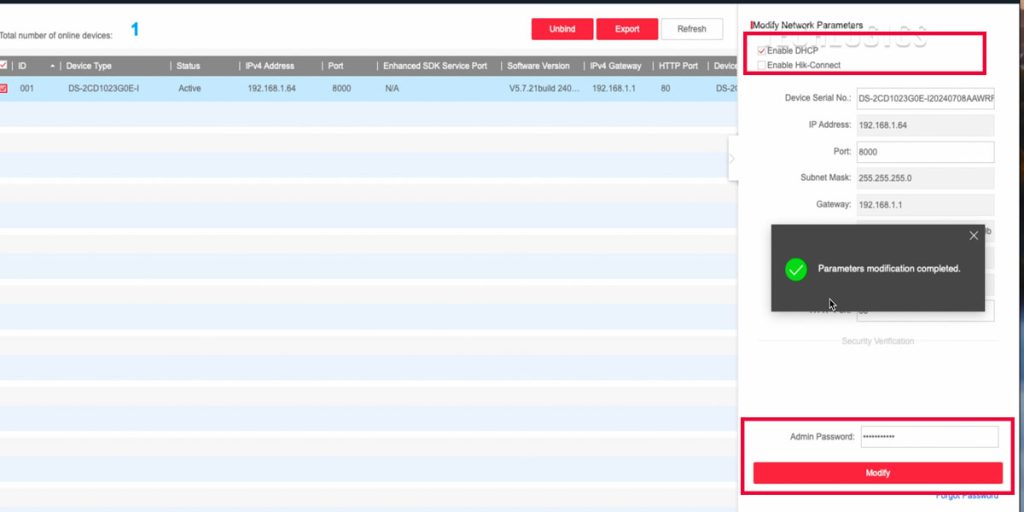
192.168.1.64. If your network’s IP range differs, you may not be able to access the camera immediately. To resolve this, enable DHCP to automatically assign an IP address that matches your network range.
To enable DHCP:
- In the SADP tool, select DHCP and enter the admin password you just created.
- Click Modify to save the settings. The camera should now be assigned an IP address compatible with your network.
Step 3: Accessing the Camera in Your Browser
With the IP address now accessible, open a web browser and enter the camera’s IP address in the URL bar. Log in using the username and password you created during activation. You may need to install a web plugin to view the camera’s feed.
Step 4: Enabling the ONVIF Protocol
To enable ONVIF, navigate through the camera’s interface:
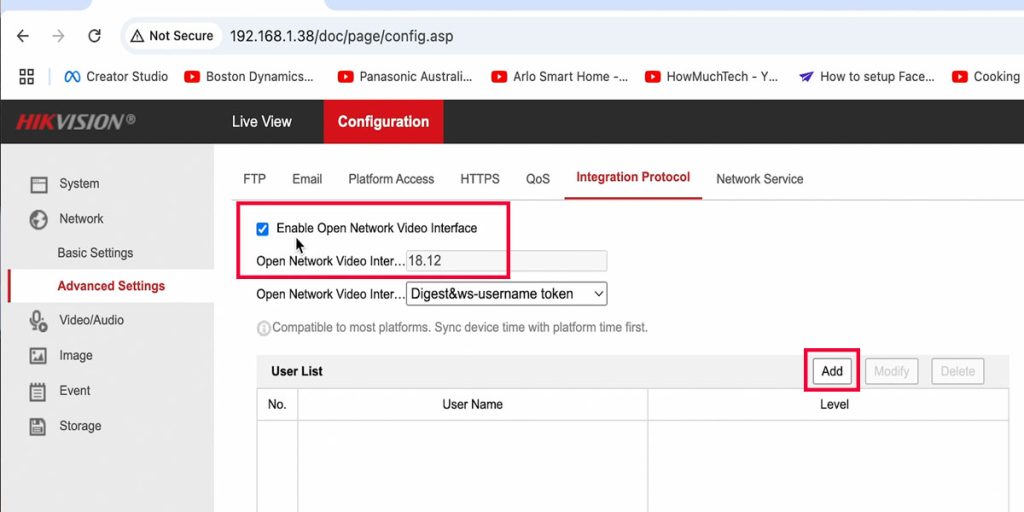
- Go to the Configuration section.
- Select Network > Advanced Settings.
- Find the Integration Protocol option and click on it to begin configuring ONVIF.
This setup allows your camera to communicate with compatible third-party devices and applications, extending its capabilities across your network.
- Check the box for Enable Open Network Video Interface (ONVIF).
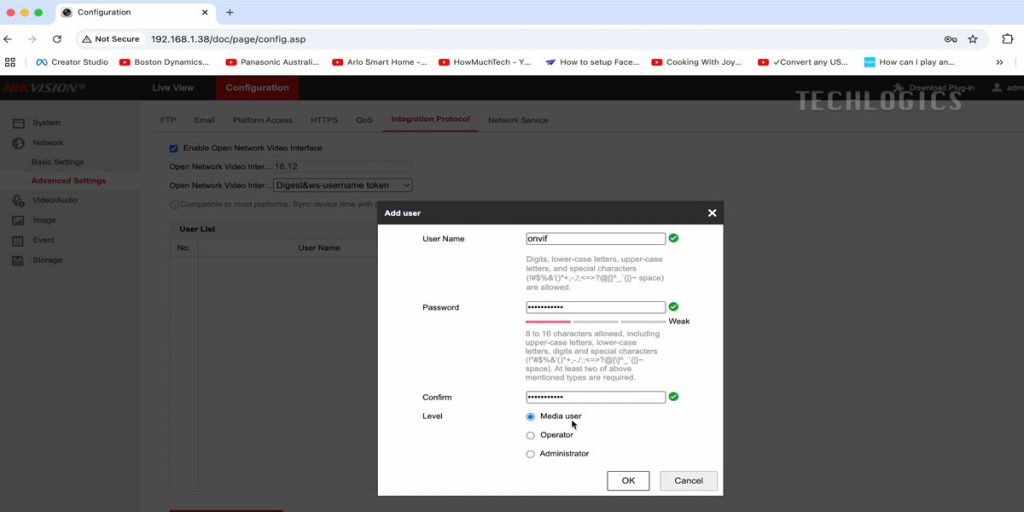
- Create a new ONVIF username and password for secure access. This will control access for any third-party devices or software connecting via the ONVIF protocol.
Tip: Assign the user level as Media User for basic streaming access. If you need more advanced permissions, consider selecting Operator or Admin, depending on the level of control you need.
- Click OK to save your ONVIF settings.
Step 5: Optional: Setting a Static IP
For added convenience, consider assigning a static IP address to the camera. This prevents its IP from changing after a reboot, making it easier to manage on your network.
Integrating the ONVIF Camera with Third-Party Software
With ONVIF now enabled, your Hikvision camera is ready for integration with third-party devices and applications that support the protocol. Use the ONVIF credentials you created to add the camera to software such as IP Camera Viewer, providing additional flexibility for streaming and monitoring.
Stay Connected for More Tips and Tutorials
We hope this tutorial has helped you enable ONVIF on your Hikvision IP camera. For more guides on ONVIF integration, third-party device compatibility, and security camera setup, subscribe to our channel for future updates.
If you found this helpful, please support our channel by liking, sharing, and subscribing. Your engagement motivates us to continue creating valuable content for the community. Thank you for your support!
