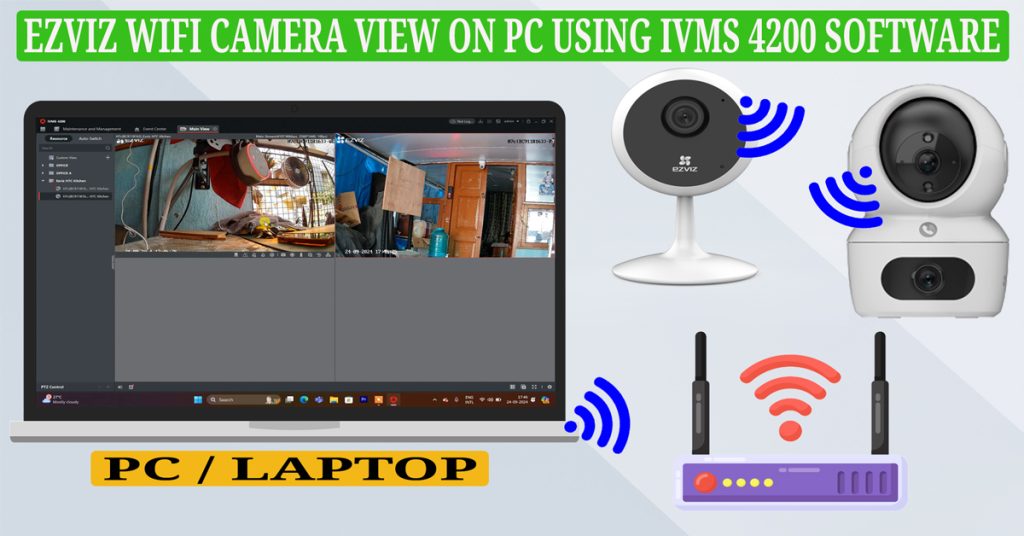
In this tutorial, we’ll show you how to access the live view and other features of your EZVIZ WiFi camera on your laptop or PC using Hikvision’s iVMS-4200 software. Follow these steps to get your camera connected and configured for easy access and control.
Step 1: Download and Install iVMS-4200 Software
To start, you’ll need to download and install the iVMS-4200 software from the Hikvision website.
Download Ivms 4200 : https://www.hikvision.com/en/support/download/software/ivms4200-series/
For Windows PC/Laptop : iVMS-4200(V3.12.0.6_E). For Mac PC/Laptop : iVMS-4200 MAC V2.0.0.17
Note: Ensure that both your EZVIZ WiFi camera and your PC or laptop are connected to the same LAN or WiFi network. This method will only work when both devices are on the same network.
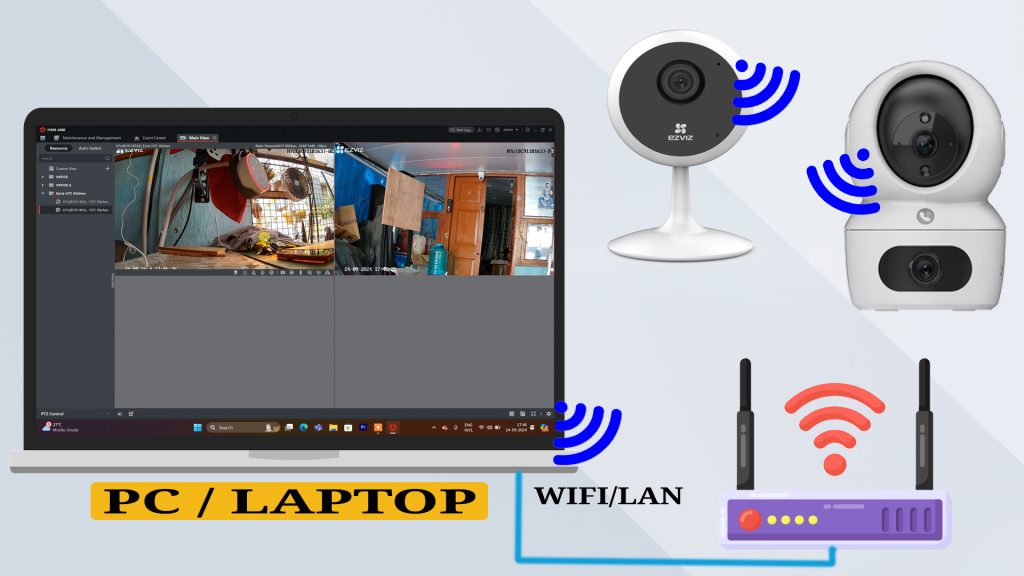
Step 2: Initial Setup of iVMS-4200 Software
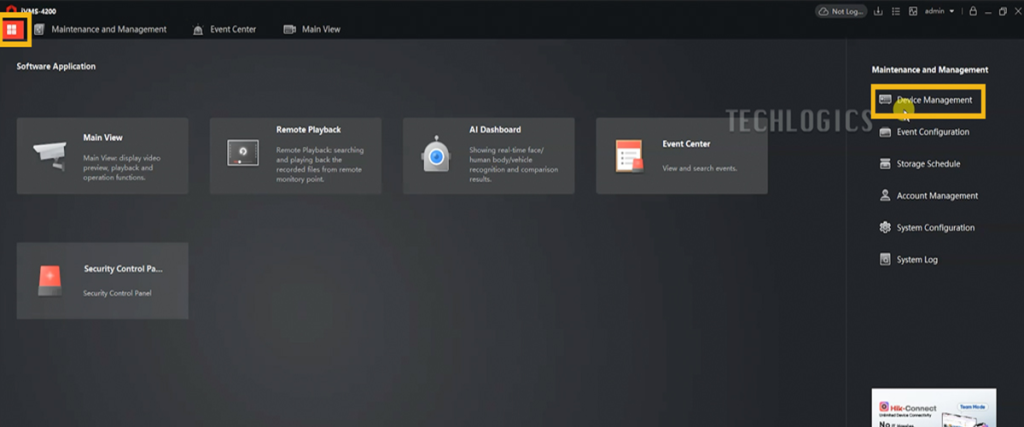
Once you have installed the software, launch iVMS-4200 and complete the initial setup. After the setup is done, go to the main menu and select the ‘Device Management’ option.
Step 3: Add Your Camera
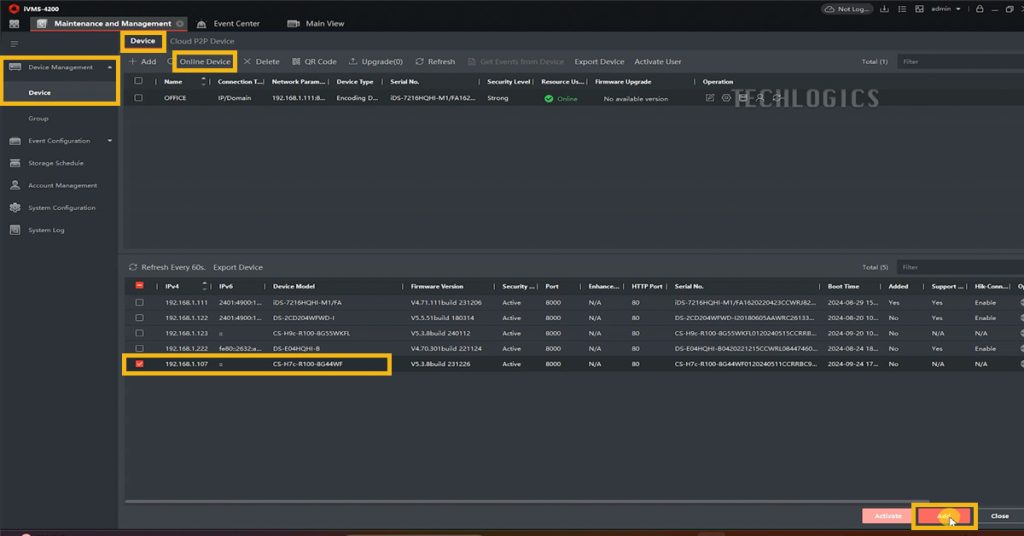
- Navigate to the ‘Device’ tab within the software.
- Select the option ‘Device Online’. This will scan your local network to detect any EZVIZ or Hikvision cameras connected to the same router or modem.
- A table will display the detected cameras. Find your EZVIZ camera in the list, tick the checkbox next to it, and click ‘Add’ to proceed.
Step 4: Enter Camera Details
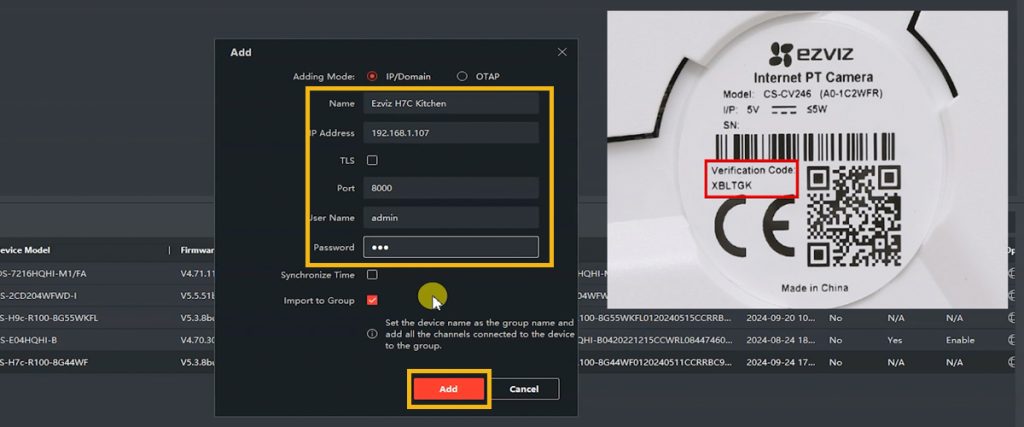
After clicking ‘Add’, a pop-up window will appear prompting you to enter your camera’s details:
- Camera Name: Enter a preferred name for your camera, such as “Front Door Camera” or “Living Room Camera.”
- IP Address: Leave the IP Address field unchanged as it is automatically populated.
- Username: Enter ‘admin’ (the default username for EZVIZ cameras).
- Password: Input the correct password that was set during your camera’s initial setup.
- Verification Code: This code can be found on a label attached to the camera body. If you’re unable to locate it, you can also retrieve it through the EZVIZ app under the camera’s settings.
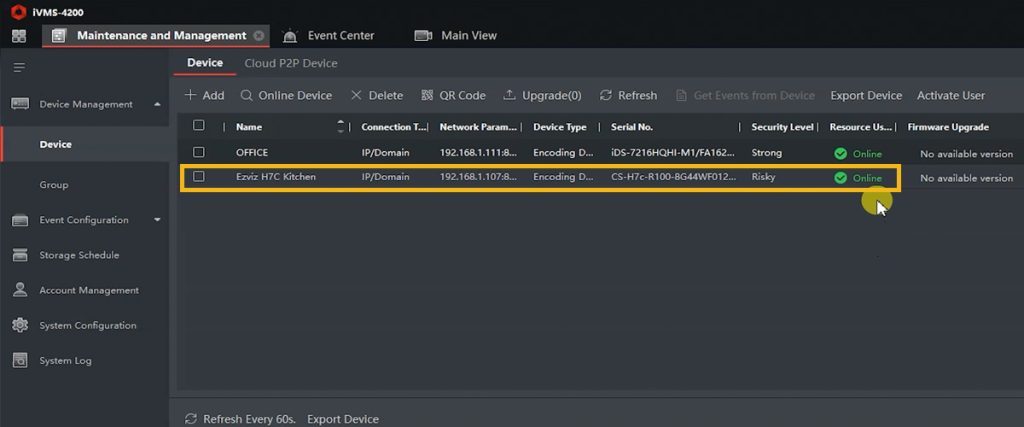
Once all fields are filled in, click ‘OK’ or ‘Add’ to finalize the setup. Your EZVIZ camera will now appear in the ‘Device’ table, and the status will show ‘Online’, indicating the camera is connected correctly.
Step 5: Access the Live View
Now that your camera has been added, you can view the live stream:
- Navigate to the ‘Live View’ menu.
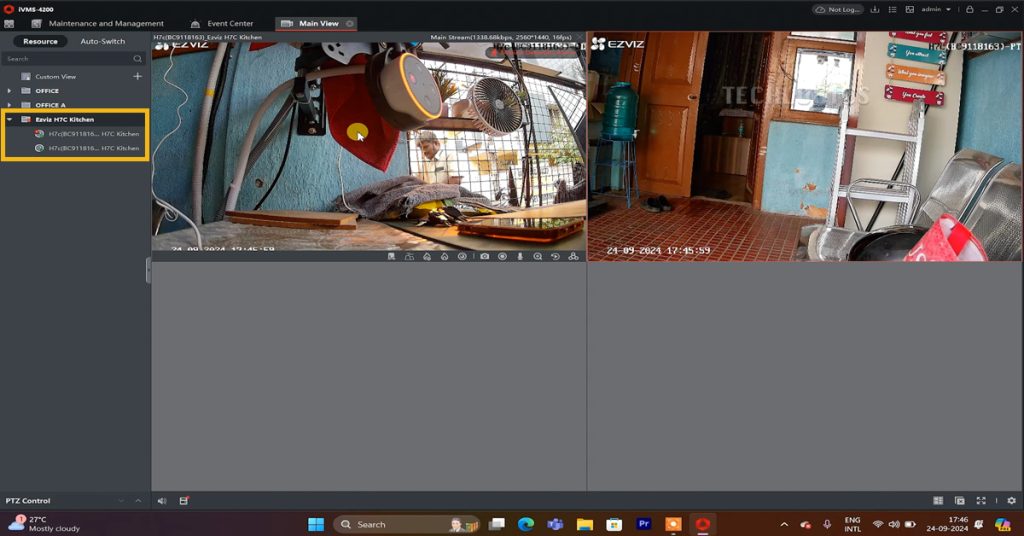
- The camera you added will be listed under this menu. If you are using a dual-lens camera (like in this demonstration), both lenses will be displayed separately—one for the fixed lens and another for the PT lens.
- Select each lens individually or click the play button next to the camera name to view the live stream.
Step 6: Control Pan and Tilt Functions
For cameras with pan and tilt (PTZ) capabilities:
- Right-click on the PT lens view and select ‘Open PTZ Control’.
- This will activate the pan and tilt control interface, allowing you to adjust the camera’s positioning directly within the software.
Step 7: Customize Your View
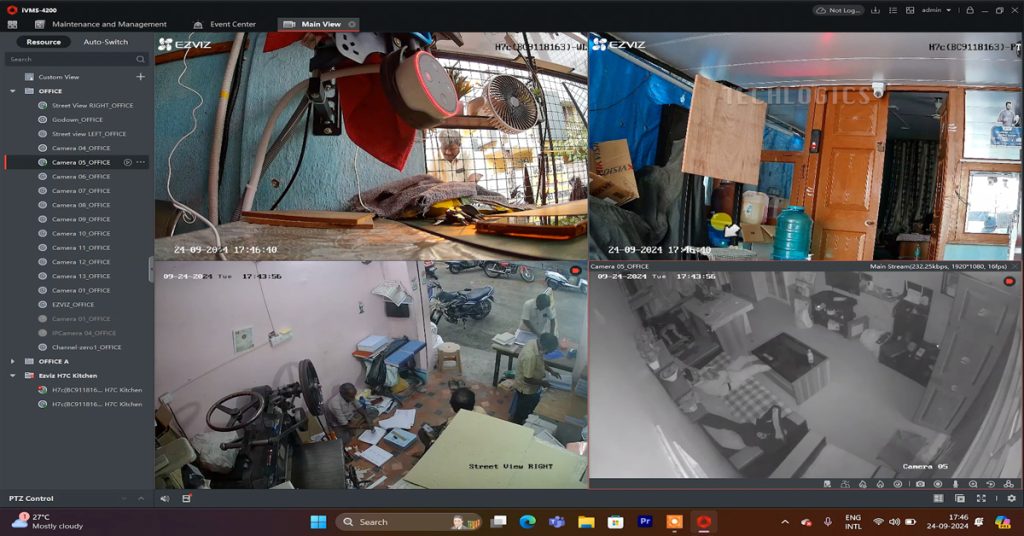
One of the useful features of iVMS-4200 is the ability to view both Hikvision and EZVIZ cameras in the same window. You can customize the layout to monitor multiple cameras simultaneously, making it easier to manage all your connected devices.
Step 8: View Recorded Footage
In addition to live streaming, the software also allows you to view recorded footage from your EZVIZ camera via the ‘Remote Playback’ menu. We’ve covered this process in another video, so be sure to follow our channel for more details.
Conclusion
By following these steps, you can easily access the live view, control pan and tilt functions, and manage multiple cameras using Hikvision’s iVMS-4200 software. For more detailed tutorials on using the EZVIZ camera or other related features, subscribe to our channel and stay updated!
