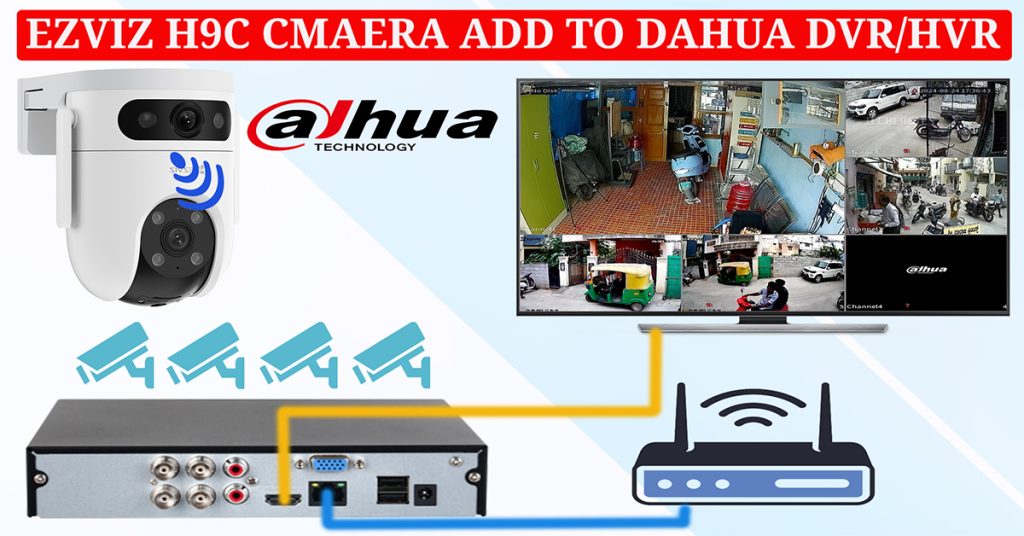
Integrating an EZVIZ H9C Dual-Lens Wi-Fi Smart Camera with a Dahua HVR can significantly enhance your home security system. This setup allows you to stream live footage from the camera and record it directly on the HVR. In this guide, we’ll walk you through the steps to successfully integrate the EZVIZ H9C with your Dahua HVR, ensuring both devices are on the same local network for effective communication.
Step 1: Prepare Your Devices
Before starting the integration process, ensure your EZVIZ H9C camera is operational. Connect the camera to your local network via Wi-Fi. Similarly, make sure your Dahua HVR is connected to the same LAN or Wi-Fi network using the same router or modem. This network alignment is crucial for both devices to communicate effectively.
Step 2: Access the Dahua HVR
To begin, connect your Dahua HVR to a monitor or TV screen and log into the admin account using the HVR’s interface. Once logged in, navigate to the ‘Camera’ section, where you can manage your connected cameras.
Step 3: Check Channel Availability
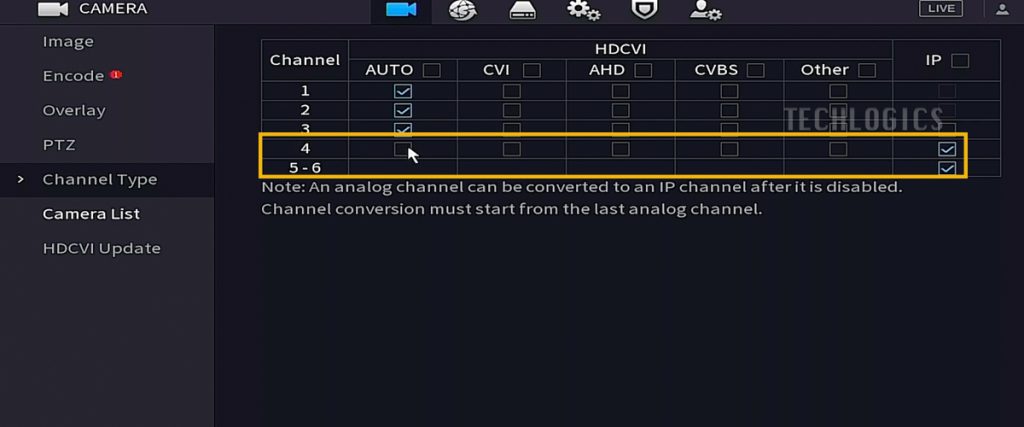
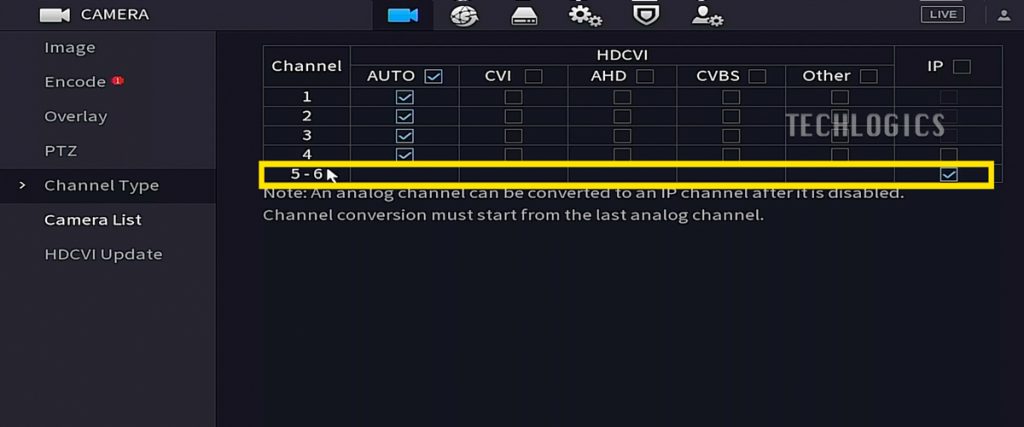
Locate the ‘Channel List’ within the Camera section to review the available channels and determine how many IP cameras your HVR can support. For example, a 4-channel Dahua HVR can support two IP cameras by default, with Channels 1 to 4 designated for analog cameras and Channels 5 and 6 reserved for IP cameras.
If your HVR allows only one IP camera on Channel 5 and you need an additional channel for the dual-lens EZVIZ camera, you can convert one of the analog channels to an IP channel. For instance, if Channel 4 is designated for an analog camera, disable it and reassign it as an IP channel. After this adjustment, Channels 4 and 5 can be used for the EZVIZ H9C camera, enabling you to view and record the dual-channel live stream.
However, since this model supports Channels 5 and 6 for IP cameras by default, you can directly use these channels for the EZVIZ H9C camera.
Step 4: Add the EZVIZ H9C Camera Using ONVIF
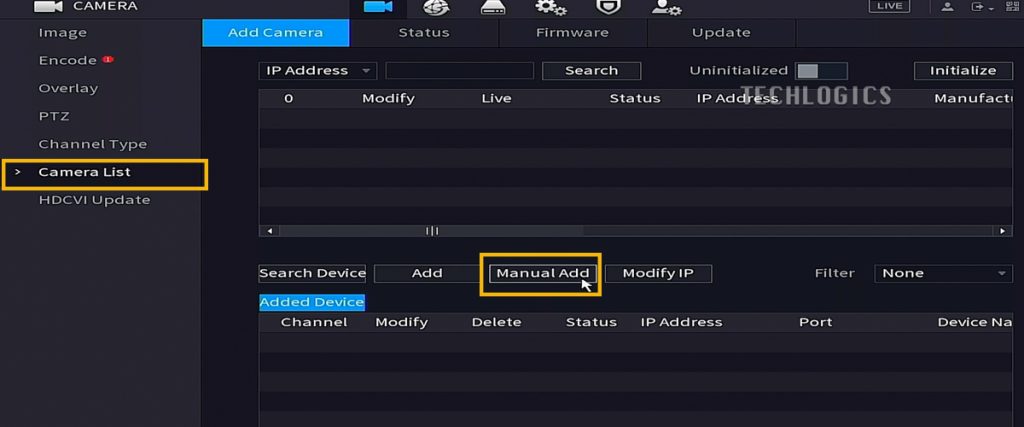
To add the EZVIZ H9C Dual-Lens Camera, navigate to the ‘Camera List’ menu on your Dahua HVR. Click on the “Manual Add” button to initiate the camera addition process. Channel ‘D5’ will be selected automatically. Under the manufacturer option, select ‘ONVIF’ to set the protocol.
Input Camera Details
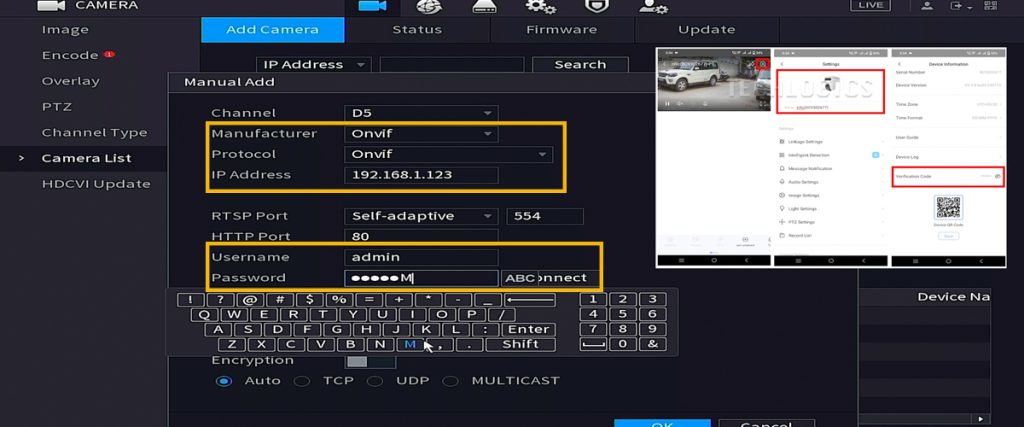
Next, enter the IP address of the H9C camera in the designated field. Leave the ‘RTSP’ and ‘HTTP’ port settings as default. Enter the camera username (‘admin’) and password, which is the verification code found on the EZVIZ camera label. Alternatively, you can retrieve this code from your EZVIZ mobile app by selecting the camera, navigating to the settings, and clicking the camera name or logo to view the device details.
The ‘Total Channels’ option will initially show 1, and it is not editable at this stage. For the dual-lens camera, click the ‘Connect’ button to obtain the camera stream authorization. Once the connection is successful, the channel number will be retrieved from the camera.
Enable Dual Channel Streaming
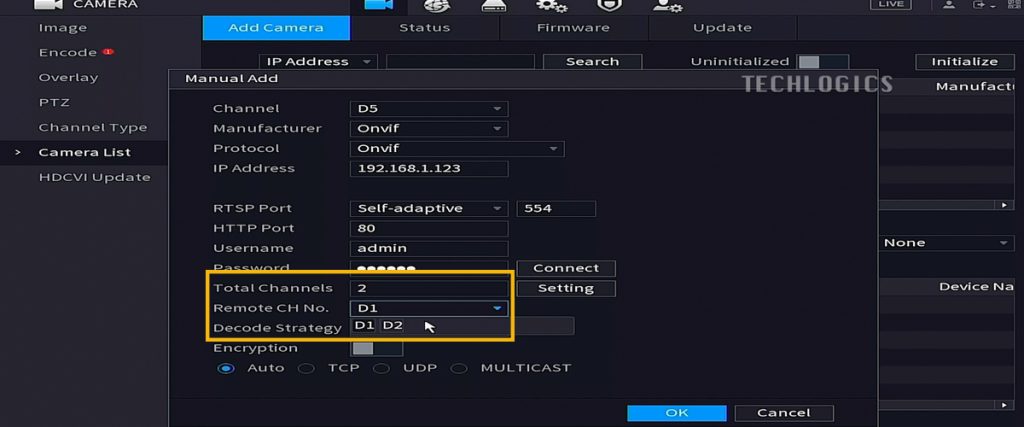
After establishing a successful connection, the ‘Total Channels’ field will become editable. Here, you can enter ‘2’ to enable the dual-channel stream for the H9C camera. The remote channels will automatically be assigned as D1 and D2, allowing you to access both streams from the camera simultaneously. Click the ‘OK’ button to add these channels to the HVR, finalizing the integration of the EZVIZ H9C Dual-Lens Camera.
Step 5: Verify Camera Status
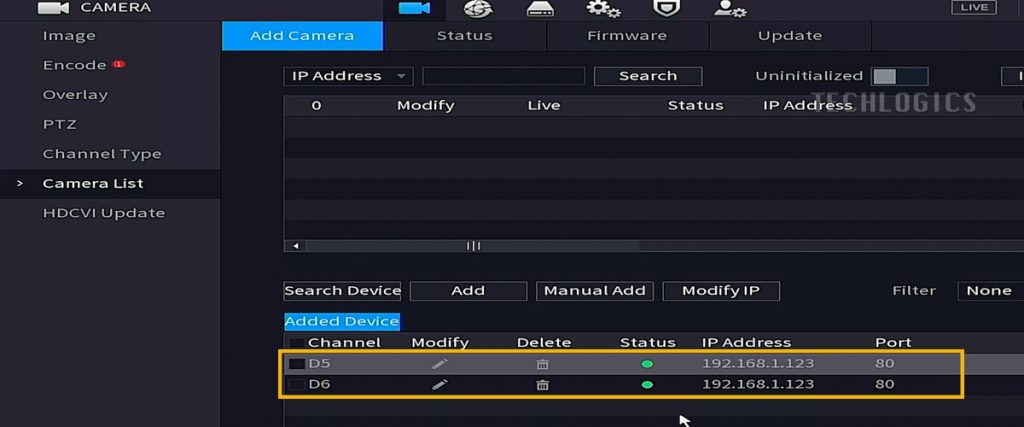
Once both channels are added, ensure the camera status for both streams shows as green or online. You can now view both the fixed and pan-tilt lens views of the EZVIZ H9C camera on the HVR live page.
Note on Dynamic IP Address
Since the EZVIZ camera is connected via Wi-Fi and assigned a dynamic IP address, it may change when the camera or router is rebooted. If added under these conditions, you might experience a loss of connection between the camera and the HVR. To avoid this issue, set a fixed IP address using the SADP tool or EZVIZ Windows PC software. We will explain this process in another part of this video series.
Step 6: Configure Recording Settings
Additionally, ensure that the added camera has a recording schedule according to your preferences. You can configure it for motion detection or continuous recording under the Storage and Schedule Settings for your convenience.
Step 7: Monitor Your Cameras
To view both analog and added Wi-Fi cameras on the same page, navigate to the Live View section of your HVR. Use the window division options to arrange and choose how you want the camera feeds displayed, ensuring you can monitor all connected cameras simultaneously.
Conclusion
Integrating the EZVIZ H9C Dual-Lens Camera with your Dahua HVR allows for enhanced monitoring and security capabilities. By following these steps, you can ensure both devices work seamlessly together, providing you with live footage and recording capabilities. If you found this guide useful, please consider supporting us. Your support helps us create more informative content and provide valuable resources to our audience. Whether through liking, sharing, or subscribing to our channel, every bit of support is greatly appreciated.
