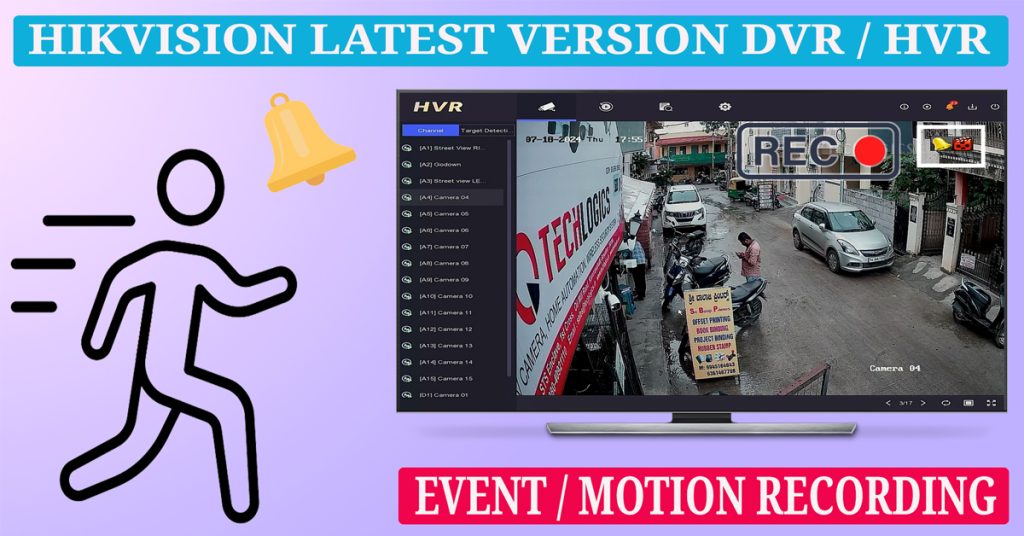
In this guide, we’ll walk you through configuring motion detection recording on the latest version of Hikvision HVR or DVR using a TV or monitor screen. By following these steps, you can ensure your security system efficiently captures all significant events.
Step-by-Step Guide
- Log In to the DVR Admin Account:
- Right-click on the screen and select ‘Menu’ to log in.
- Enable Event Recording:
- Navigate to ‘System’ and enable ‘Event’ recording.
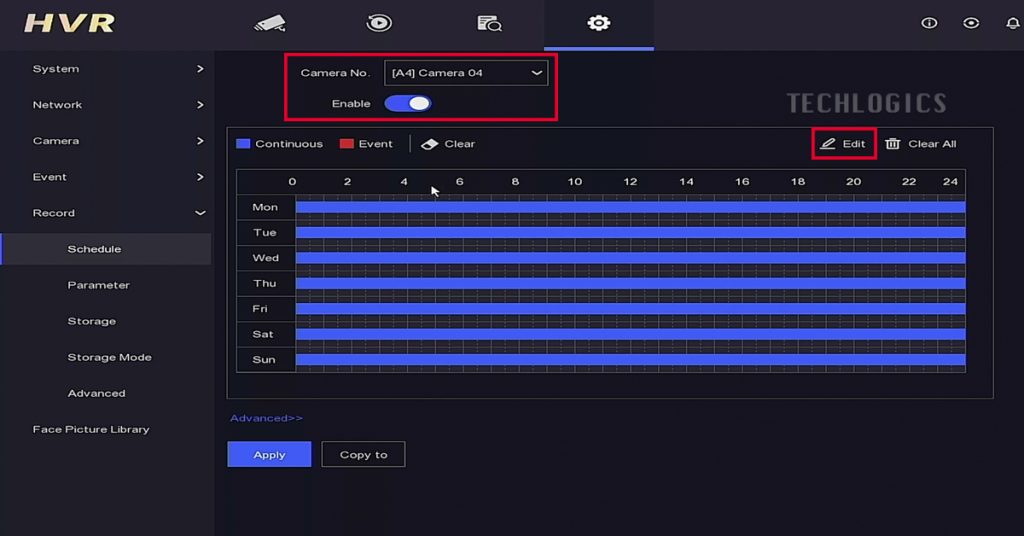
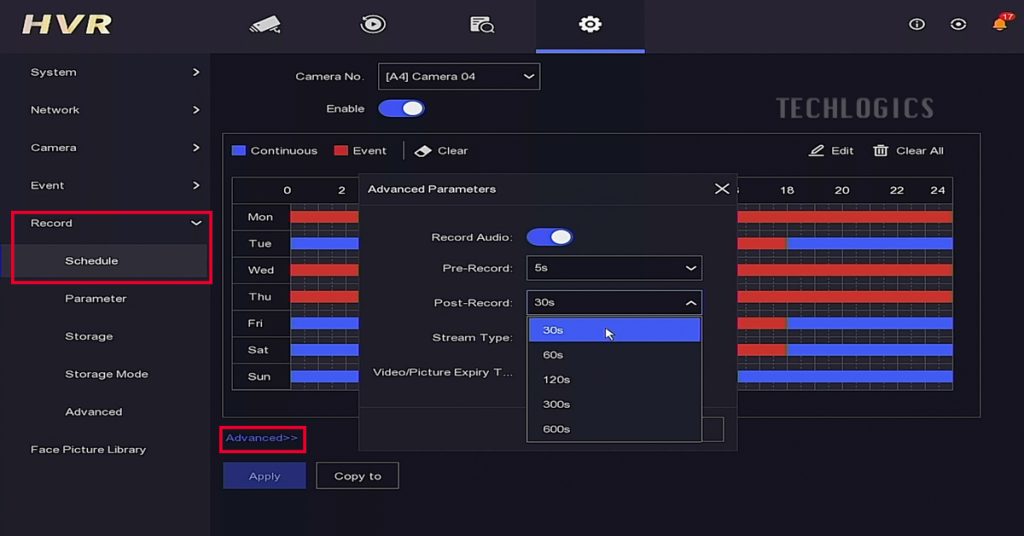
- Go to the ‘Record’ menu, then the ‘Schedule’ menu.
- Select the camera (e.g., camera 4) for which you want to enable motion detection recording.
- Set the Recording Schedule:
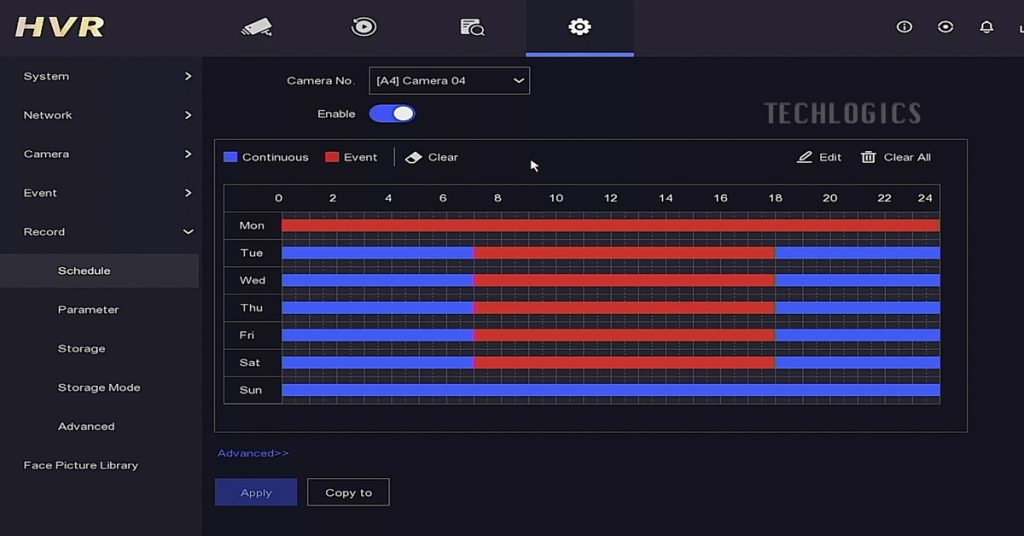
- Click on ‘Edit’ to choose between continuous or event recording for each weekday.
- Set the schedule from 0 hours to 24 hours.
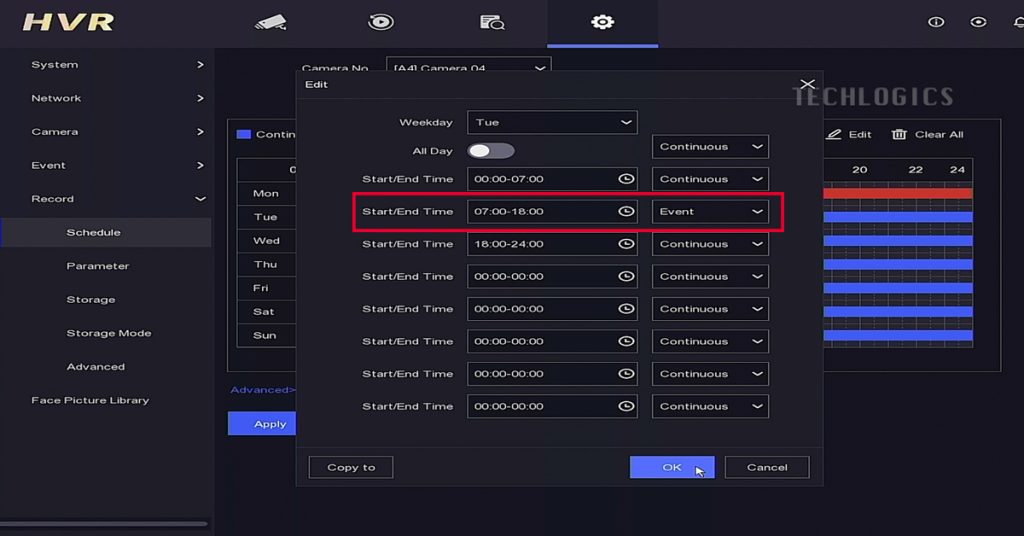
- For each hour, specify ‘Start & End Time’ for either continuous or motion (event) recording.
- Toggle ‘All Day’ to set a 24/7 schedule for continuous or event recording.
- Customize the schedule for each hour if ‘All Day’ is toggled off.
- Configure Time Segments:
- Each day can have up to seven time segments.
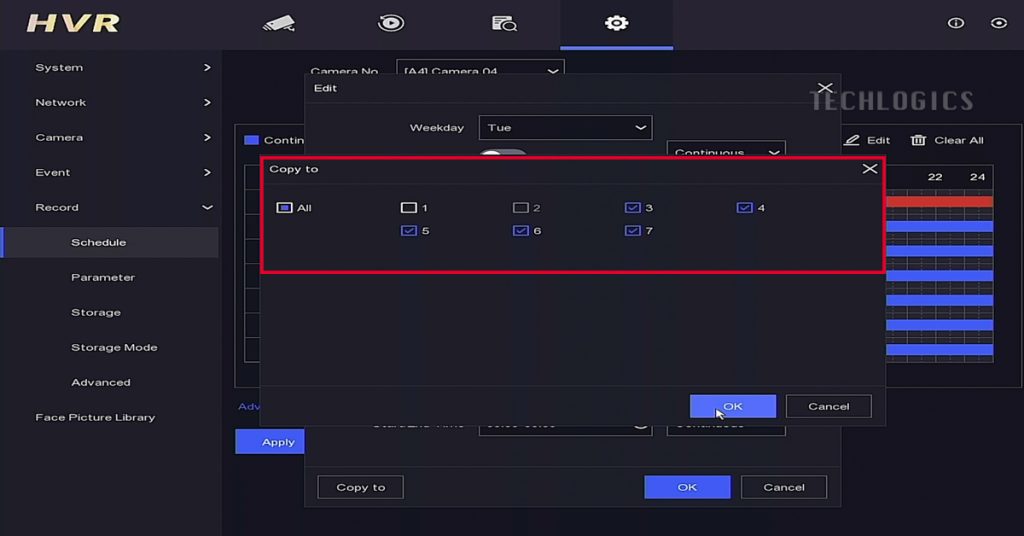
- For example, on Tuesday:
- Segment 1: Continuous recording from 00:00 to 07:00.
- Segment 2: Event recording from 07:00 to 18:00.
- Segment 3: Continuous recording from 18:00 to 24:00.
- Use the ‘Copy To’ option to apply these settings to other weekdays.
- Click ‘Apply’ to save the recording schedule.
- Enable Motion Detection:
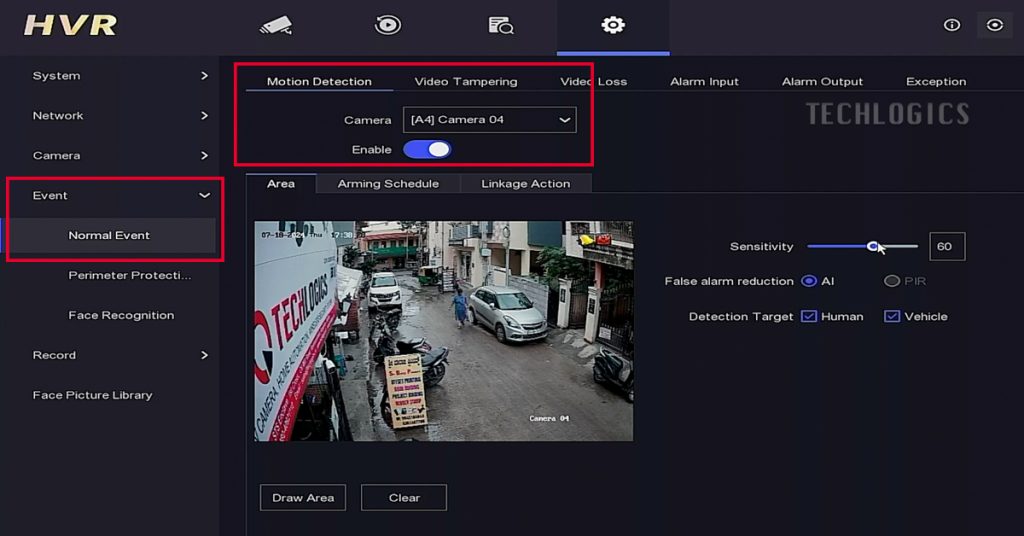
- Go to ‘System’, then ‘Event’, followed by ‘Normal Event’, and select ‘Motion Detection’.
- Select the cameras for which you’ve set the recording schedule.
- Toggle ‘Enable’ to activate motion detection.
- Adjust detection sensitivity and targets as needed.
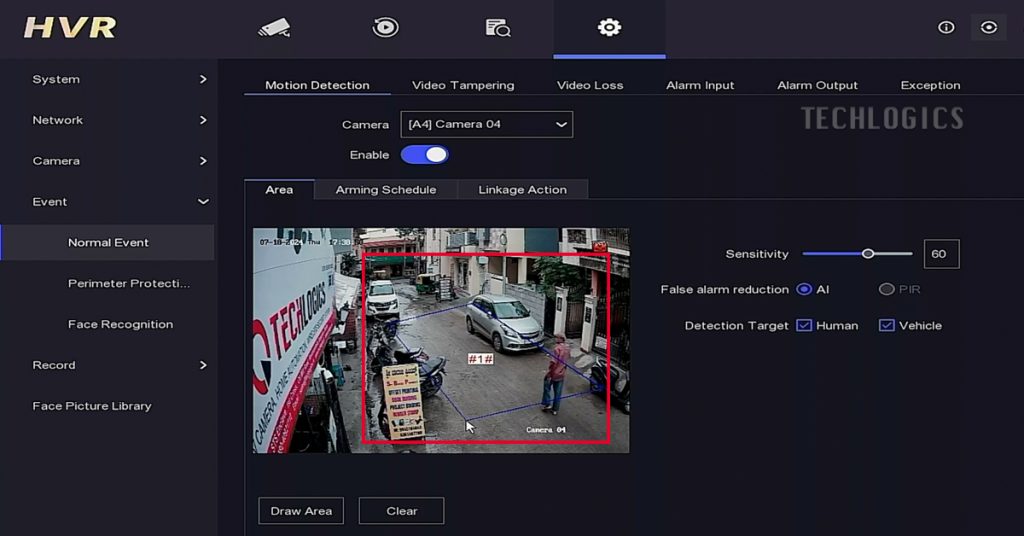
- Click ‘Draw Area’ to define the motion detection area in the camera’s view.
- Left-click to draw the area and right-click to finalize.
- Click ‘Apply’ to save the motion detection settings.
- Set the Arming Schedule and Linkage Action:
- Enable ‘All Day’ in the ‘Arming Schedule’ for 24/7 motion detection.
- Disable ‘Normal Linkage’ notifications to avoid disturbances.
- Adjust Pre-Recording and Post-Recording Durations:
- Go to ‘Schedule’, then ‘Advanced’.
- Set pre-recording and post-recording durations in seconds.
- Click ‘Apply’ to save these parameters.
- Monitor Recording Activity:
- The DVR will capture motion events as configured, indicated by a bell symbol.
- During idle times, it won’t record unless set for continuous recording.
- By default, post-recording duration is set to 30 seconds.
Viewing Recorded Videos
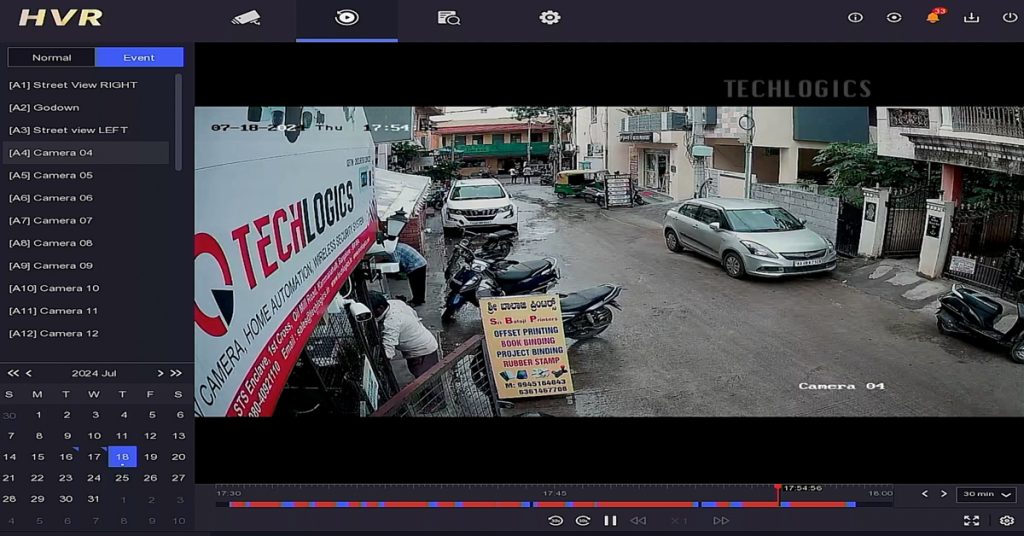
- Access the recorded videos under the ‘Playback’ option.
- In the ‘Event’ section, the timeline bar will show blue and red marks representing continuous and motion recording activity, respectively.
- Any non-recorded time will appear as empty on this timeline.
For more detailed information on the playback feature, please check out our other videos in this series where we provide a comprehensive explanation.
Support Us
If you found this guide useful, please consider supporting us. Your support helps us create more informative content and provides valuable resources to our audience. Whether through liking, sharing, or subscribing to our channel, every bit of support is greatly appreciated.
