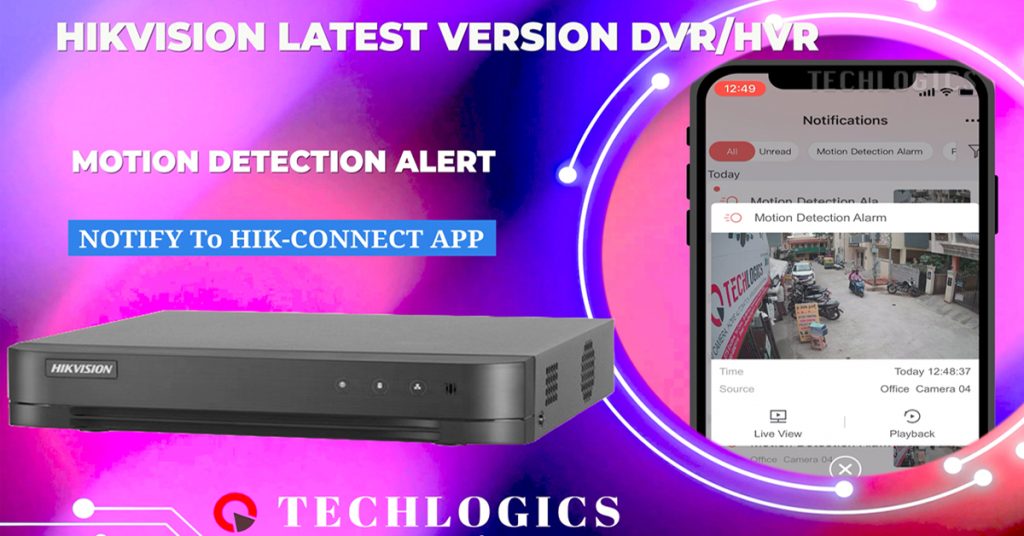
Ensuring the security of your premises is crucial, and motion detection alerts can significantly enhance your surveillance system. In this blog post, we’ll show you how to enable motion detection alerts on the latest version of a Hikvision DVR or HVR recorder and receive these alerts directly on your Hik-Connect mobile app. Let’s dive in!
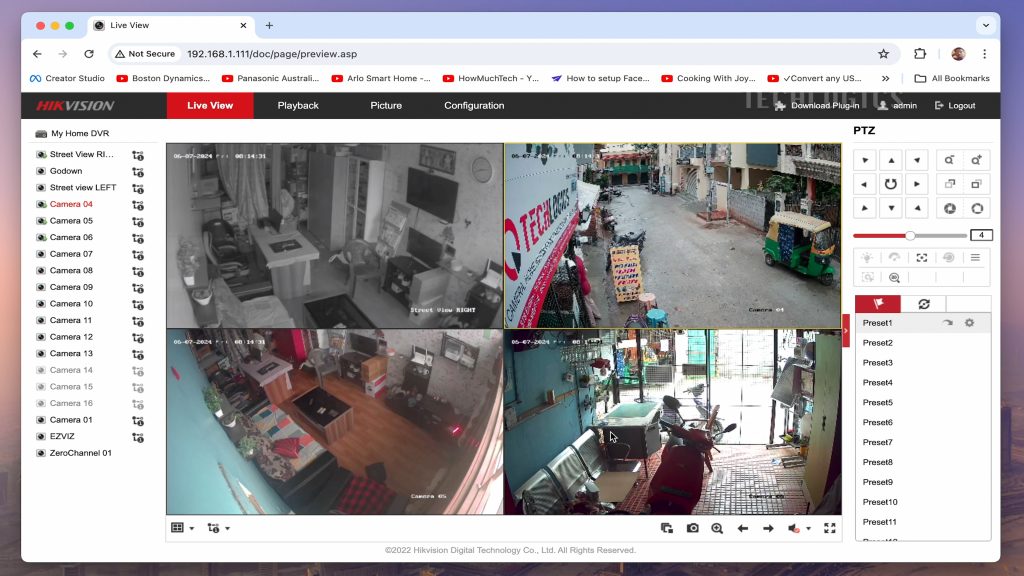
Step 1: Accessing Your DVR To start, open your web browser and enter the IP address of your DVR. Log in using your admin username and password. Make sure your DVR and PC are connected to the same network during this configuration.
Step 2: Finding Your DVR’s IP Address If you’re unsure of your DVR’s IP address, you can use the SADP (Search Active Device Protocol) tool provided by Hikvision to find it easily.
Step 3: Configuring Motion Detection
- Navigate to the DVR configuration settings.
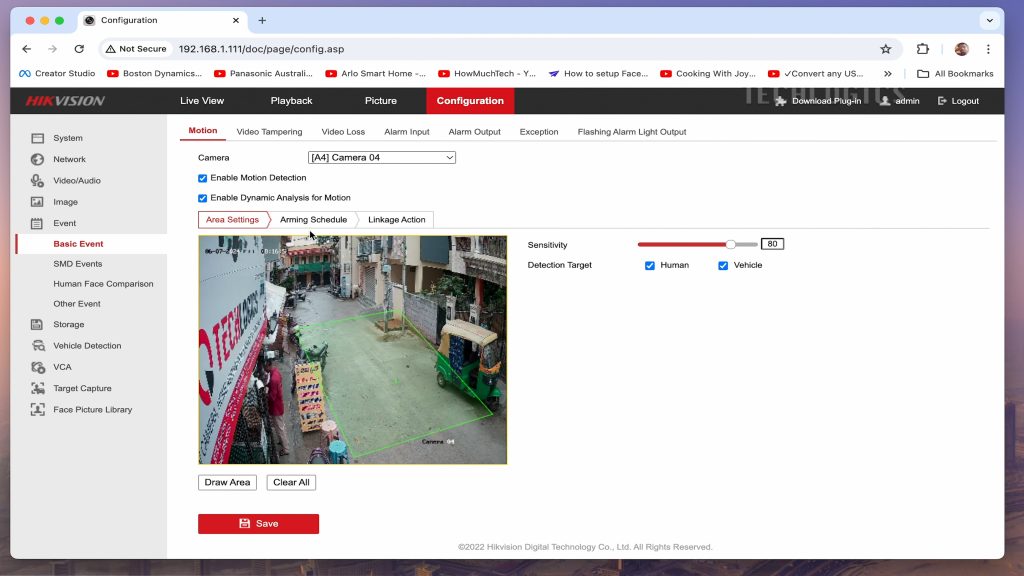
- Select ‘Basic Event’, then choose ‘Motion Detection’.
- Select the specific camera you want to configure from the list.
- Check the box labeled “Enable Motion Detection” to enable motion detection for that camera.
Step 4: Adjusting Sensitivity and Detection Area
- Sensitivity and Threshold: Optionally, adjust the sensitivity or threshold for motion detection to fine-tune how sensitive the camera is to movement.
- Detection Target Filter: Some systems offer a detection target filter that allows you to specify certain areas within the camera’s field of view where you want motion detection to be active. Enable and adjust this filter according to your preferences.
- Draw Area: Click on the “Draw area” option. Use the left mouse button to draw the shape of the area where you want motion detection to be active, such as a square or rectangle. Once you’ve outlined the desired area, finalize the selection by right-clicking your mouse.
Step 5: Setting Up Arming Schedule
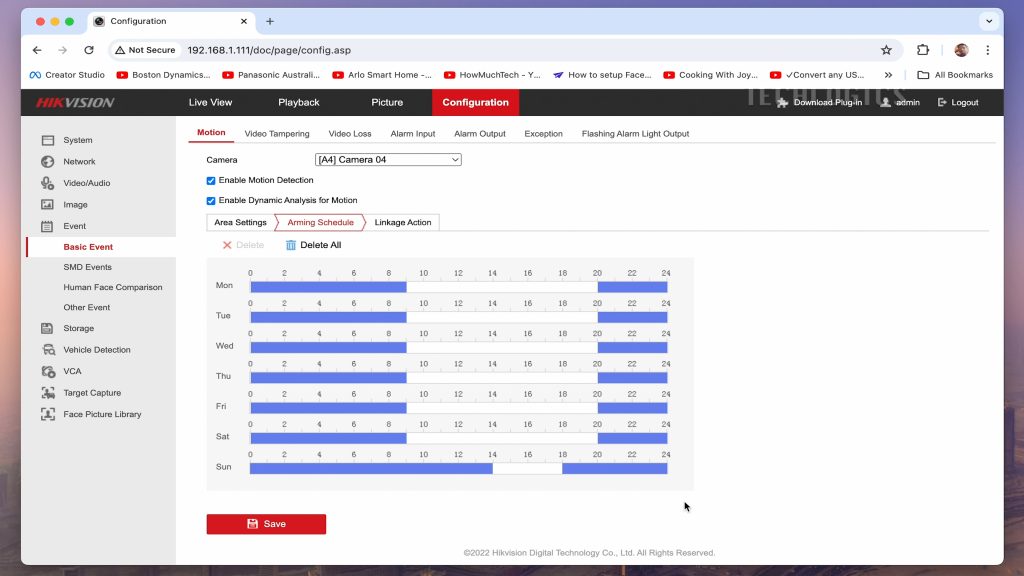
- Click on ‘Arming schedule’ to set specific times of day, days of the week, or other intervals when motion detection will be active.
- Customize the schedule for each day using your own timing settings.
- For example, on Monday, activate motion detection from midnight to 9 AM and then again from 8 PM until midnight. Note that motion detection is not activated between 9 AM and 8 PM.
- Copy the same schedule to other days if required.
- For Sunday, set different timing as needed.
Step 6: Customizing Alert Settings
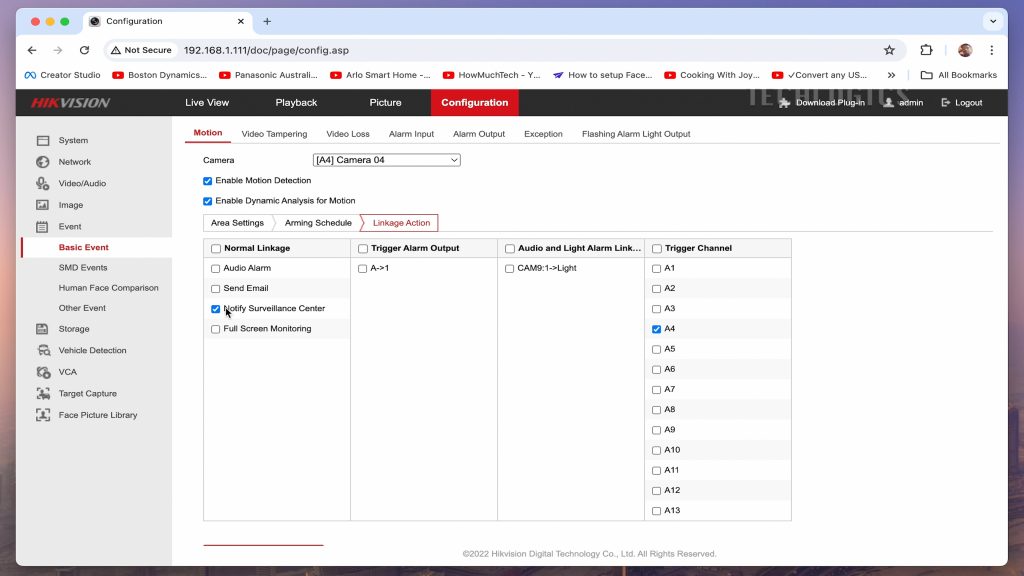
- In the “Linkage Action” section, select the option to enable the type of alert you want to receive.
- To receive alerts on your Hik-Connect mobile app, choose the “Notify surveillance center” option.
Step 7: Saving and Confirming Settings
- Save the settings once you have configured the schedule and alert preferences.
- Save the settings again to confirm your motion detection setup.
Step 8: Receiving Notifications on Hik-Connect With motion detection alerts set up, your DVR will now push notifications to the Hik-Connect mobile app whenever motion activity is detected according to your arming schedule.
Configuring Notifications on Hik-Connect App for Your DVR
Ensuring that you receive timely notifications on your Hik-Connect mobile app is essential for staying updated on any detected motion or events. Here’s a step-by-step guide to configuring notifications for your DVR device:
- Accessing Hik-Connect App Settings: Open the Hik-Connect app on your mobile device and log in to your account. From the main screen, select your DVR device.
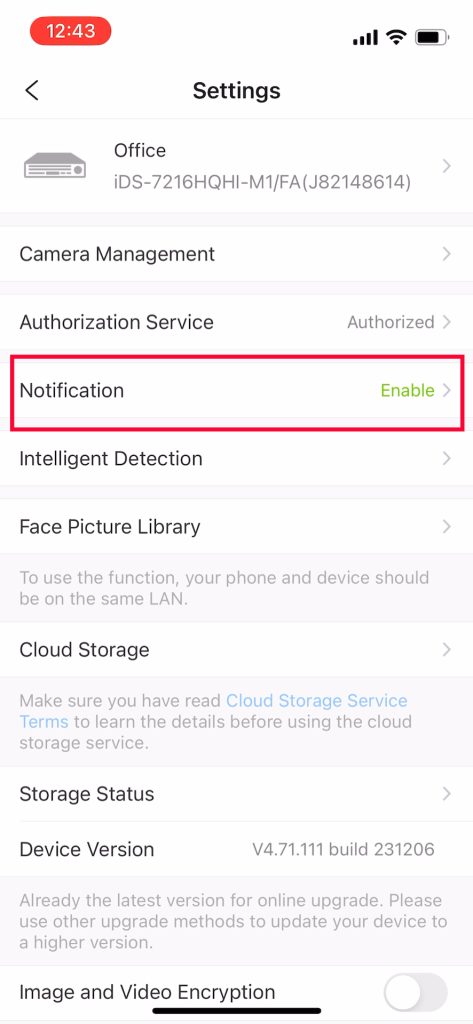
- Navigating to Device Settings: Once you’ve selected your DVR device, tap on the gear icon to access its settings.
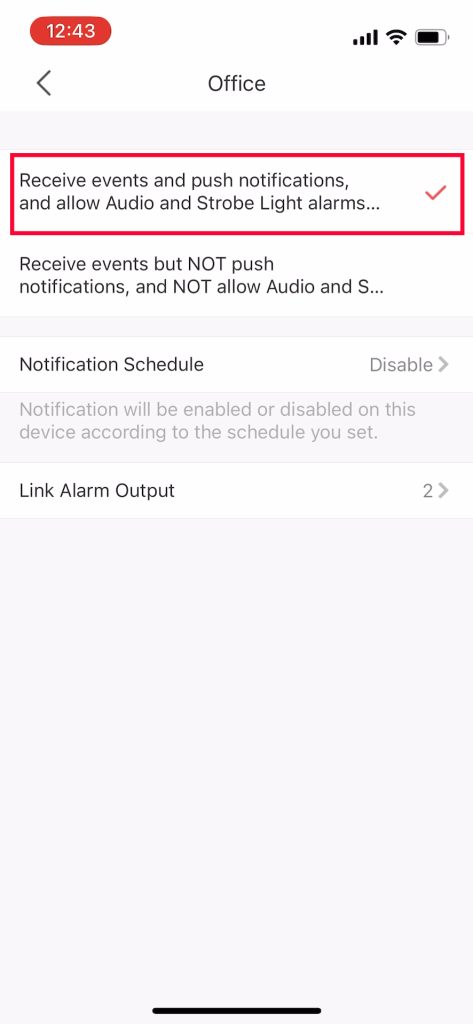
- Enabling Notifications: In the device settings menu, navigate to the “Notification” settings. Ensure that the “Notification” toggle is enabled to receive alerts.
- Customizing Notification Preferences: Select the option to receive events and push notifications. Additionally, ensure that both audio and strobe light alarms are allowed for comprehensive alerting.
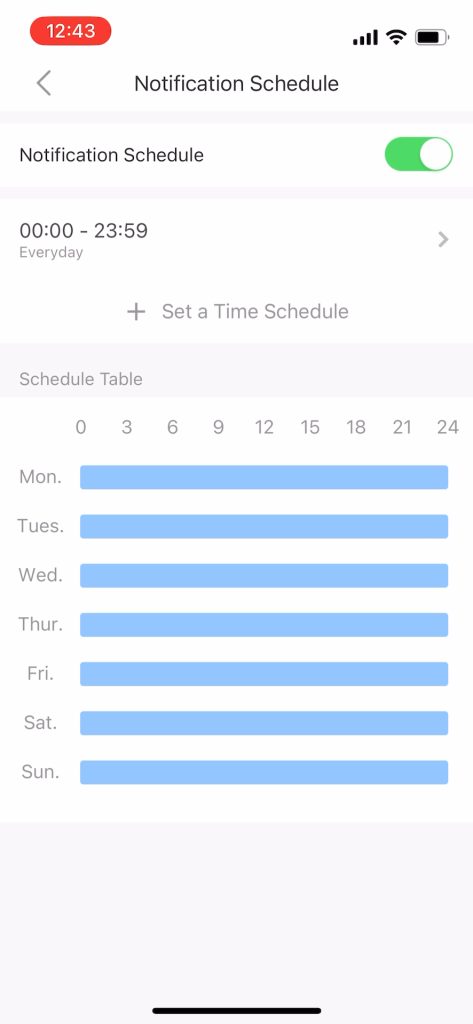
- Setting Notification Schedule: Enable the notification schedule and customize it to suit your preferences. You can choose to receive notifications “All Day” or set custom timings based on your routine.
- Completing Configuration: Once you’ve adjusted the settings to your liking, save the changes.
By completing this configuration, you’ll ensure that you receive notifications on your mobile phone from anywhere through the Hik-Connect app, keeping you informed about any motion detection or events detected by your DVR device.
Important Note: To receive alerts even when your phone screen is locked, ensure that your phone’s settings, specifically the Hik-Connect notification settings, are enabled for “All Hik-Connect notifications.”
For further assistance or additional information on configuring notifications and events for Hikvision DVR or NVR devices, explore our video series or reach out to our support team.
Your support is invaluable to us! If you found this guide helpful, please consider supporting us by liking, sharing, or subscribing to our channel. Your support enables us to continue providing valuable resources to our audience. Thank you for your support!
