Welcome back, tech enthusiasts! Today, we’re diving into the world of home security with an exciting unboxing and setup guide for the eufy Security Indoor Camera C220. Whether you’re looking to monitor your home, office, or small business, this camera is a game-changer. In this post, we’ll walk you through everything from installing the memory card to configuring the Eufy Security mobile app and optimizing recording settings for top-notch performance. Let’s get started!
Unboxing the eufy Security Indoor Camera C220
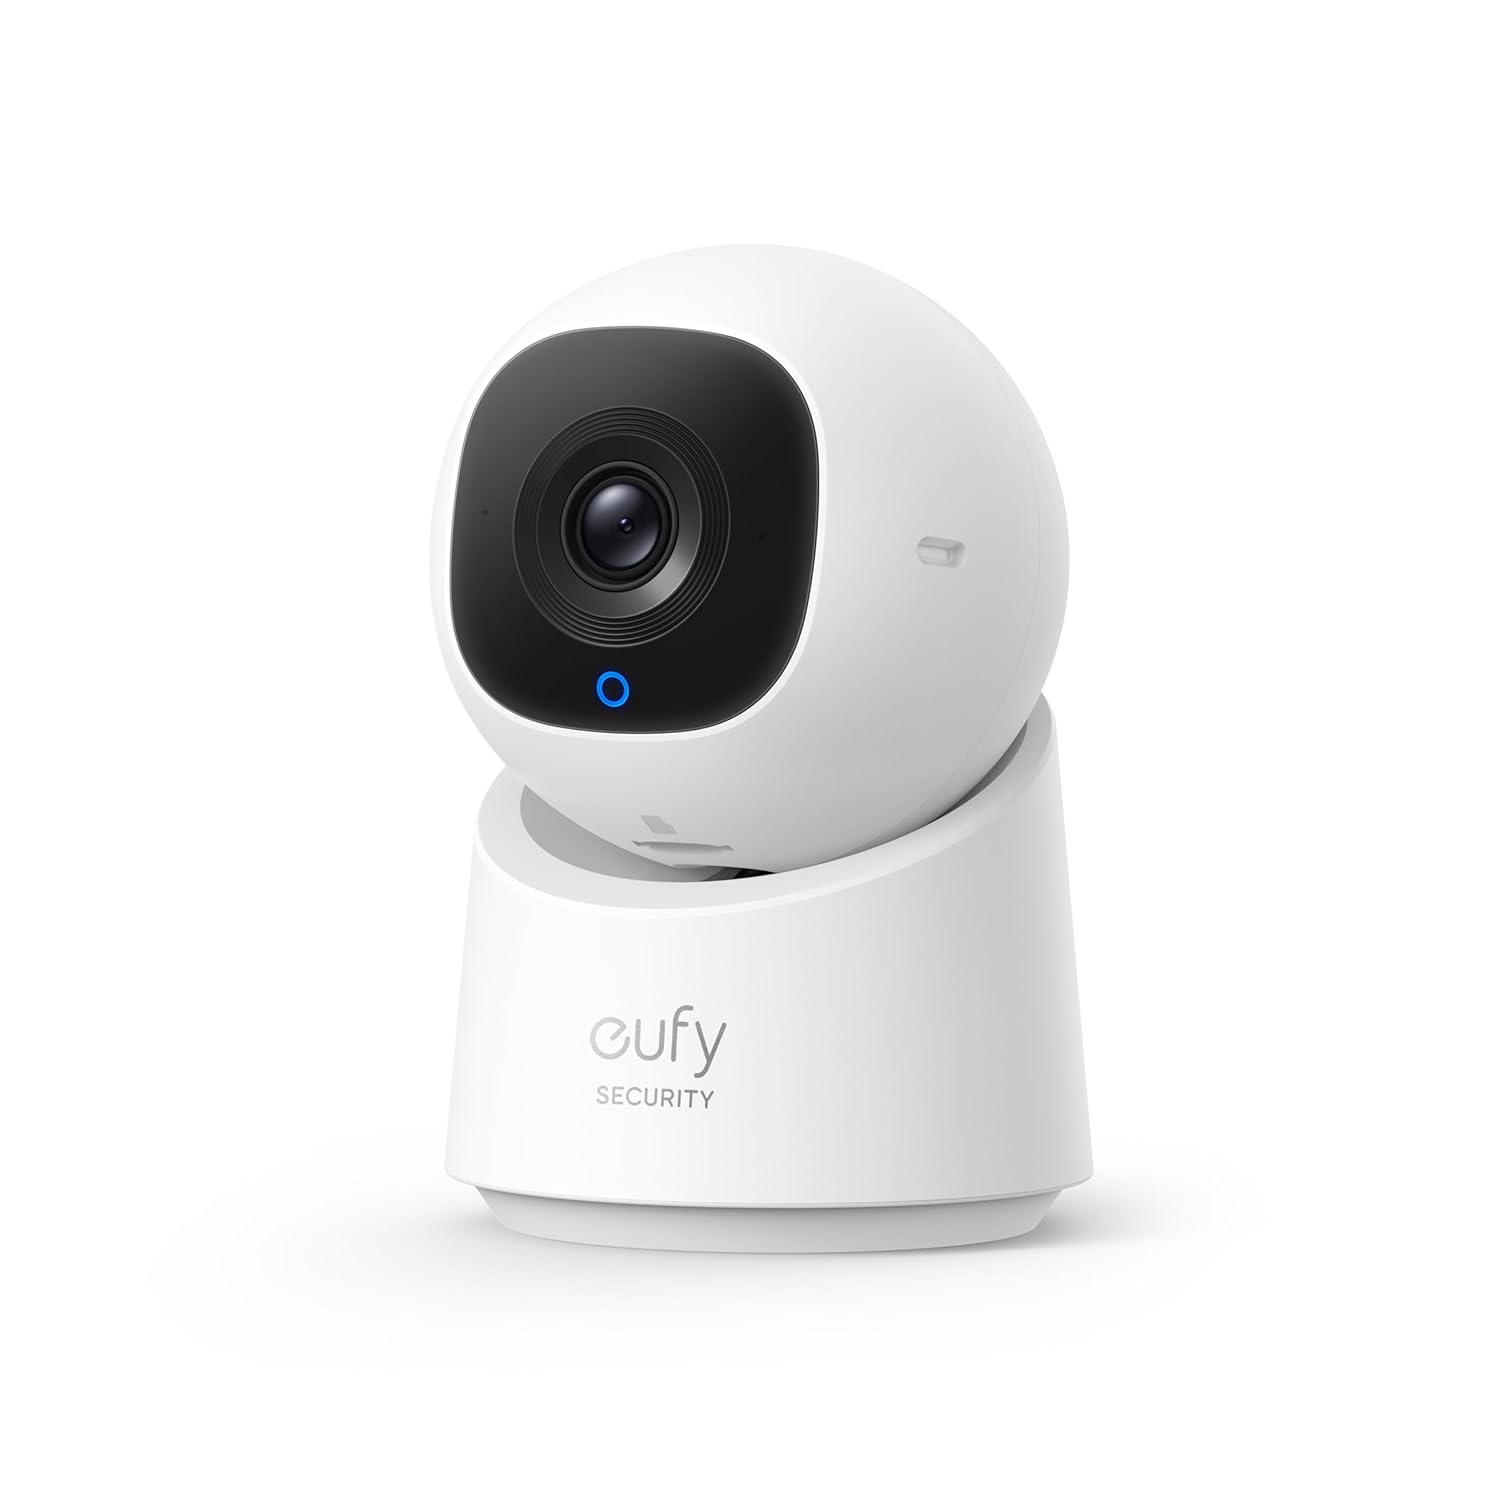
The eufy Security Indoor Camera C220 is a powerhouse designed for indoor HD monitoring, making it ideal for spaces like warehouses, lobbies, server rooms, garages, or even your living room. Here’s what you’ll find when you open the box:
- The Camera: Compact, sleek, and packed with cutting-edge features.
- Mounting Hardware: Includes a power adapter, USB cable, fixing screws, a drill template, and a detailed user manual.
Key Features:
- 2K Resolution: Crystal-clear footage that captures every detail.
- On-Device AI: Detects and tracks human movement for smarter surveillance.
- 360° Surveillance: Eliminates blind spots with full-room coverage.
- Privacy Mode: A single press turns the camera away for instant privacy.
- Local Storage: Supports microSD cards up to 128GB (not included) for 1-2 weeks of footage without monthly fees.
- Smart Home Integration: Works seamlessly with Alexa and Google Assistant.
With everything you need for a quick setup included, this camera is perfect for both residential and commercial use. Let’s dive into the setup process!
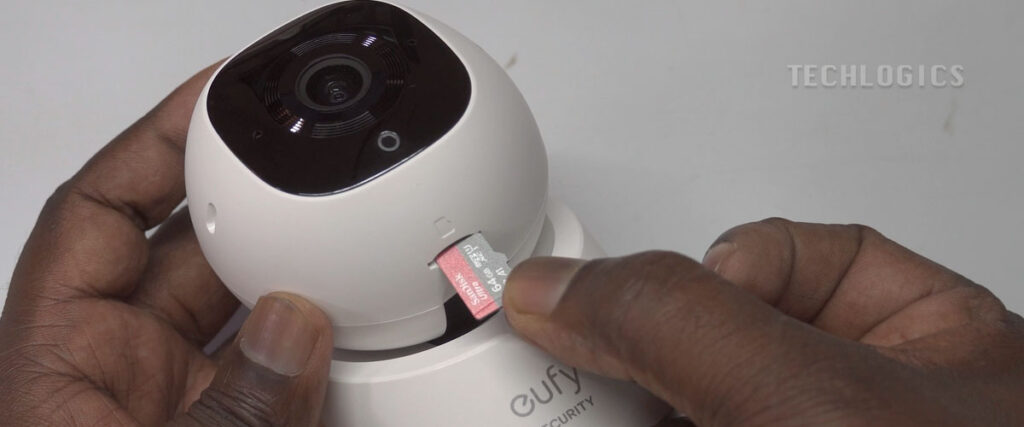
Step 1: Installing the microSD Card
Before we power up the camera, let’s install the microSD card for local storage. Follow these steps to ensure a smooth process:
- Power Off the Camera: Always turn off the camera before inserting or removing the microSD card to avoid damage.
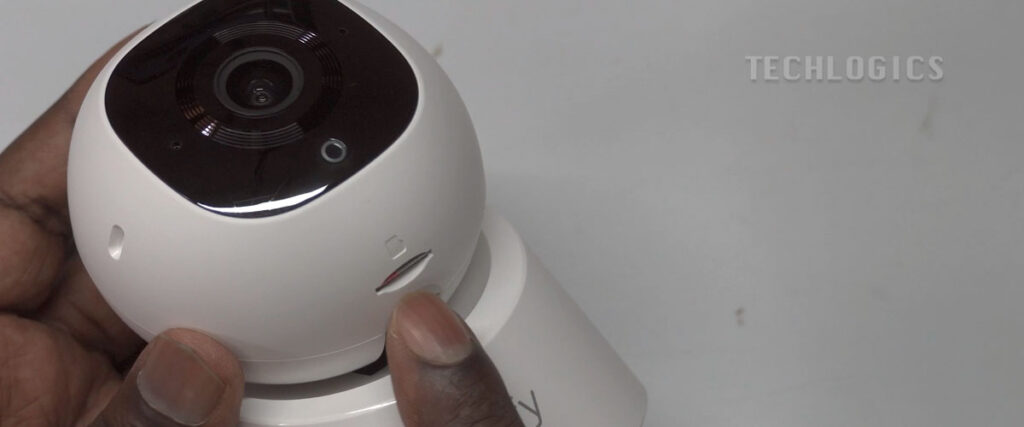
- Locate the Card Slot: Gently tilt the camera lens downward to reveal the microSD card slot at the top of the rotating lens. You’ll see clear icons guiding you.
- Insert the Card: Use a high-quality microSD card (up to 128GB) for ample storage. Align the card with the slot and press it in until you hear a click. This confirms it’s securely in place.
- Double-Check: Ensure the card is snug to prevent data loss or recording errors.
- Remove (If Needed): To remove the card, press it gently, and it will pop out.
With the card installed, you’re ready to power up the camera!
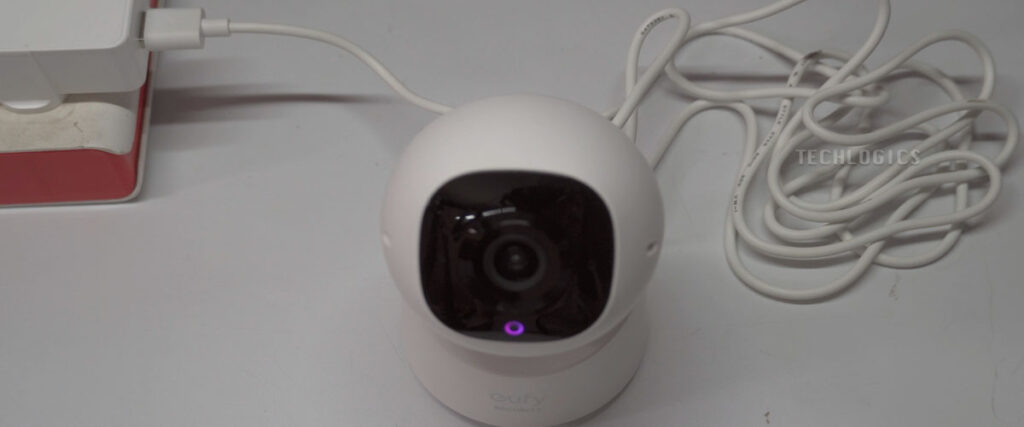
Step 2: Powering On the Camera
Now, let’s bring the camera to life:
- Connect the Power Adapter: Plug the included DC power adapter into the camera and a power outlet.
- Watch the Startup Sequence: The camera’s pan-tilt lens will rotate once, and a purple light will appear, indicating the boot-up process.
- Wait for the Blue Light: Once the light turns blue, the camera is ready for Wi-Fi setup and app configuration.
This quick startup ensures all systems are functional before you proceed.

Step 3: Downloading and Setting Up the Eufy Security App
To unlock the full potential of your camera, you’ll need the Eufy Security app. Here’s how to get started:
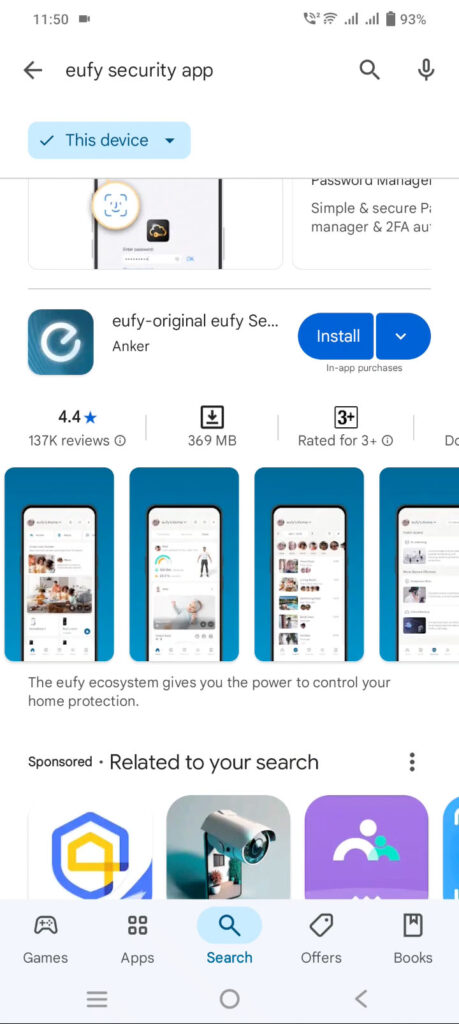
- Download the App:
- Scan the QR code in the user manual, or search for “Eufy Security App” by Anker in the Play Store (Android) or App Store (iOS).
- Tap “Install” and accept any permissions. The app will download and install in minutes.
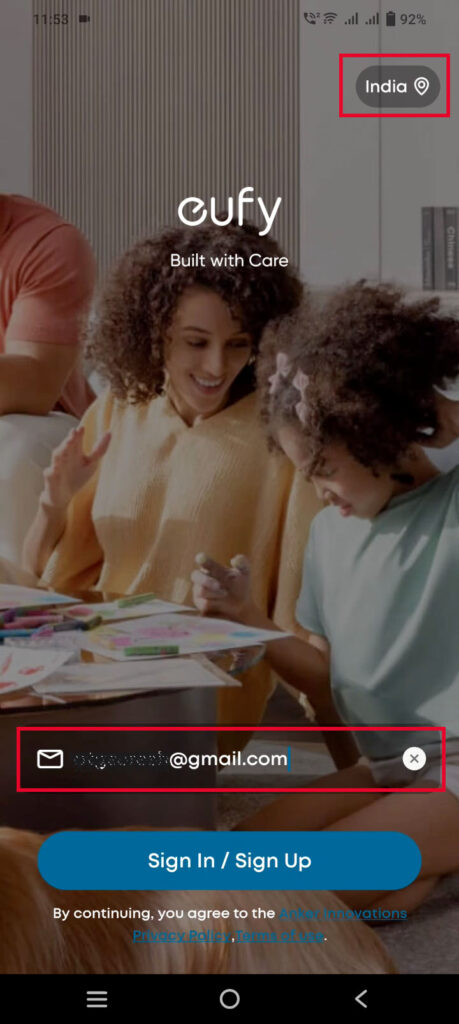
- Open the App:
- Launch the app and select your region for optimal performance.
- Create or Log In to Your Account:
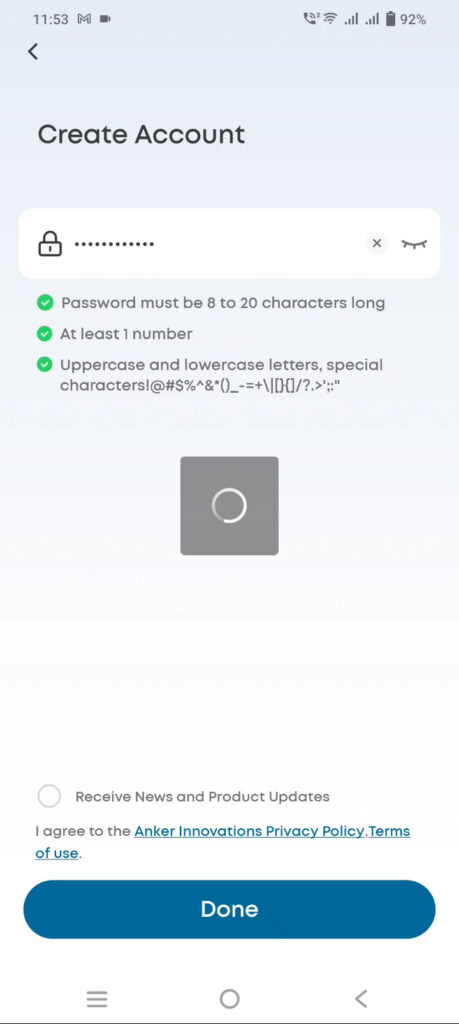
- New Users: Enter your email, click “Sign Up,” and verify your account with the code sent to your inbox. Create a strong password with letters, numbers, and special characters.
- Existing Users: Log in with your email and password.
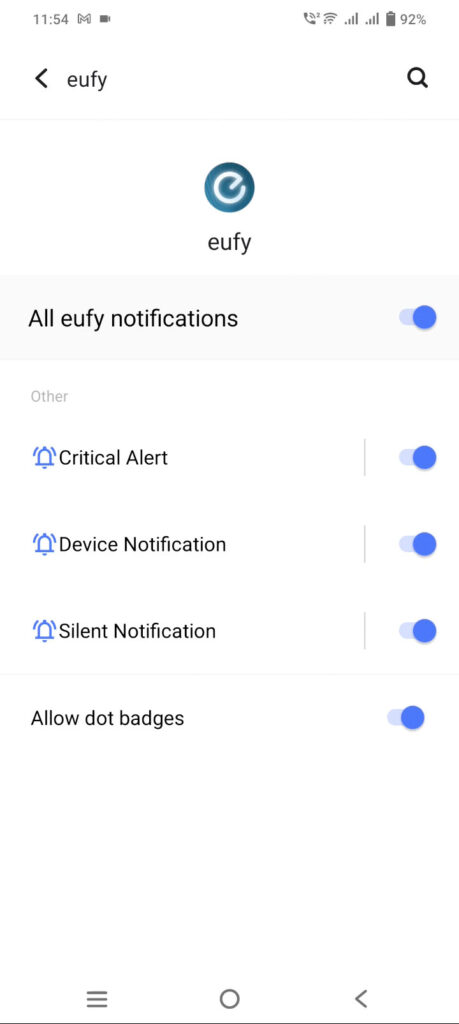
- Enable Notifications: Allow notifications to receive real-time alerts for motion or human detection.
With the app installed, you’re ready to add your camera!
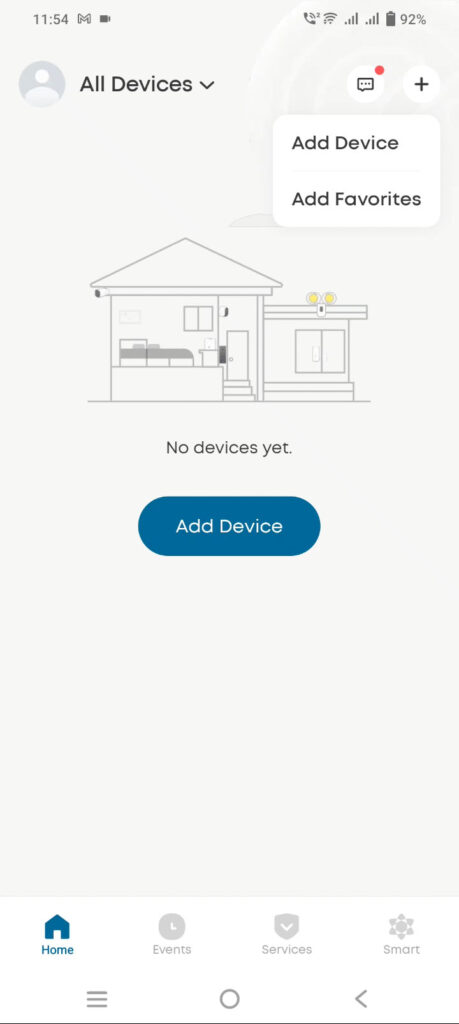
Step 4: Adding the Camera to the App
Let’s connect the camera to your Wi-Fi and pair it with the app:
- Start the Setup:
- Open the app and tap “Add Device” or the “+” symbol.
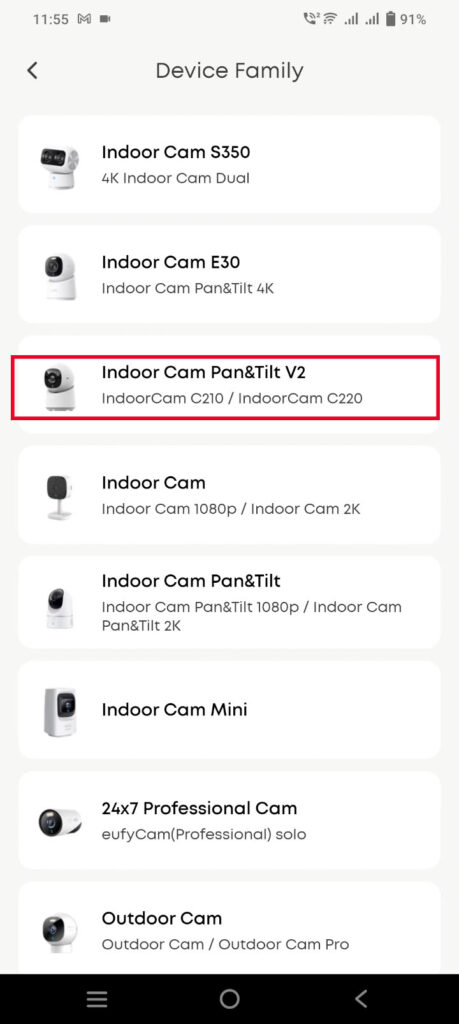
- Select “Wired Devices” and choose the C220 model from the list.
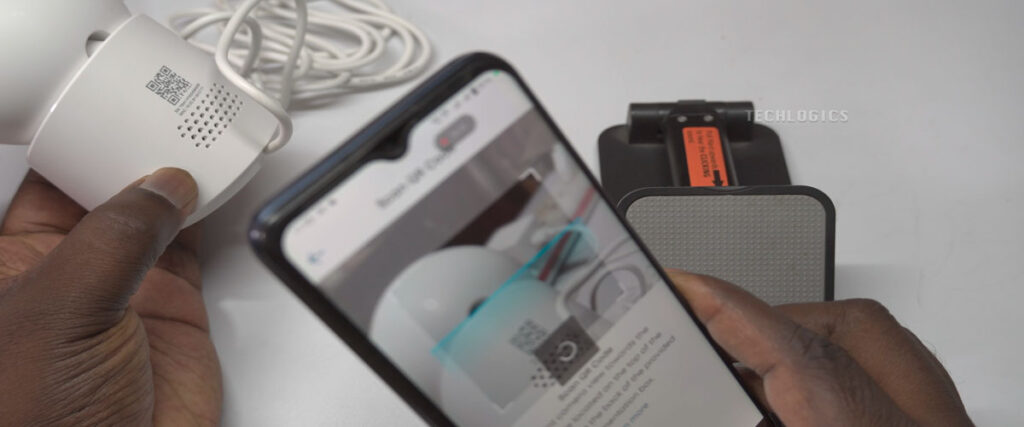
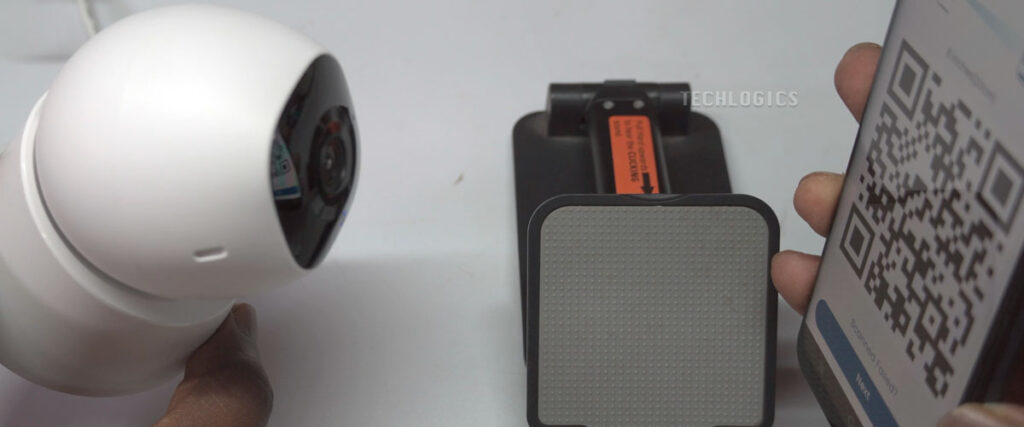
- Scan the QR Code:
- Allow camera access to scan the QR code on the camera’s body (usually on a sticker).
- Position your phone so the app can read the code clearly. This links the camera to the app securely.
- Connect to Wi-Fi:
- Ensure your phone is on a 2.4 GHz Wi-Fi network (the camera doesn’t support 5 GHz).
- Select your home Wi-Fi, enter the password, and tap “Next.”
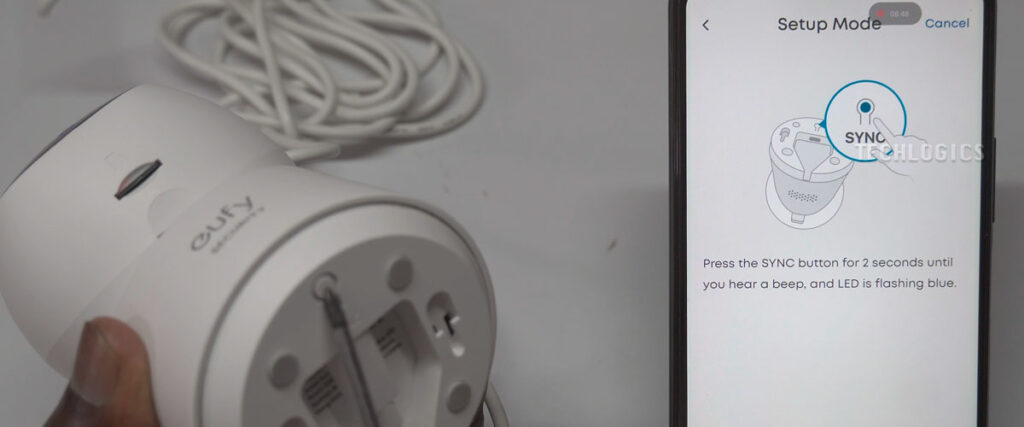
- Sync the Camera:
- Power on the camera (blue LED should be on).
- Press and hold the SYNC button at the bottom of the camera for 2 seconds until you hear a beep.
- Generate a Wi-Fi QR Code:
- Tap “Next” in the app to create a QR code for Wi-Fi connection.
- Hold your phone 10-20 cm from the camera lens to scan the code.
- The camera will say, “Connecting to the Wi-Fi network,” confirming the process.
- Finalize the Setup:
- Once connected, the camera will announce, “The setup was successful,” and the app will confirm.
- Name your camera (e.g., “Living Room Cam”) and choose notification settings (motion, human detection, etc.).
- Enable audio recording if desired (disabled by default).
- Select the camera’s placement (table, wall, or ceiling) to optimize image orientation.

Step 5: Configuring Recording Settings
Your camera is now connected, but let’s ensure it’s recording properly:
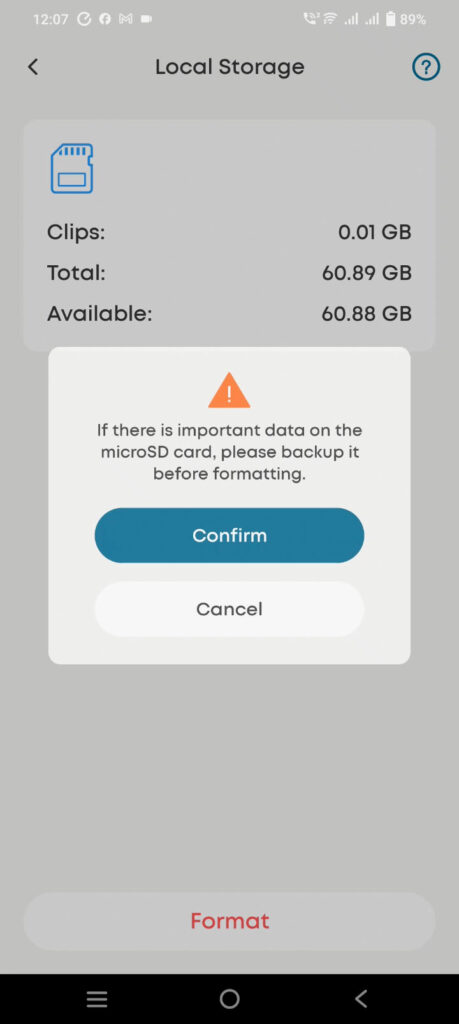
- Check the microSD Card:
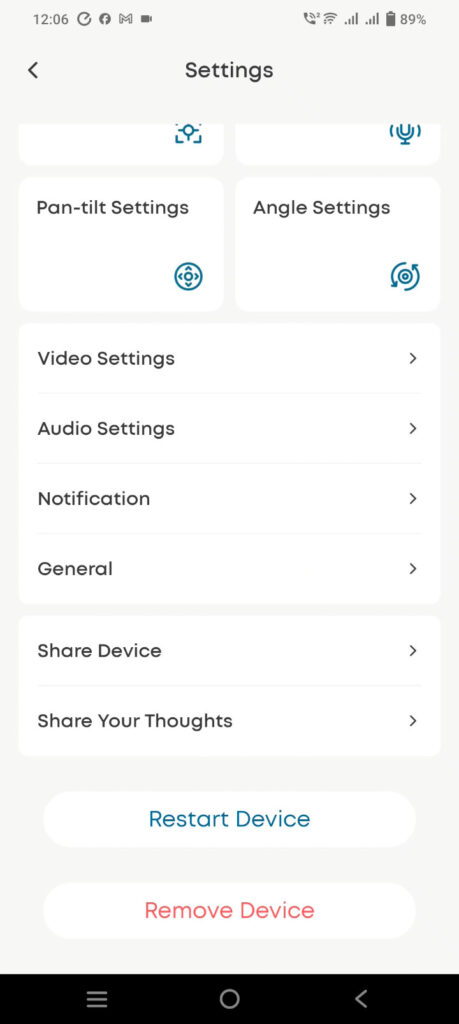
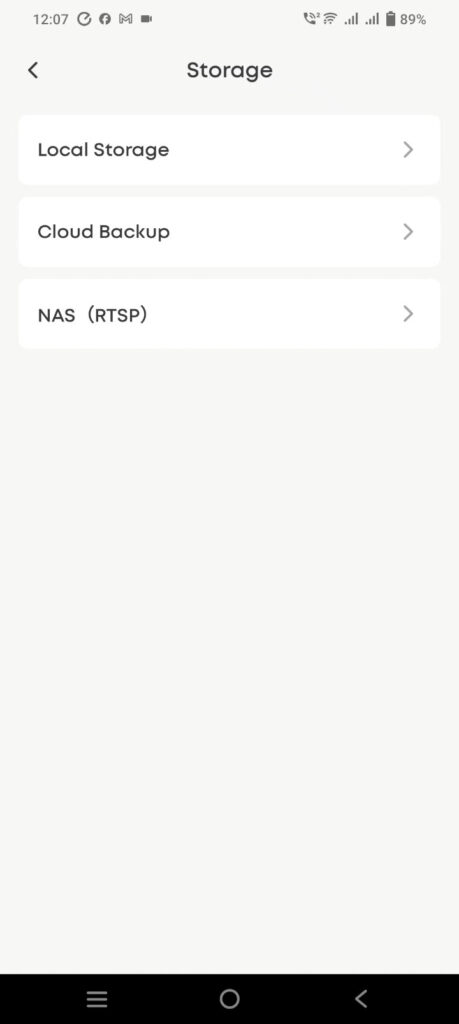
- In the app, go to Settings > General > Storage > Local Storage.
- If the card is “Uninitialized” or full, tap “Format” to prepare it for recording.
- Once formatted, the status will change to “In Use,” showing available storage.
- Customize Recording Mode:
- By default, the camera records motion detection events.
- Adjust settings to continuous recording or other modes based on your needs.
- Access Footage:
- Switch to the SD card storage view in the app to review recorded footage.
Step 6: Installing and Using the Camera
Now it’s time to mount the camera in its final location:
- Use the included mounting hardware (screws and drill template) to secure the camera on a table, wall, or ceiling.
- Once installed, enjoy features like:
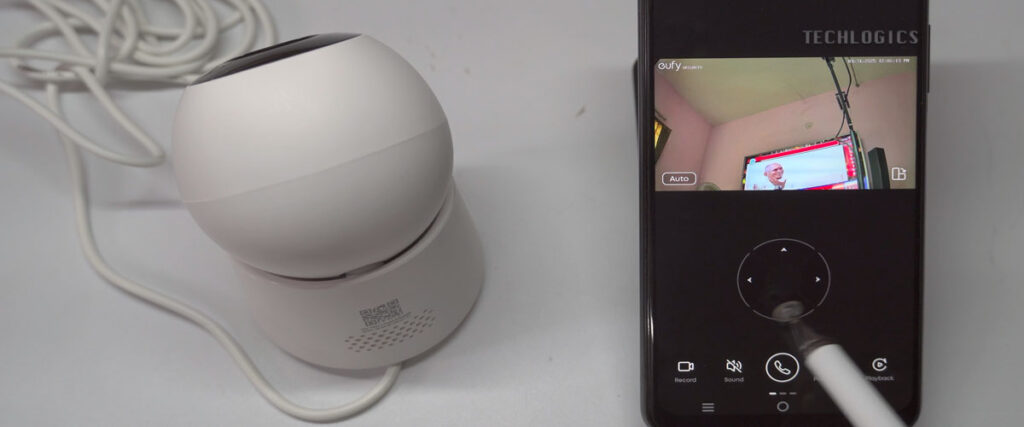
- Live Streaming: View real-time footage from anywhere via the app.
- Playback: Access recorded footage easily.
- PTZ Control: Remotely pan, tilt, or zoom to focus on specific areas.
If prompted, update the camera’s firmware to ensure optimal performance. This takes just a few minutes but keeps your device running smoothly.
Why Choose the eufy Security Indoor Camera C220?
This camera is more than just a security device—it’s peace of mind. With no monthly fees, local storage, and smart home compatibility, it’s a cost-effective and versatile solution for monitoring your home or business. Whether you’re keeping an eye on loved ones or securing your property, the C220 delivers exceptional performance with minimal hassle.
Final Thoughts
Congratulations! Your eufy Security Indoor Camera C220 is now set up and ready to keep you connected and protected. The Eufy Security app makes it easy to manage your camera from anywhere, whether you’re at home or on the go. Explore features like live streaming, playback, and PTZ control to make the most of your device.
If you found this guide helpful, please share it with others who might benefit! Stay tuned for more tips and tricks to maximize your eufy security system. Have questions? Drop them in the comments, and we’ll be happy to help.
Happy monitoring, and thank you for being part of our community!
Support Our Content
Your likes, shares, and subscriptions inspire us to create more helpful guides. Every bit of support makes a difference—thank you!


