Welcome to TECH LOGICS! In this comprehensive guide, we’ll walk you through the process of setting up the TP-Link Tapo C201 Indoor Pan & Tilt Camera on your Wi-Fi network, configuring SD card storage, and using the Tapo app to ensure a seamless and effective home security setup. Whether you’re a tech enthusiast or a beginner, this guide is designed to make securing your home straightforward and efficient.
Why Choose the Tapo C201?
The Tapo C201 is a feature-packed indoor security camera with a sleek black design and robust capabilities:
- 1080p HD Video: Crystal-clear footage for effective monitoring.
- Pan and Tilt Functionality: Offers a 360° horizontal and 114° vertical range for complete room coverage.
- Enhanced Night Vision: See up to 40 feet in low-light conditions for round-the-clock surveillance.
- Motion Detection: Instant smartphone alerts for any unusual activity.
- Two-Way Audio: Communicate through the camera’s built-in microphone and speaker, ideal for interacting with pets or deterring intruders.
- Local Storage: Supports microSD cards up to 512GB for secure, cost-effective footage storage.
- Tapo App: Simplifies live streaming, settings adjustments, and remote monitoring.
- Privacy Mode: Disable recording when privacy is needed.
- Smart Home Integration: Works seamlessly with Google Assistant and Amazon Alexa for hands-free control.

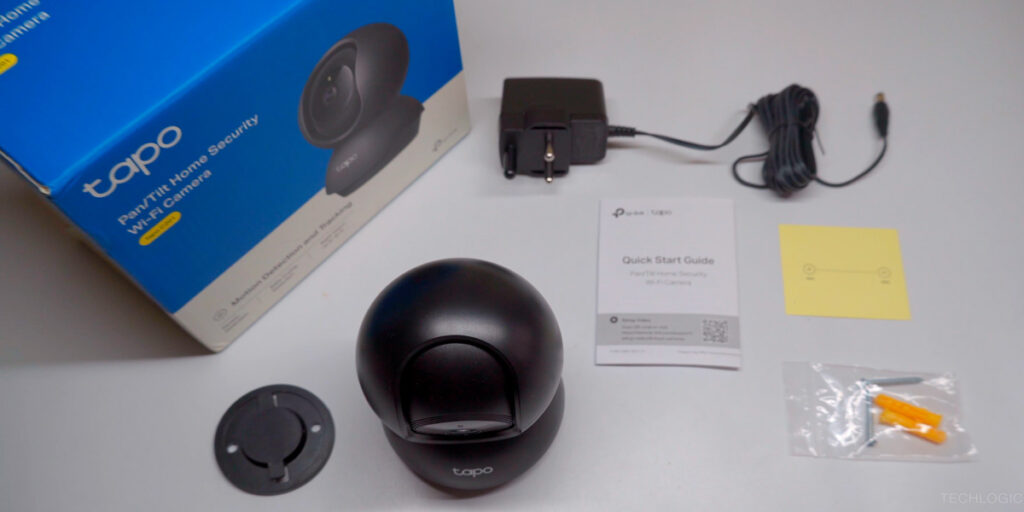
The package includes everything you need for an easy setup: a user manual, a drill template, a DC power adapter, and a camera fixing mount with screws. Let’s dive into the setup process!
Step 1: Memory Card Installation
Proper installation of the microSD card ensures reliable footage storage. Follow these steps:
- Power Off the Camera: Ensure the camera is completely powered off to avoid damage to the camera or microSD card.
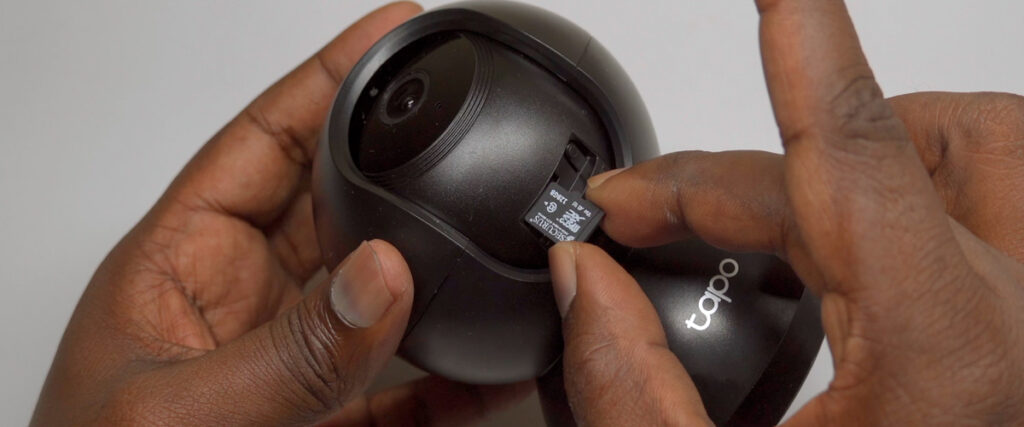
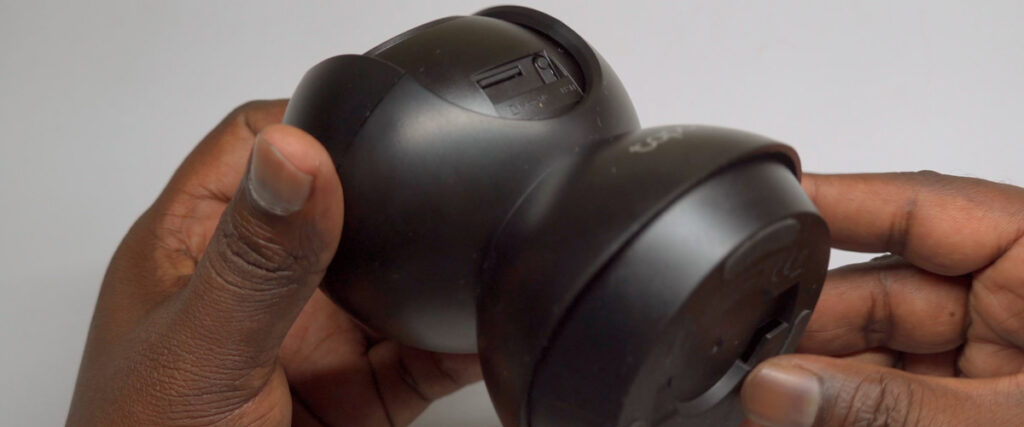
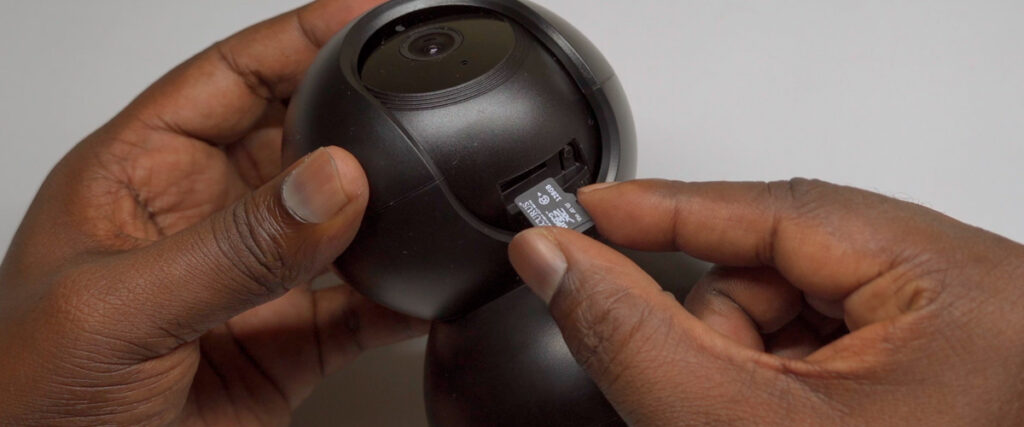
- Locate the Card Slot: The microSD slot is on the bottom of the camera, near the rotating lens. Gently lift or tilt the lens upward to access it.
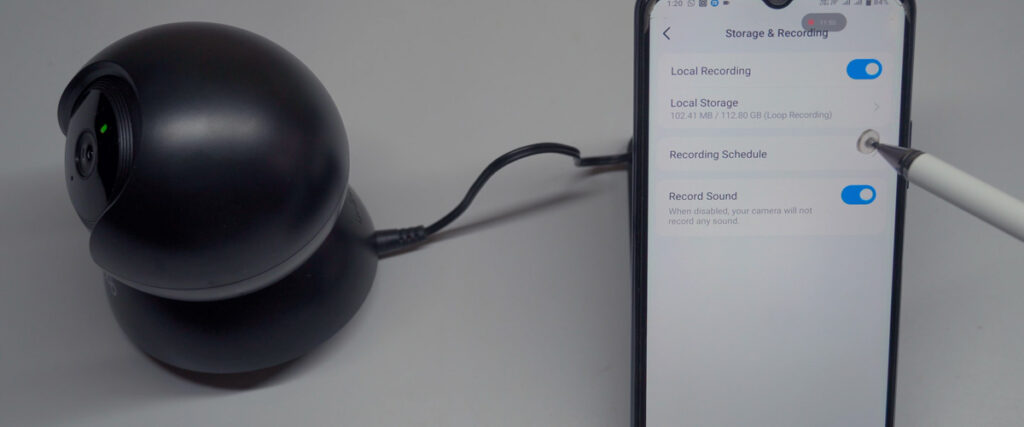
- Insert the Card: Align the microSD card with the gold contacts facing downward and the notched edge properly oriented. Push gently until it clicks into place. The Tapo C201 supports cards up to 512GB, offering ample storage for continuous or motion-triggered recordings.
- Remove the Card (if needed): Press gently on the card to release it, then carefully pull it out.
- Power On: Once the card is inserted, power on the camera. It will automatically start recording if configured for auto-start.
- Storage Tips: A 512GB card can store up to two weeks of footage, depending on video quality, frame rate, and recording mode (continuous or motion-activated). Regularly check and format the card via the Tapo app to maintain performance.
Note: Ensure the card is fully inserted before powering on to prevent data loss or recording errors.
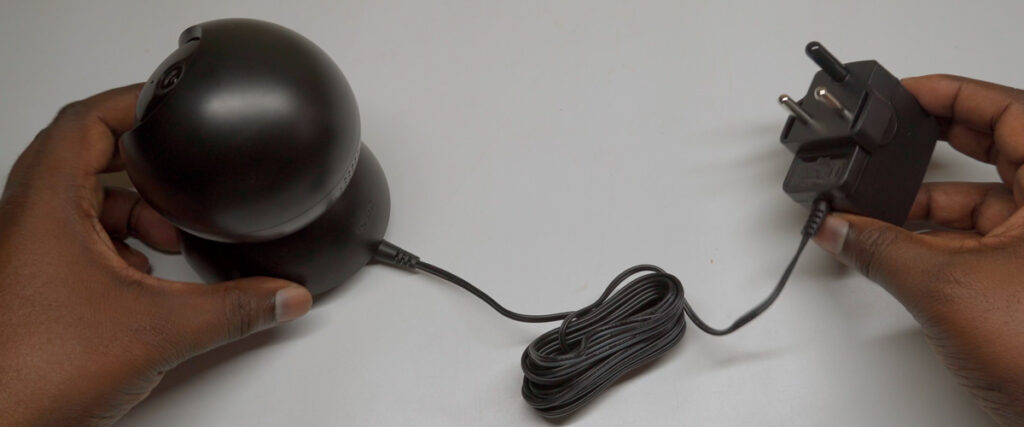
Step 2: Powering Up the Camera
- Connect the Power Adapter: Plug the included DC power adapter into the camera’s power port and connect it to a stable power outlet.
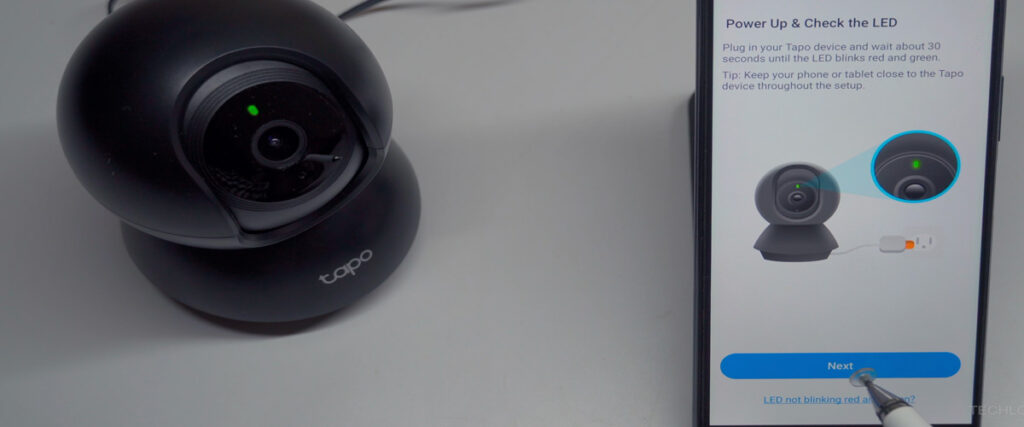
- Startup Process: The camera will begin its startup sequence, with the pan-tilt lens rotating to perform self-tests. A solid red light indicates the camera is booting.
- Ready for Setup: Once the startup is complete, the red and green LEDs will flash alternately, signaling that the camera is ready for Wi-Fi setup and configuration via the Tapo app.

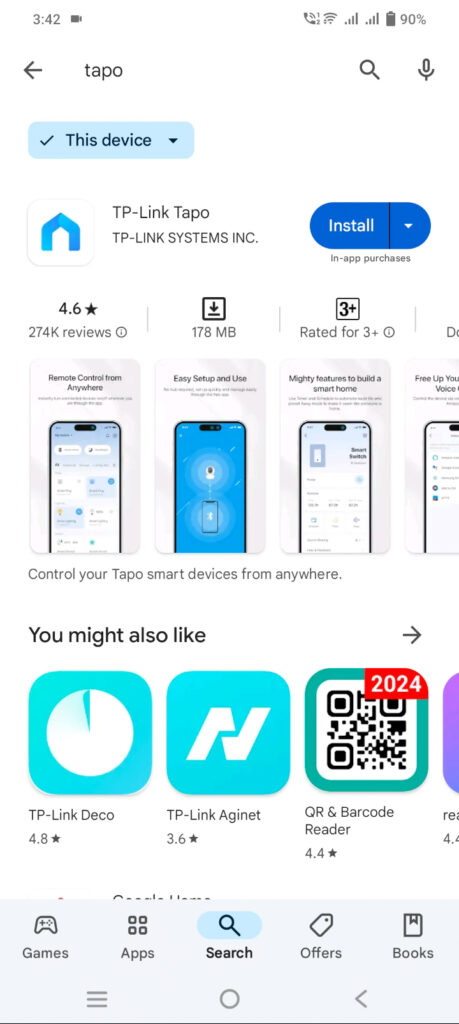
Step 3: Download and Install the Tapo App
The Tapo app is essential for configuring and managing your camera. Here’s how to get started:
- Locate the QR Code: Find the QR code in the user manual and scan it with your smartphone’s camera or a QR code app to be redirected to the app download page.
- Download the App:
- For Android: Open the Google Play Store, search for “Tapo” (developed by TP-Link), and tap Install.
- For iOS: Open the Apple App Store, search for “Tapo,” and tap Install.
- Open the App: Once installed, launch the app and review the Terms of Use and Privacy Policy. Tap Continue to accept and proceed.
- Grant Permissions: Allow access to camera, location, and notifications to ensure full functionality.
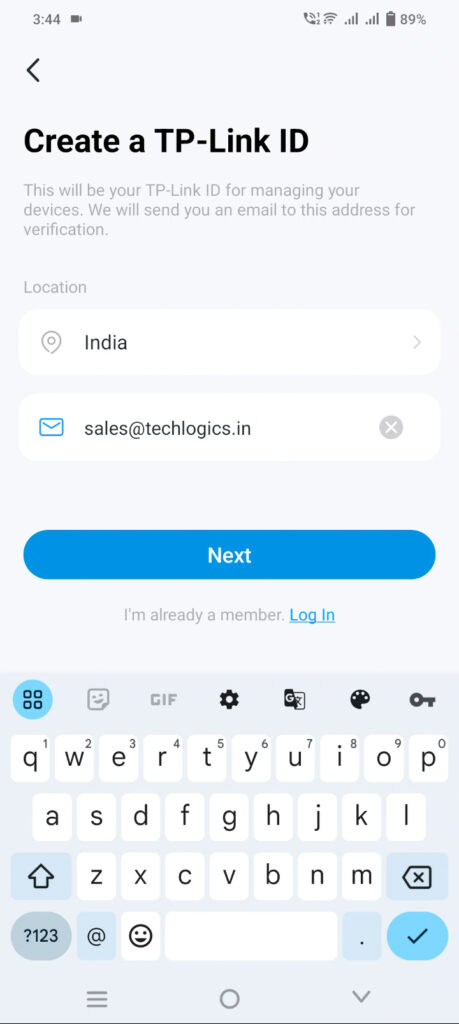
Step 4: Create a TP-Link Account
To use the Tapo app, you’ll need a TP-Link ID. Follow these steps:
- Choose an Option: Log in with an existing TP-Link ID or select Create a TP-Link ID to register.
- Register:
- Select your region.
- Enter a valid email address and tap Next.
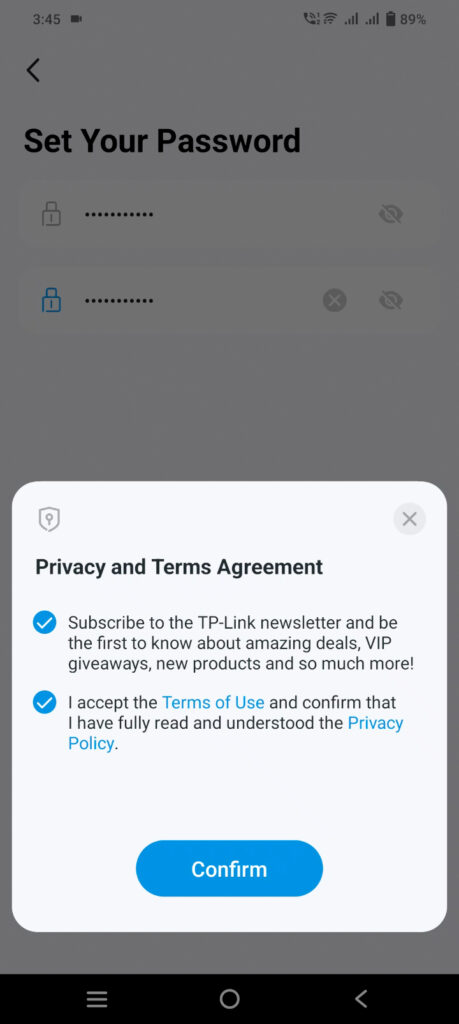
- Create a strong password (following the app’s security criteria) and tap Sign Up.
- Agree to the Privacy and Terms agreement and tap Confirm.
- Verify Your Email: Check your inbox (and spam folder) for a verification email. Follow the instructions to activate your account.
- Log In: Use your email and password to log in. Grant any additional permissions prompted by the app.
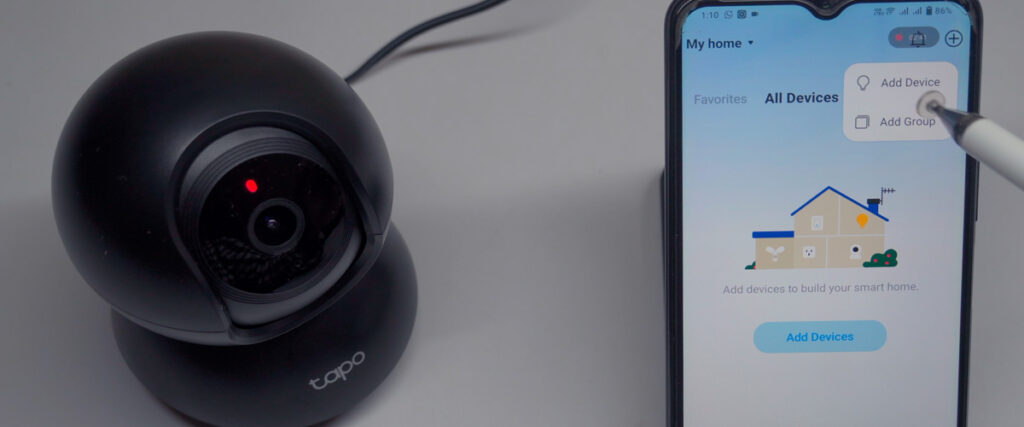
Step 5: Adding the Camera to the Tapo App
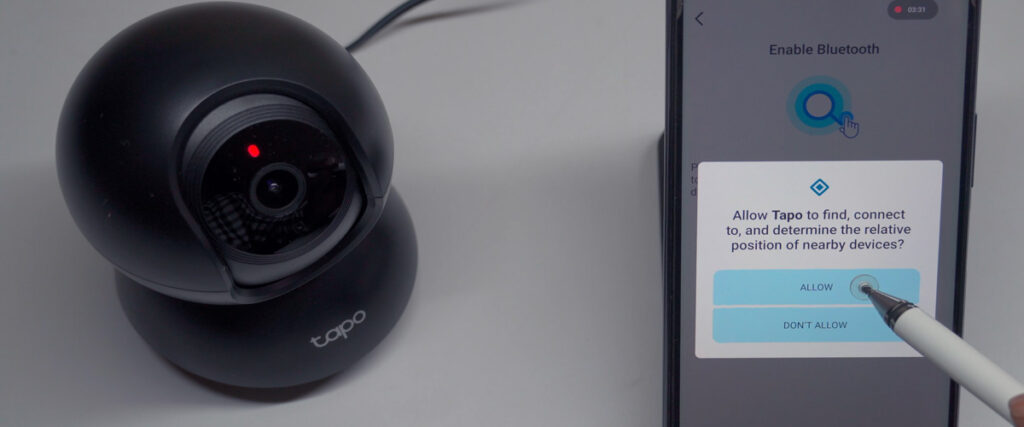
- Prepare the Camera: Ensure the camera is in network connection mode (indicated by blinking red and blue LEDs). If not, reset the camera by pressing the reset button for 5-10 seconds.
- Enable Bluetooth and Location: Turn on Bluetooth and location services in your device’s settings to allow the app to detect the camera.
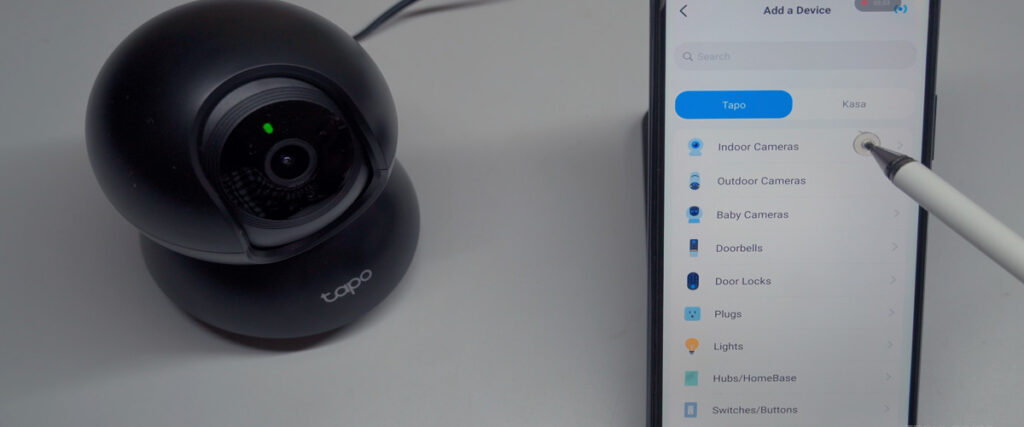
- Select the Camera:
- Open the Tapo app and tap Add Device or Device on the main screen.
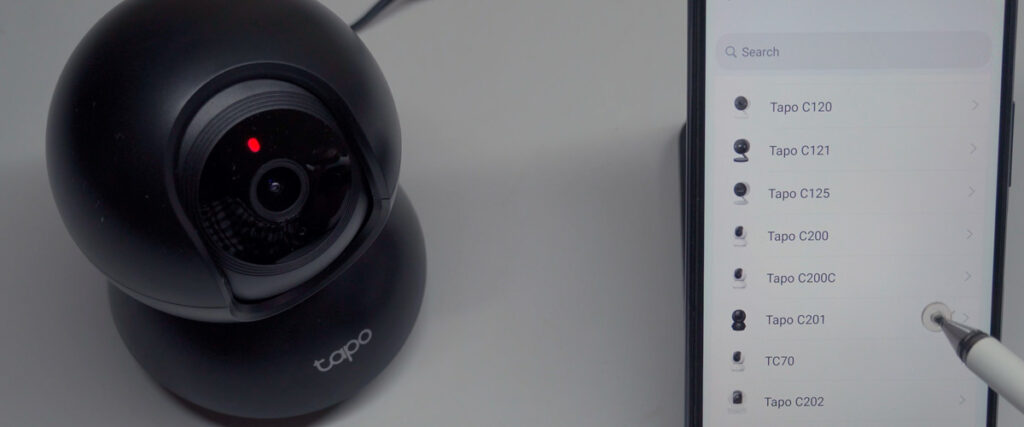
- Navigate to the Tapo tab and select Indoor Camera > Tapo C201.
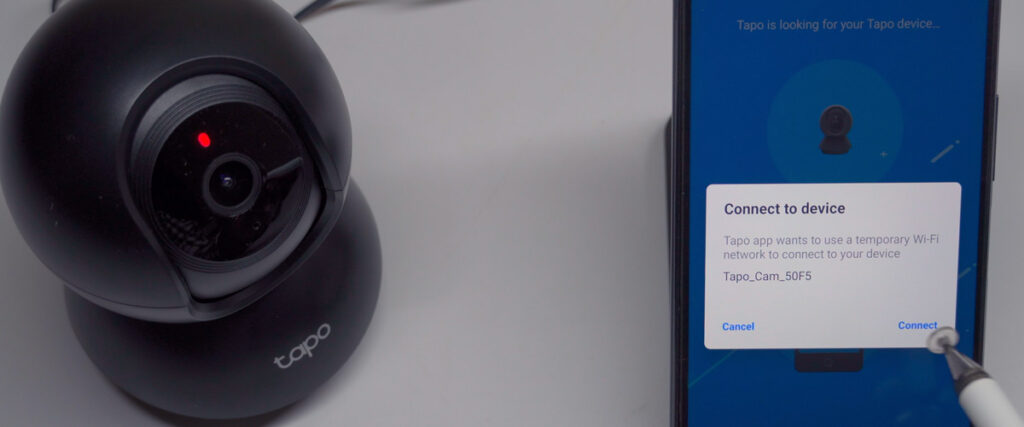
- Connect to the Camera’s Wi-Fi:
- When prompted, connect to the camera’s temporary Wi-Fi network in your phone’s Wi-Fi settings.
- If a connection error occurs, tap Try Again to retry.
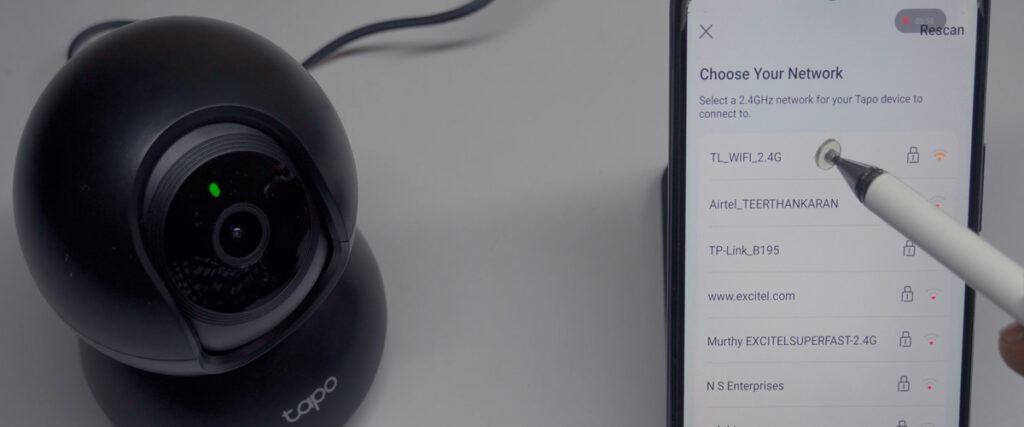
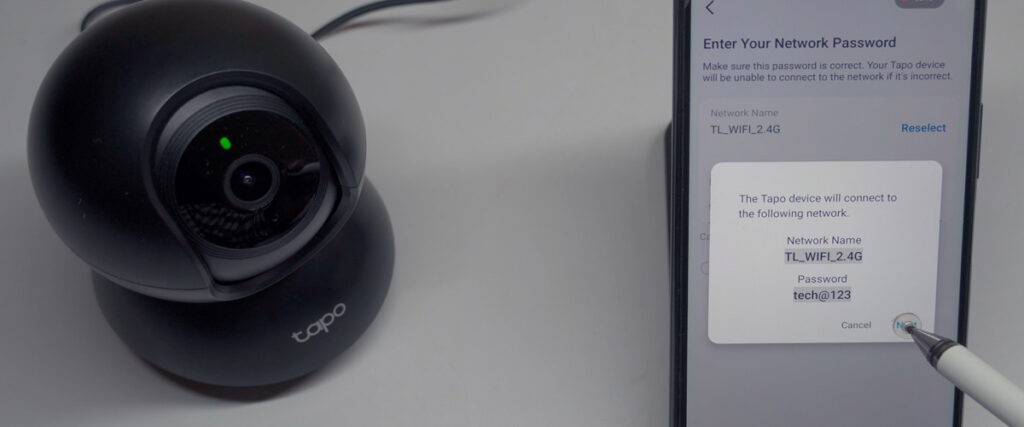
- Connect to Home Wi-Fi:
- Select your home Wi-Fi network from the list and enter the password.
- Keep the camera near your router during setup for a stable connection.
- The connection process may take a few minutes. A stable green LED indicates a successful connection.
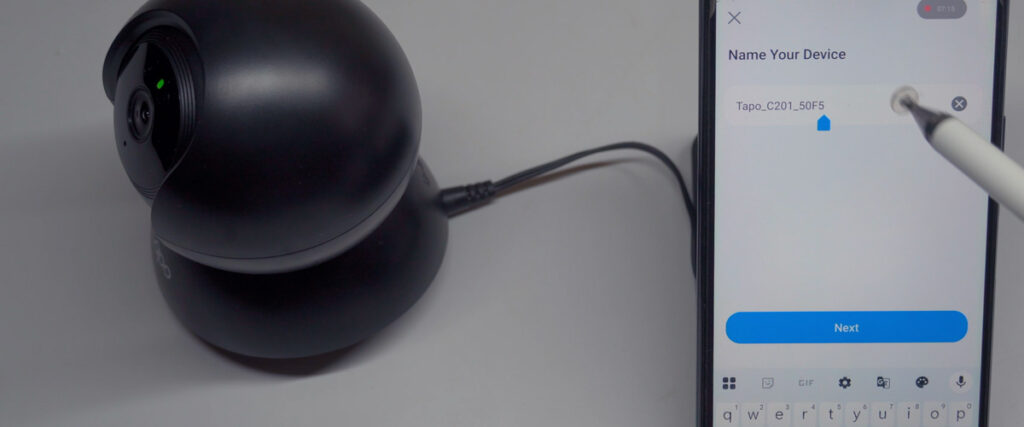
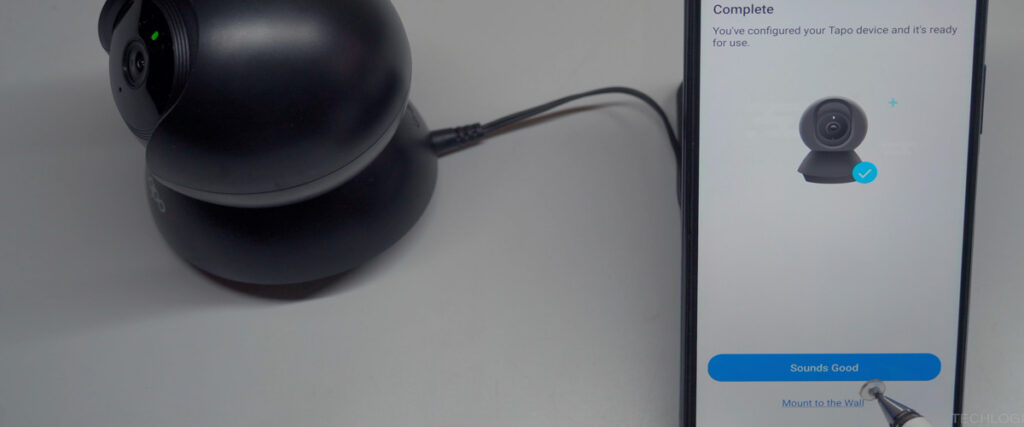
- Finalize Setup:
- Assign a name and location to the camera for easy identification.
- Choose an icon for the camera (optional).
- Tap Next to complete the setup.
- Adjust for Mounting (if applicable): If mounting on a ceiling, select Mount in the Wall to adjust the screen orientation or invert the image by 180°.
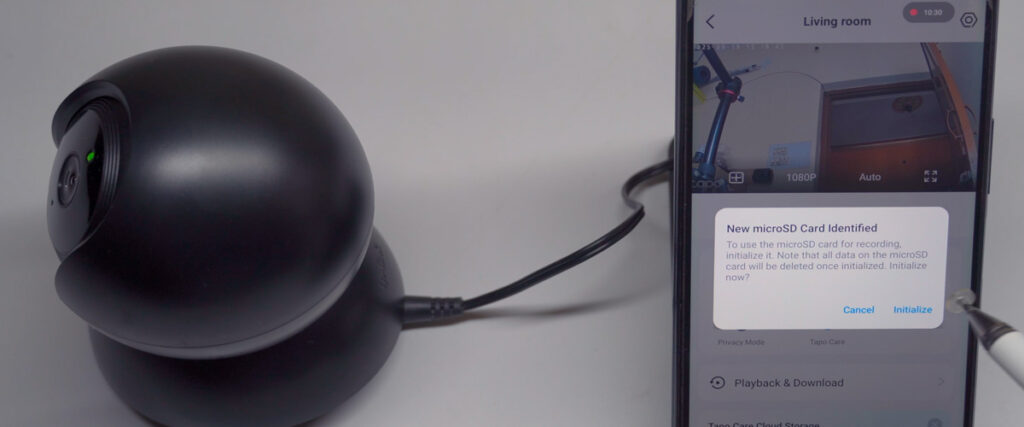
Step 6: Initializing the MicroSD Card
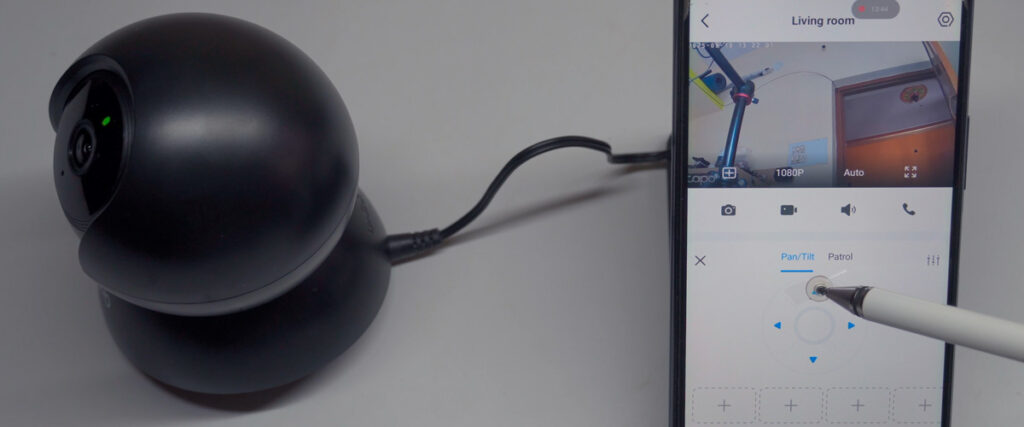
- Access the Live Stream: Tap the camera icon on the app’s home screen to view the live feed.
- Initialize the Card: If prompted, select Initialize to format the microSD card. This prepares it for recording. You can also manually check or initialize the card in the camera settings.
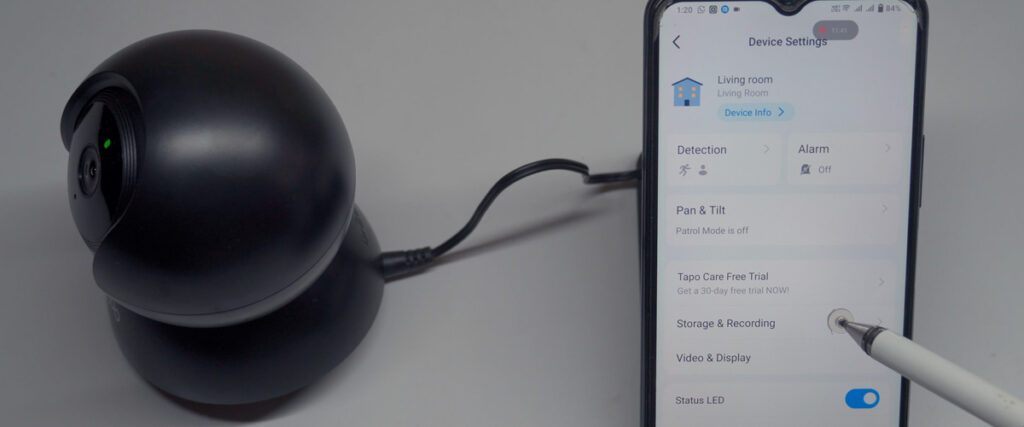
- Configure Settings:
- Tap the settings icon on the camera’s main page.
- Select Device Info to set the date and time based on your location.
- Customize recording preferences (e.g., continuous or motion-activated) in the recording settings.
Step 7: Exploring Advanced Features
Once set up, the Tapo C201 offers a range of features:
- PTZ Control: Use the app to pan, tilt, and zoom for flexible monitoring.
- Live Streaming and Playback: Access live footage or review recordings via the app, even remotely.
- Storage Options: Configure local storage (microSD) or explore cloud storage options later.
- Firmware Updates: Check for updates in the app to keep the camera’s performance optimized.
- Event Alerts and Two-Way Audio: Receive motion alerts and communicate through the camera.
For detailed guides on these features, refer to additional resources in our series.
Step 8: Mounting the Camera
After configuring the Wi-Fi and app settings, mount the camera in your desired location using the included fixing mount and screws. Ensure it’s positioned for optimal coverage, leveraging its 360° pan and 114° tilt capabilities.
Conclusion
The TP-Link Tapo C201 Indoor Pan & Tilt Camera is a versatile and user-friendly solution for home security. With its high-definition video, night vision, motion detection, and smart home integration, it provides peace of mind day and night. By following this step-by-step guide, you can set up your camera, configure storage, and start monitoring your home in no time.
If you found this guide helpful, please like, share, or subscribe to our channel for more tech tutorials and resources. Your support helps us create valuable content to empower your tech journey. Thank you for choosing TECH LOGICS!


