Welcome to TECH LOGICS! In this blog post, we’ll walk you through the process of setting up your TP-Link 4G Wireless Router, including how to change the WiFi SSID and password, and configure it using the TP-Link Tether app on your mobile device. Let’s dive in!
Step 1: Connect to the TP-Link Router Wirelessly
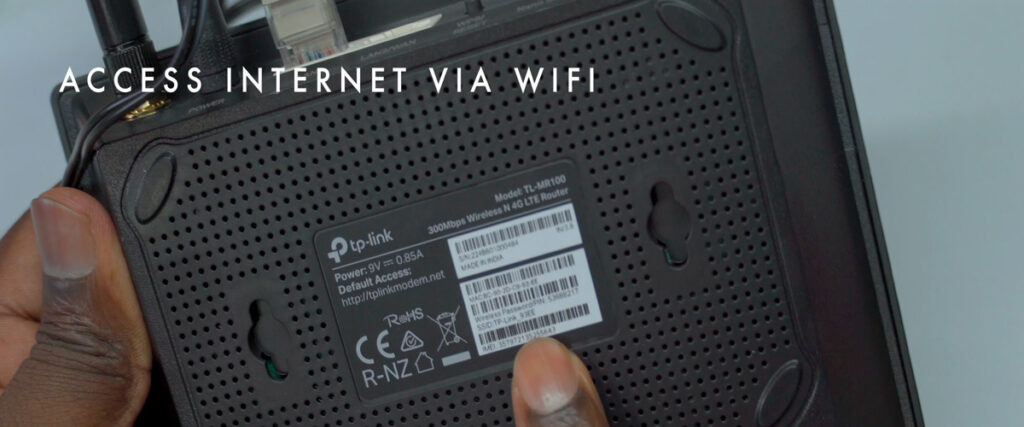
To begin, locate the default SSID (network name) and wireless password printed on the label at the bottom of your TP-Link router. This information is crucial for connecting your smartphone, computer, or other Wi-Fi-enabled devices to the network.
- On your mobile device, navigate to the Wi-Fi settings and tap the network icon to view available networks.
- Find and select your router’s SSID from the list.
- Enter the default password from the router’s label (note that Wi-Fi passwords are case-sensitive).
- Once connected, your device will have access to the internet, allowing you to proceed with the setup.


Step 2: Download and Install the TP-Link Tether App
The TP-Link Tether app is a user-friendly tool for managing your router settings. Here’s how to get it set up:
- Open the Play Store (or App Store) on your smartphone or tablet.
- Search for “TP-Link Tether” and select the app developed by TP-LINK SYSTEMS INC.
- Tap Install and accept any necessary permissions. The installation should complete in a few minutes.
- Once installed, launch the app by tapping Open or find it on your home screen/app drawer.
- Select your region to ensure optimal performance and connectivity with local servers.


Step 3: Log In or Register with the Tether App
If you already have a TP-Link Tether ID, log in by entering your phone number or email address and password. For new users, follow these steps to register:
- On the login screen, select the registration option.
- Enter your email address and create a strong password (including a mix of letters, numbers, and special characters).
- Check your email for an activation link, click it to verify, and return to the app to select Activate and Login.
- For added security, enable facial recognition or biometric authentication (e.g., fingerprint scanning) if your device supports it.
This ensures your account is secure and ready to manage your TP-Link devices.


Step 4: Add and Configure Your Router
If your router is already connected via Wi-Fi, it may appear in the app. Otherwise, add it manually:
- Tap Add Device or the + symbol in the Tether app.
- Select Add a Router and use the QR code scanning feature (if available) to add the device.
- Set a device password to secure access to your router’s settings.
- On the Set Your SIM Card page, click Next to proceed.
- On the Set Wireless Network Name and Password page:
- Enter your preferred SSID and password, or
- Choose Use the Default Wireless Settings to keep the default options.
- Click Apply to save your settings.


Step 5: Connect to the New Wi-Fi Network
After applying the settings, your Wi-Fi SSID will update to the new name. Connect to it using the password you set, then confirm in the app by selecting I’m connected. Once complete, you’ll see a Congratulations message. Click Finish to finalize the setup.
Step 6: Explore the TP-Link Tether App Features
The Tether app provides a wealth of information and customization options, including:
- Router’s IP address and Wi-Fi SSID.
- Total number of connected devices.
- Advanced features like guest networks, parental controls, and bandwidth management.
You can also update your Wi-Fi password, adjust bandwidth allocation, or perform firmware updates in real-time, all from your mobile device.


Why Use the TP-Link Tether App?
The TP-Link Tether app eliminates the need for a computer browser, offering a convenient way to manage your router settings on the go. Its intuitive interface makes it easy to:
- Modify network settings.
- Monitor connected devices.
- Enable features like parental controls or guest networks.
- Perform real-time updates for optimal network performance.
Final Thoughts
By following these steps, you can confidently set up and customize your TP-Link 4G Wireless Router, ensuring a reliable internet experience for all your devices. The TP-Link Tether app simplifies network management, making it accessible anytime, anywhere.
If you found this guide helpful, please share it with others, like, or follow us for more tech tutorials. Your support helps us create more valuable content for our community. Thank you for reading, and happy networking!


