Welcome back to our blog! Today, we’re diving into the world of video door phones and walking you through the process of connecting an Analog Video Door Phone using a Cat6 cable. Whether you’re setting this up at home or in your office, we’ve got you covered with a step-by-step guide. Let’s get started!
For this tutorial, we’ll be using the Hikvision Analog Video Door Phone as our example. The setup includes an indoor station (mounted inside your space) and a door station (installed outside for visitors). The key to connecting these two? A trusty Cat6 cable, perfect for transmitting video and audio signals over long distances.
Step 1: Running the Cat6 Cable
To begin, plan the route for your Cat6 cable, which will run directly between the indoor station and the door station. Keep it away from power lines or areas with heavy electromagnetic interference to ensure a clean, uninterrupted signal.
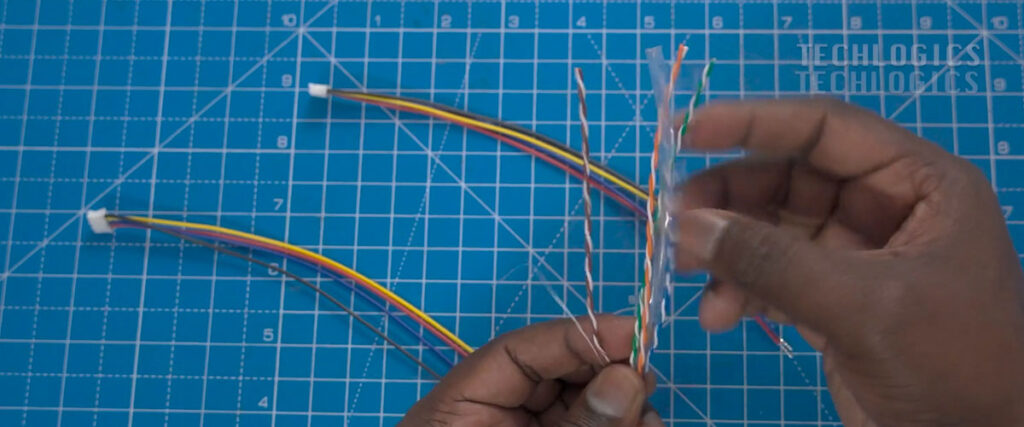
Once you’ve mapped out the path, cut the Cat6 cable to the appropriate length—keeping it under 90 meters for optimal performance. After cutting, strip both ends of the cable to expose the individual wires inside. This will make it easier to connect everything securely.
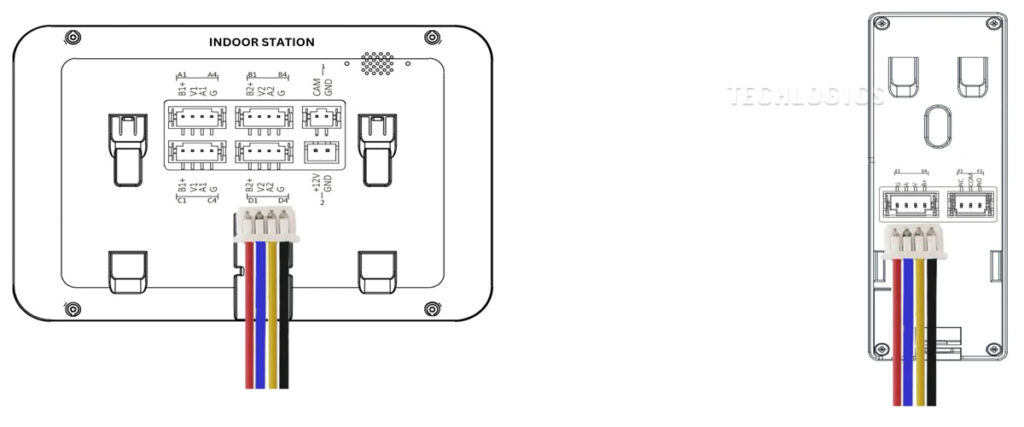
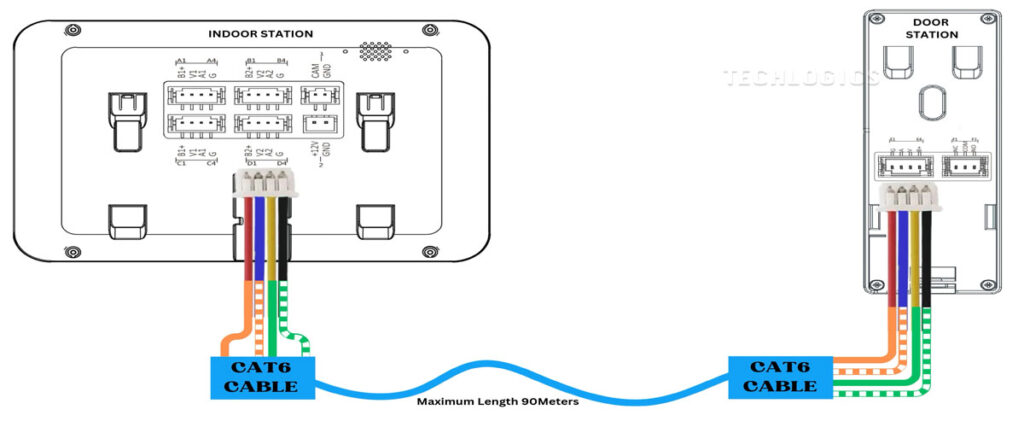
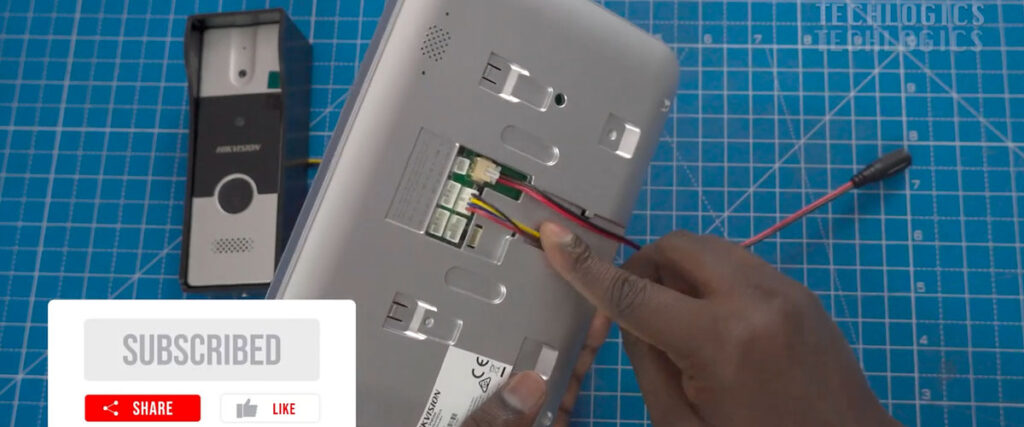
Step 2: Wiring the Indoor Station
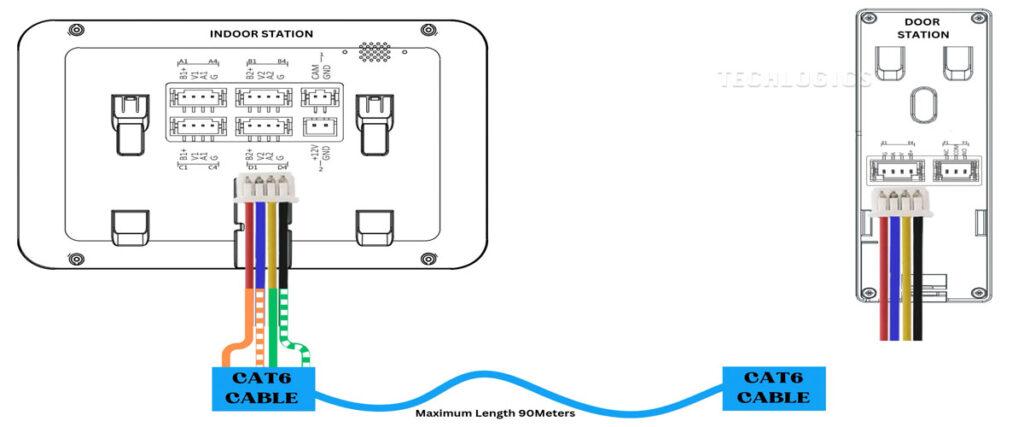
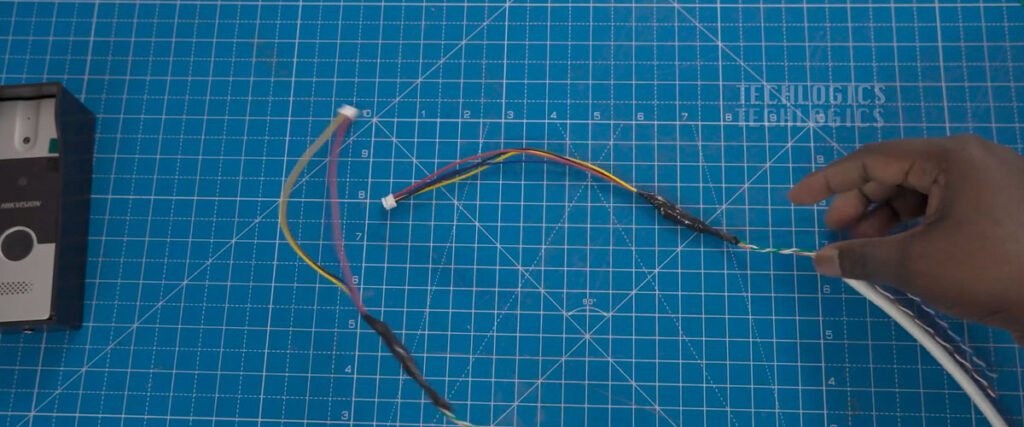
Now, let’s connect the Cat6 cable to the indoor station. Your Hikvision kit should include a 4-pin connector, and you’ll need to match the wires according to the correct color code. Here’s how:
- Red wire (Power Supply) from the 4-pin connector → Connect to the Orange wire of the Cat6 cable.
- Blue wire (Video Input) from the 4-pin connector → Connect to the White Orange wire of the Cat6 cable.
- Yellow wire (Audio Input/Output) from the 4-pin connector → Connect to the Green wire of the Cat6 cable.
- Black wire (Grounding Signal) from the 4-pin connector → Connect to the White Green wire of the Cat6 cable.
Double-check these connections! mismatched wiring can cause your system to malfunction. If your 4-pin connector uses different colors, just ensure the functionality (power, video, audio, ground) aligns with the corresponding Cat6 wires.
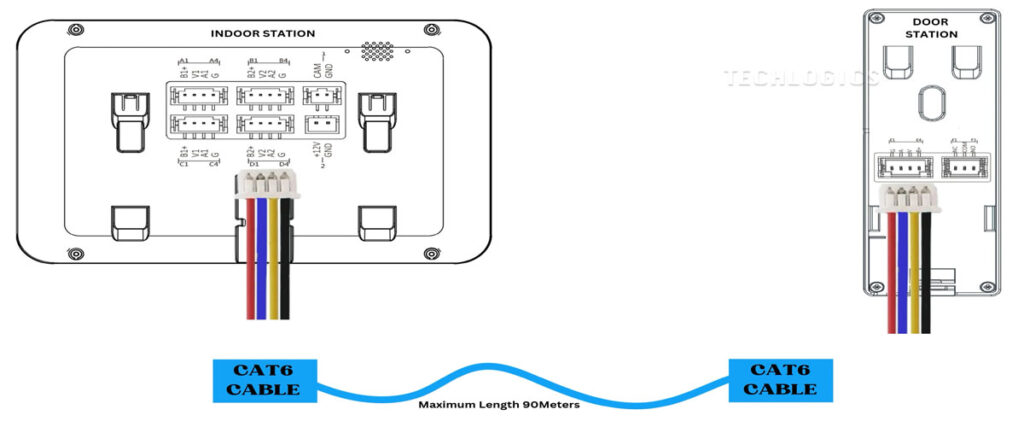
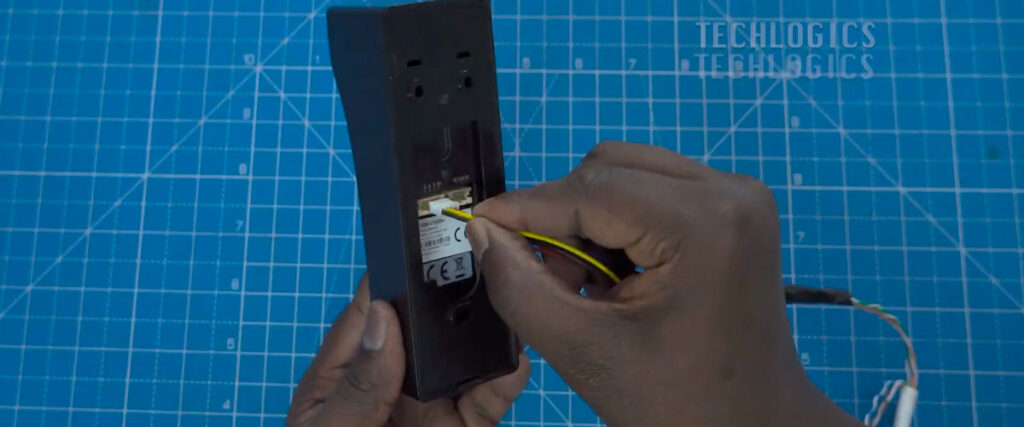
Step 3: Wiring the Door Station
Head outside to the door station and repeat the same process using the 4-pin connector and the other end of your Cat6 cable:
- Red wire (Power Supply) → Orange wire of the Cat6 cable.
- Blue wire (Video Input) → White Orange wire of the Cat6 cable.
- Yellow wire (Audio Input/Output) → Green wire of the Cat6 cable.
- Black wire (Grounding Signal) → White Green wire of the Cat6 cable.
Consistency is key here. Match the wiring to the indoor station setup, and if your connector has unique colors, adjust accordingly while keeping the functionality intact.
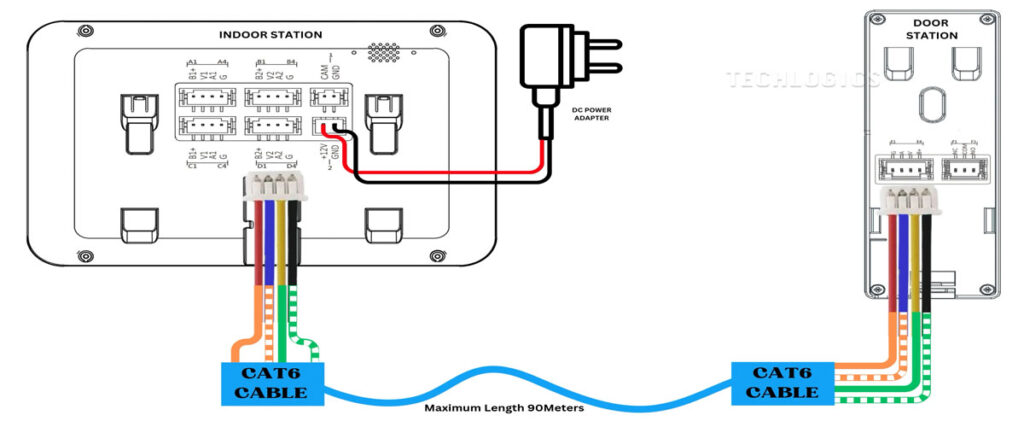
Step 4: Powering Up
With the wiring complete, it’s time to power the system. Connect the provided DC power adapter (or appropriate wiring) to the indoor station. This will supply power to both the indoor and door stations through the Cat6 cable.
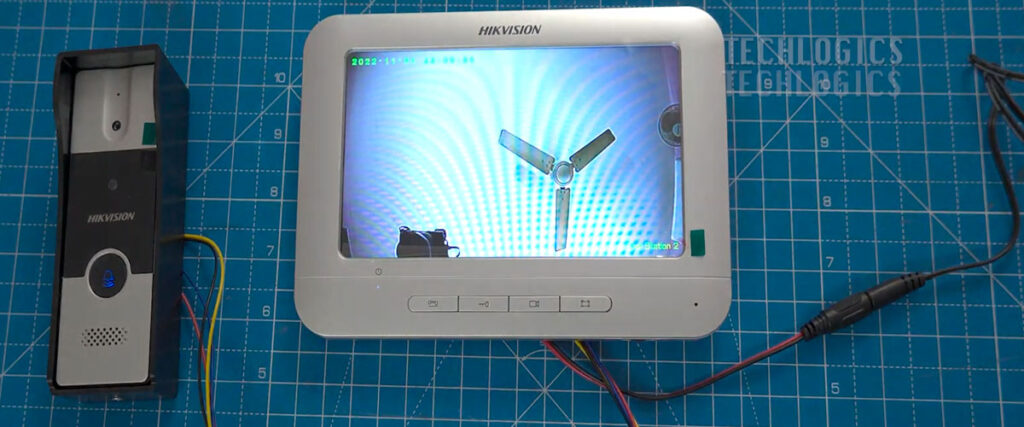
Step 5: Testing the Setup
Now for the fun part—testing! Turn on the power, then press the call button on the door station. If everything’s wired correctly, you should see a clear video feed on the indoor station and hear crisp audio for two-way communication. Troubleshoot any issues by rechecking your connections.
Wrapping Up
And there you have it—a fully functional Analog Video Door Phone setup using a Cat6 cable! This DIY project is a great way to boost security and convenience at your doorstep. If you found this guide helpful, let us know in the comments below. Have questions or need clarification? Feel free to ask—we’re here to help!
Stay tuned for more DIY tips and electronic installation guides. Thanks for reading, and we’ll catch you in the next post!


