In this guide, we’ll walk you through the initial setup steps for connecting your Hikvision 4G PT Network Camera to the internet using a LAN connection, as an alternative to a 4G SIM. You’ll learn how to connect the camera to a router or modem, configure it for access from a PC or laptop, and enable the Hik-Connect feature for remote monitoring via the Hik-Connect mobile app. This is the first part of our series designed to help you get started with your camera.
Step 1: Power Off and Install the Memory Card (If Needed)
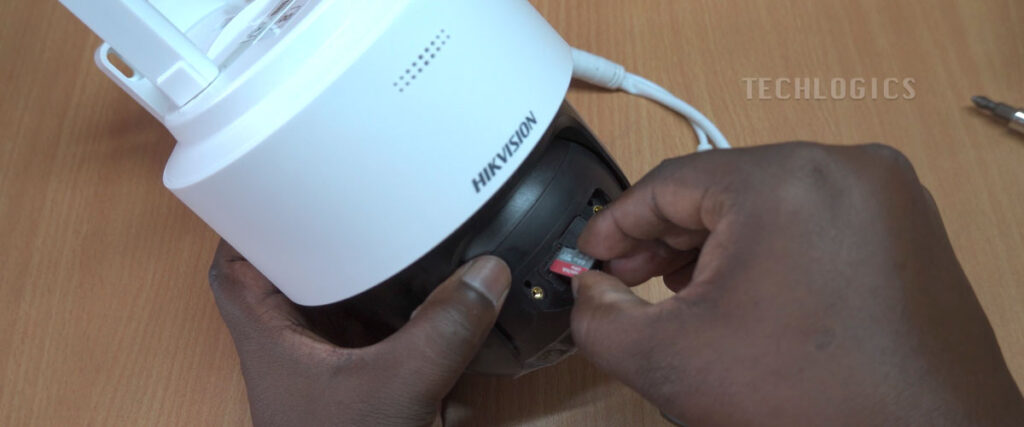
Before starting, power off the camera to protect its internal components and the microSD card from damage due to static electricity or surges. Disconnect the power supply or unplug the adapter.
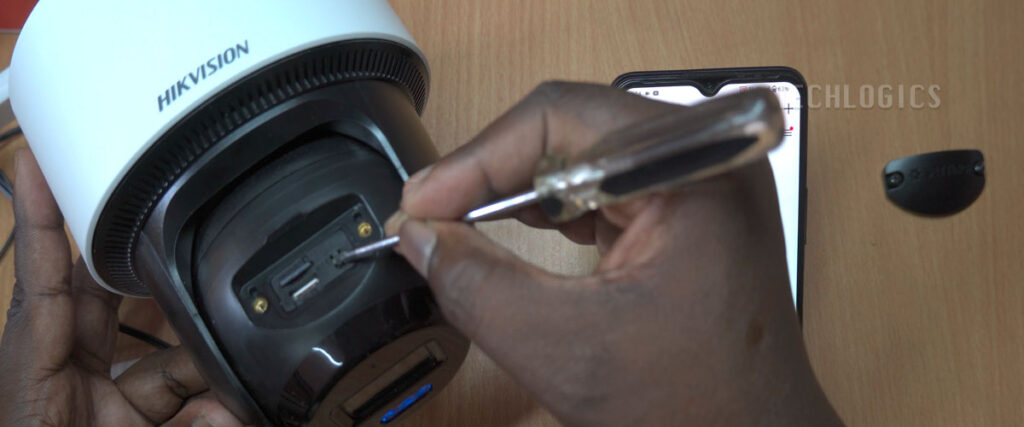
The microSD card slot is located on top of the camera, typically under a protective cover. Ensure the camera is off during installation to avoid data corruption or hardware issues. Align the microSD card correctly and insert it gently until it’s firmly seated. A loosely connected card can lead to recording errors or data loss.
Note: Since we’re using a LAN connection, you can skip the SIM card slot. For a detailed guide on memory card installation, check out our related tutorial in this series.
Step 2: Power Up and Connect to the Network
Once the microSD card is installed, reconnect the power using the provided DC power adapter and plug it into a stable power source. Then, connect the camera to your router or modem using a Cat6 LAN cable from the camera’s Ethernet port. This wired connection ensures a stable network, critical for surveillance cameras.
Upon powering on, the camera’s PT (pan-tilt) lens will rotate, and the red indicator light will illuminate, signaling the boot process. After a few moments, the red light will switch to a flashing blue light, indicating the camera is ready for configuration. You’ll also hear a voice announcement confirming network connectivity.
If you need to reset the camera, press and hold the reset button for up to 5 seconds. After releasing, the camera will restart, and the blue LED and voice prompt will confirm it’s ready for setup.

Step 3: Initialize and Activate the Camera Using SADP Software
To configure the camera, ensure your PC or laptop is connected to the same router as the camera. The SADP (Search Active Device Protocol) software is the most efficient way to find your camera’s IP address and activate it.
🔗 Download SADP Software: https://www.hikvision.com/en/support/tools/hitools/clea8b3e4ea7da90a9/
- Download and Install SADP: If you haven’t installed SADP, download it from the link provided in our video description.
- Scan the Network: Open SADP to scan your network. It will detect all Hikvision devices, displaying their IP address, device type, and status.
- Activate the Camera: Select your camera from the list and set a new password (entered twice for confirmation). This step activates the camera and secures it against unauthorized access.
- Set Security Options: Optionally, answer a security question and register an email for password recovery.
- Enable DHCP: In SADP, select the camera, check the DHCP box, and enter the password you set. This allows the camera’s IP address to be automatically assigned based on your router’s settings.


Step 4: Access the Camera via Web Browser
With the camera activated, access it by entering its IP address (shown in SADP) into a web browser. Log in using the default username admin and the password you set in SADP. This opens the camera’s web interface, where you can configure settings and view the live feed.
Example Url : http://192.168.1.65
User Name : admin
Password : [Yours One]
To view the live feed in the Live View section, install the required plugin. Refer to our related video for plugin installation instructions.


Key Configuration: Set Date and Time
Accurate timestamps are essential for recordings. Navigate to System > System Settings > Time Settings in the web interface. Choose to:
- Manually set the date and time, or
- Select Sync with computer time for automatic synchronization.

Step 5: Enable Hik-Connect for Remote Access
To monitor your camera remotely via the Hik-Connect mobile app:
- Go to Configuration > Network > Platform Access > Hik-Connect in the web interface.
- Toggle the Enable option for Hik-Connect.
- Create and enter a verification code for added security. This code is used when sharing live feeds or granting remote access.
- Save the settings. The camera will connect to Hik-Connect’s cloud platform, and its status will update to Online if configured correctly.

Step 6: Add the Camera to the Hik-Connect App
In the Hik-Connect app, add the camera by:
- Entering the camera’s serial number, or
- Scanning the QR code on the camera label.
For detailed instructions, watch the next part of our video series.
📺 Watch the full series for memory card installation and more: https://youtube.com/playlist?list=PLyP-721PkT6QkbCLximi9EiH36IJZ3FyK&si=Dwhx17bU40FD9zQ8
Conclusion
You’ve now successfully set up your Hikvision 4G PT Network Camera via LAN, activated it with SADP, configured basic settings, and enabled Hik-Connect for remote access. Stay tuned for more tutorials in this series to explore advanced features and troubleshooting tips.
If you found this guide helpful, please like, share, and subscribe to support our community. Your support helps us create more valuable content. Thank you for joining us!


