Hello everyone, and welcome back to our blog! If you’re having trouble accessing your Hikvision DVR or HVR because you’ve forgotten the admin password, don’t worry! In this post, we’ll guide you through the steps to reset it using the Hik-Connect app. This feature is available on the latest version of Hikvision DVR, and it’s crucial that your DVR is already connected to your Hik-Connect account to view and manage your cameras from your mobile device.
Before You Start
Before diving into the steps, ensure that your DVR is connected to the internet. You should also have the Hik-Connect app installed on your phone. Importantly, the phone you are using must be the one that the device owner used to add the DVR to the Hik-Connect account.
Step-by-Step Guide to Resetting Your Password
Step 1: Access the Password Reset Option
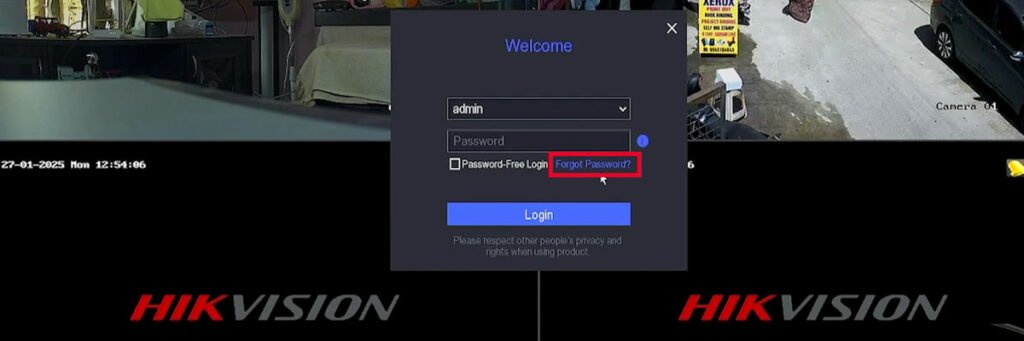
- Go to the DVR Login Screen: On your DVR, click on the option labeled ‘Forgot Password’ to start the password recovery process.
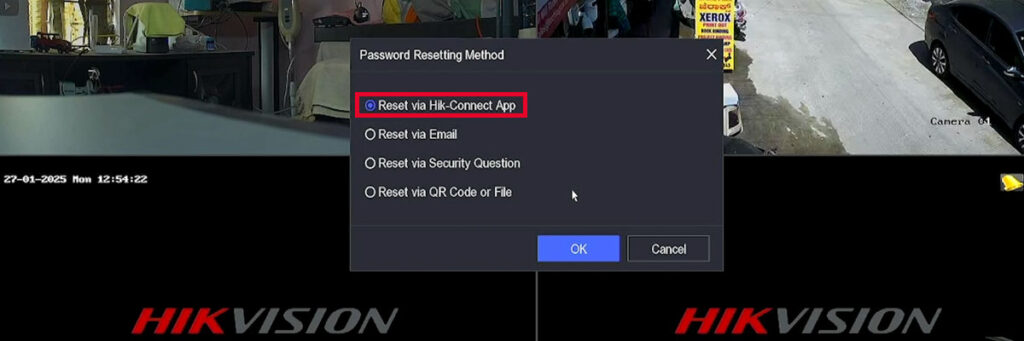
- Choose Reset Method: From the available methods listed, select ‘Reset via Hik-Connect App’ and then click the ‘OK’ button. This action will generate a Device QR code that you will need to scan with the Hik-Connect mobile app.
Step 2: Open the Hik-Connect App
- Launch the App: Open the Hik-Connect app on your mobile device. Ensure that the device is already added and accessible within the app. This confirmation is essential for verifying your status as the device owner.
- Important Note: If you are not the owner of the device or if the device has not been added to your Hik-Connect account, this method will not work.
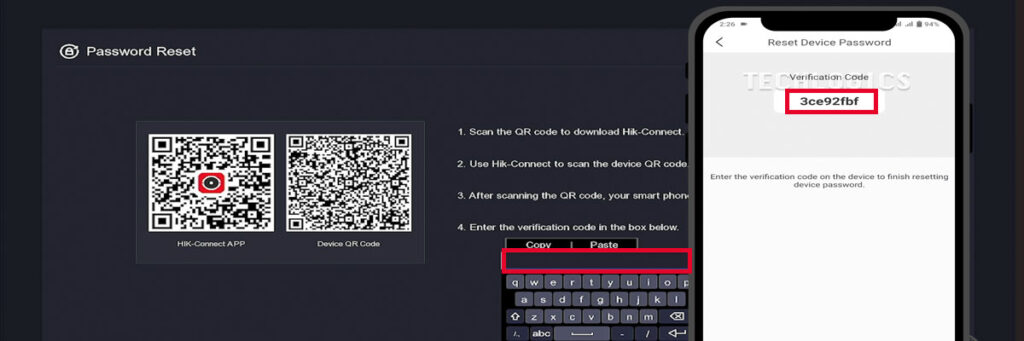
Step 3: Scan the QR Code
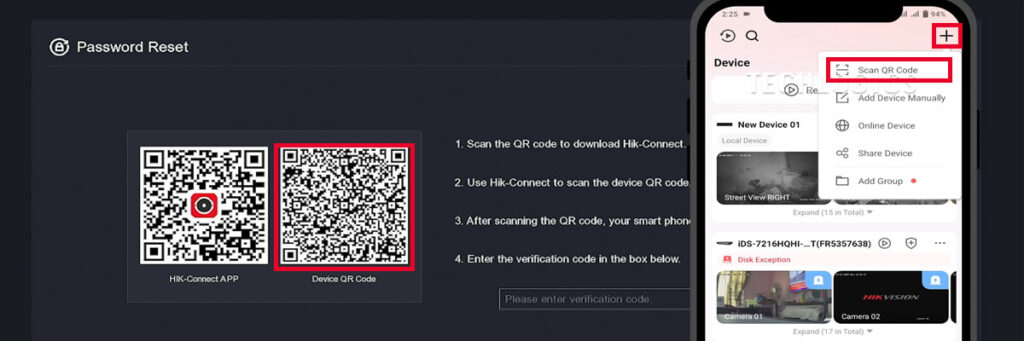
- Locate the Scan Option: On the top right-hand side of the app, you should see a ‘+’ symbol. Click that symbol and select ‘Scan QR Code.’ This will activate your camera for scanning.
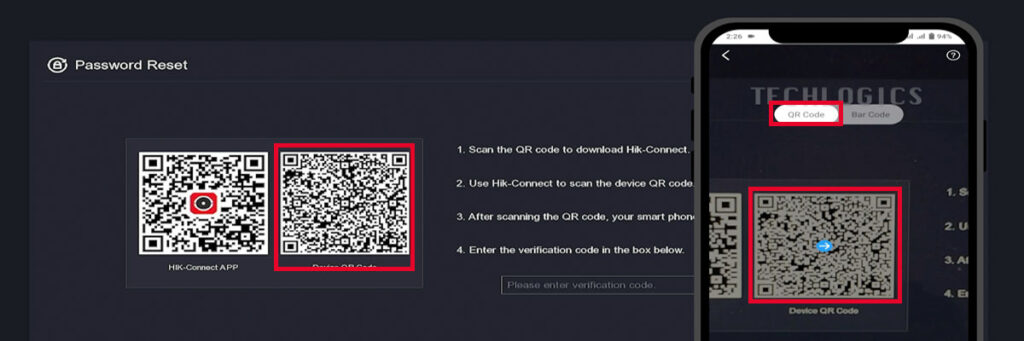
- Scan the Code: Point your camera at the Device QR code displayed on your monitor, carefully labeled ‘Device QR Code.’ Ensure you are scanning the correct QR code as interference from other codes may prevent accurate scanning.
Step 4: Enter the Verification Code
- Receive Temporary Code: Once the QR code is successfully scanned, you will receive a temporary ‘Verification Code’ for the device.
- Input the Code: Enter this code in the verification field on your monitor screen using your mouse. After entering the code, click the ‘OK’ button to proceed to the reset password window.
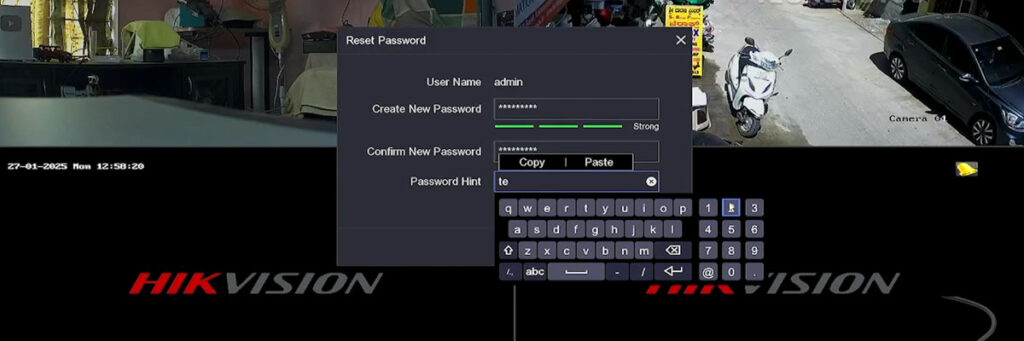
Step 5: Create a New Password
- Set Your New Password: In the password creation fields, enter your new password twice. To enhance security, make sure your password includes a combination of uppercase letters, lowercase letters, numbers, and special symbols.
- Add a Password Hint: After you’ve entered the password, you’ll need to provide a hint. This hint should be something that helps you remember your password in case you forget it later.
- Finalize the Process: Once you’ve successfully entered your new password and hint, click the ‘OK’ button to save the changes and complete the password reset process.
Optional Step: Set an Activation Password
During this process, you have the option to set an activation password for your IP camera device. This adds another layer of security, ensuring that only you can access and manage your cameras.

Conclusion
The reset process has now been completed successfully! You can log in to your DVR using your newly created password. You may also be prompted to set a pattern lock password for additional security. After completing this step, you will have full access to configure the device as needed.
Thank you for reading! We truly appreciate your support as we strive to create more valuable content like this for you. If you found this guide helpful and informative, please share it with your friends and family. Don’t forget to subscribe to our channel for more upcoming tutorials and guides. Your support motivates us to continue delivering high-quality content aimed at enhancing your experience with technology!


