Welcome to TECH LOGICS! In this comprehensive guide, we’ll walk you through the process of resetting your TP-Link Vigi Mini IP Dome Camera using a hardware reset, creating a new password, and configuring its IP address with the VIGI Config Tool. By following these steps, you’ll ensure your camera is securely set up and easily accessible on your network. Let’s dive in!
Step 1: Preparing for a Factory Reset
To begin, you’ll need to perform a factory reset using the reset button located inside the camera’s housing. Follow these precautions to avoid electrical hazards or damage:
- Power Off the Camera: Disconnect the power supply to the camera to ensure safety.
- Open the Dome Cover: Carefully unscrew the screws securing the dome cover. Gently remove the cover to expose the internal components, including the motherboard where the reset switch is located. Take care not to force or damage any parts during this process.

Step 2: Powering On and Locating the Reset Switch
After opening the housing:
- Reconnect the Power Supply: Plug the camera back in and wait 2–3 minutes for it to fully boot up and initialize its internal systems. This step ensures the camera is stable before proceeding.
- Locate the Reset Switch: The reset switch is on the motherboard. Refer to the camera’s manual or our accompanying video for its exact location to avoid confusion.

Step 3: Performing the Factory Reset
- Initiate the Reset: Press and hold the reset switch for up to 5 seconds. You’ll hear a voice prompt confirming the reset, indicating that all settings have been restored to their factory defaults.
- Wait for Reboot: After the reset, wait an additional 2–3 minutes for the camera to fully restart and stabilize.

Step 4: Reassembling the Camera
- Reposition the Housing: Carefully place the dome cover back onto the camera, ensuring proper alignment.
- Secure the Screws: Fasten the screws tightly to protect the internal components and prevent any movement or exposure.

Step 5: Connecting to Your Network
Before initializing the camera, ensure it’s connected to your LAN network. You can manage this connection using the VIGI Config Tool or a web browser.
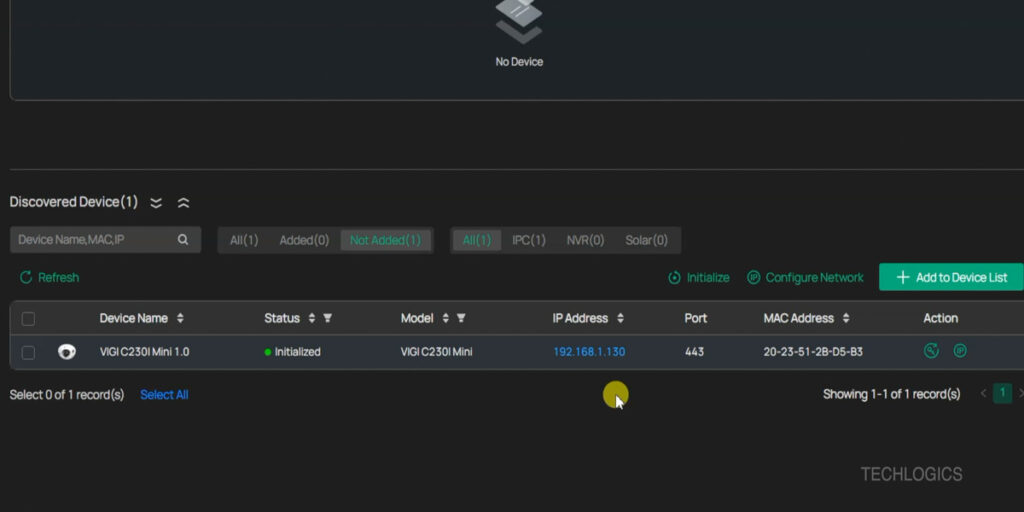
- Open the VIGI Config Tool: Navigate to the “Device Management” page. The tool will automatically scan for all connected VIGI devices on your LAN, displaying them under the “Discovered Devices” section.
- Check Camera Status: If the camera shows as “Uninitialized,” proceed to the initialization process.
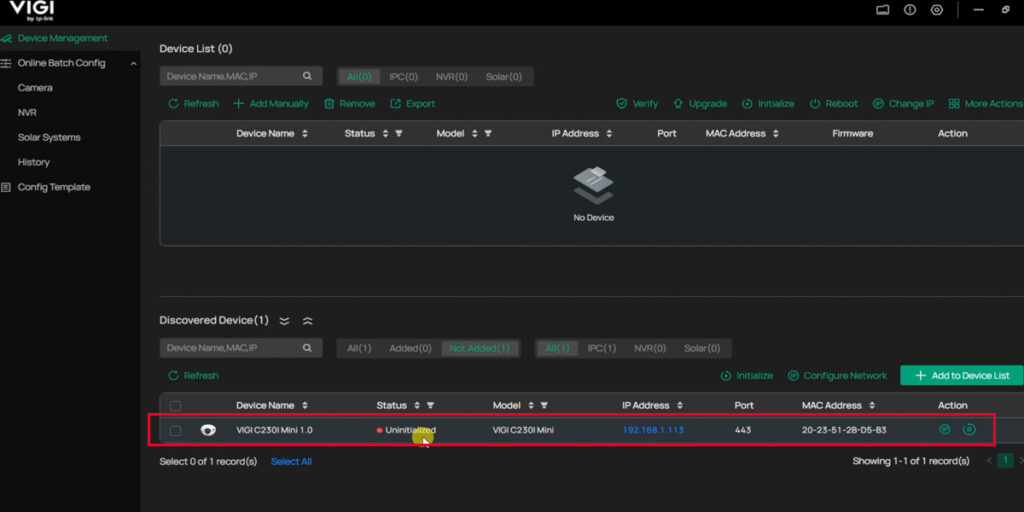
Step 6: Initializing the Camera
To activate your camera:
- Access the Initialize Option: In the “Action” section of the VIGI Config Tool, click the “Initialize” icon.
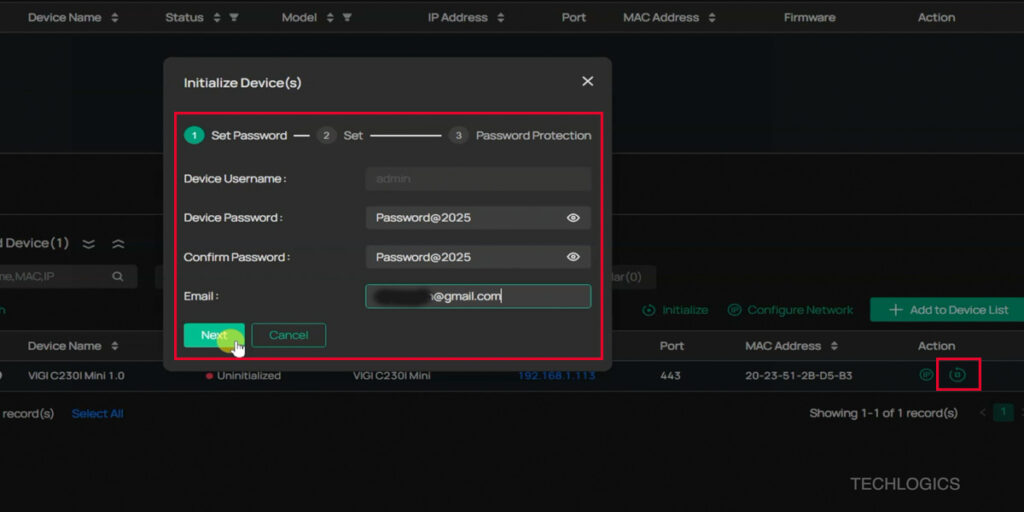
- Set a Secure Password: Create a strong password using a combination of uppercase letters, symbols, and numbers. You may also be prompted to provide an email address for recovery purposes.
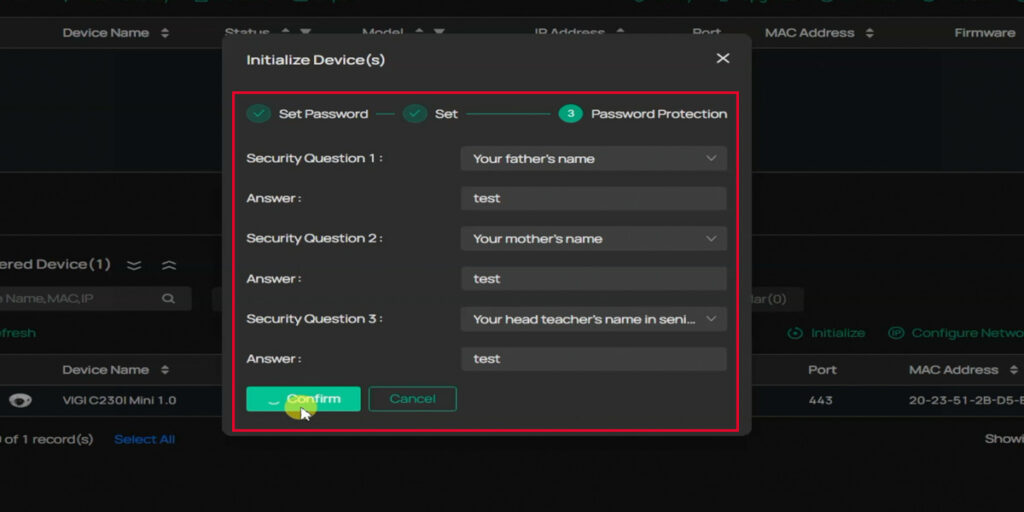
- Configure Additional Settings: Select your region and time zone for accurate settings, and set up a security question for password recovery.
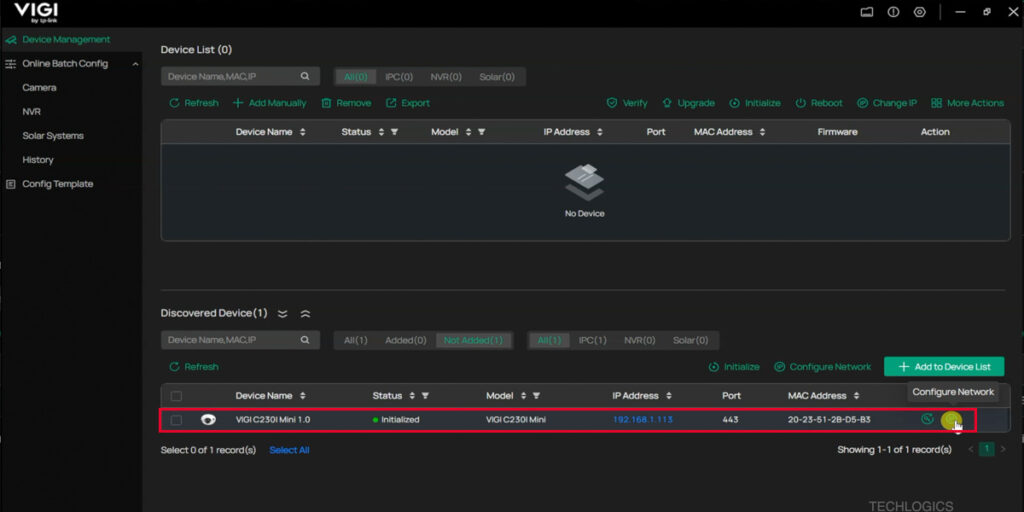
- Complete Initialization: Click “Finish” to save your settings. The camera status should now display as “Initialized,” indicating it’s ready for network configuration.
Step 7: Setting a Static IP Address
Assigning a static IP address ensures consistent access and simplifies network management:
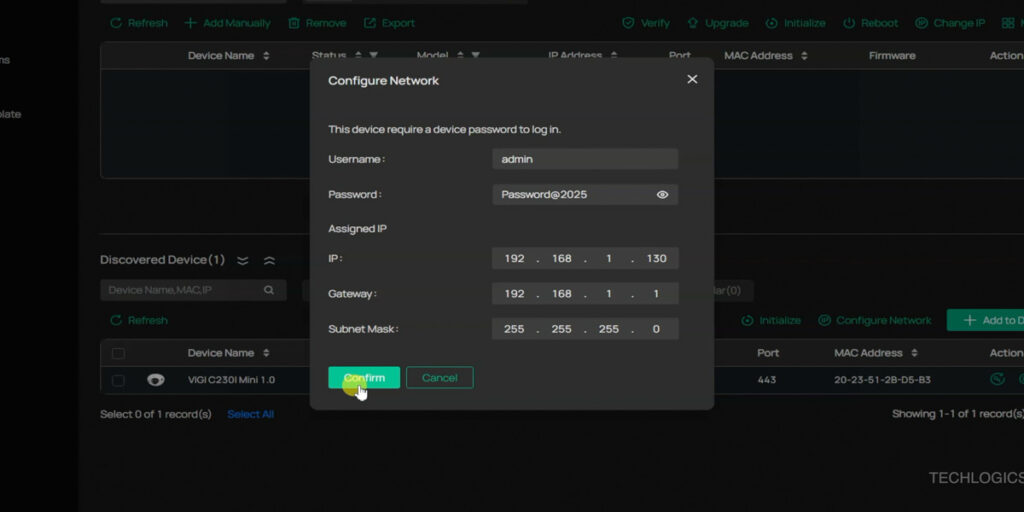
- Access Network Configuration: In the VIGI Config Tool’s “Action” section, click the “Configure Network” icon.
- Enter Credentials: Input the password you set during initialization.
- Set the IP Address: Enter a static IP address within your network’s IP range, along with the gateway IP address (typically your modem or router’s IP).
- Save Settings: Click “Confirm” to apply the settings. Verify the IP address and gateway to ensure accuracy.
Step 8: Accessing the Camera
To view live footage and manage settings:
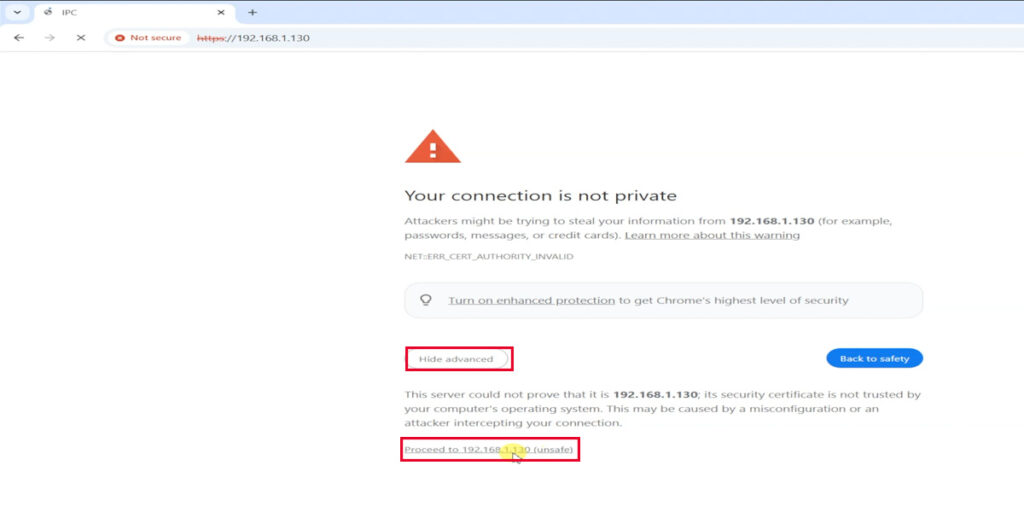
- Open a Web Browser: Enter the camera’s static IP address in the address bar.
- Bypass Security Warnings: If a security warning appears, click “Advanced” and then “Proceed” to access the login page.
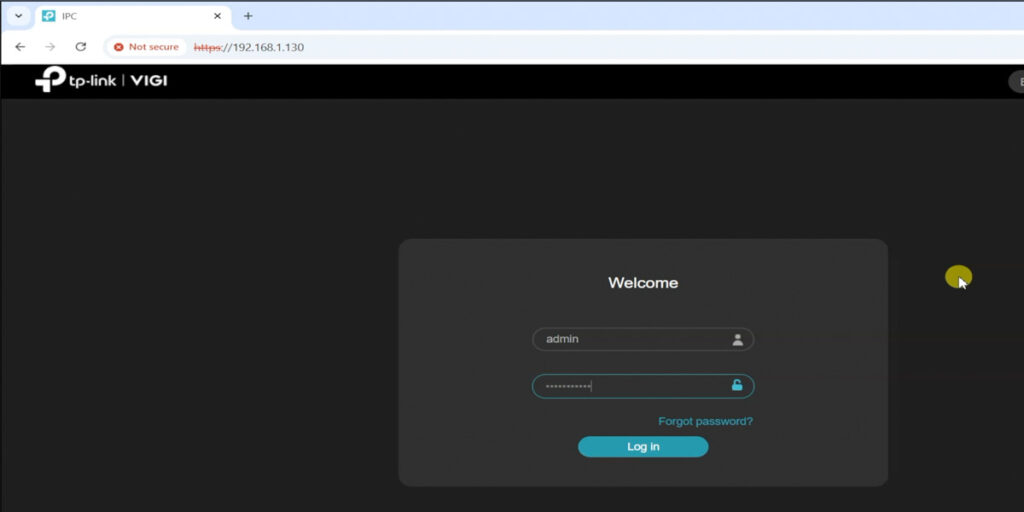
- Log In: Use the username and password created during initialization to log in securely and access the camera’s features.
Final Thoughts
By following these steps, you’ve successfully reset and configured your TP-Link Vigi Mini IP Dome Camera for secure and reliable operation on your network. Assigning a static IP address and setting a strong password enhances both stability and security, making remote monitoring seamless.
If you found this guide helpful, please consider supporting TECH LOGICS by sharing this post or exploring our other tech tutorials. Your support helps us continue providing valuable resources for our community!


