In this step-by-step guide, we’ll walk you through the process of installing and configuring the latest iVMS-4200 PC client software to manage your Hikvision 4G Smart network cameras. Whether you’re setting up remote monitoring for the first time or looking to maximize the potential of your Hikvision cameras, this tutorial has you covered with clear, actionable instructions.
Downloading the iVMS-4200 Software
To get started, you’ll need to download the iVMS-4200 software. You have two options:
- Direct Link: Use the download link provided in the video description (if applicable) for a quick shortcut to the download page. This is the fastest way to get the software without navigating the website. Ivms 4200 PC Client software Download : https://www.hikvision.com/en/support/download/software/ivms4200-series/
- Hikvision Website: Visit the official Hikvision website manually. Here’s how:
- Open your preferred web browser (e.g., Chrome, Firefox, or Edge) and type the official Hikvision URL into the address bar.
- Once the homepage loads, find the Support menu at the top of the page and click it.
- Navigate to the Download section within the Support page.
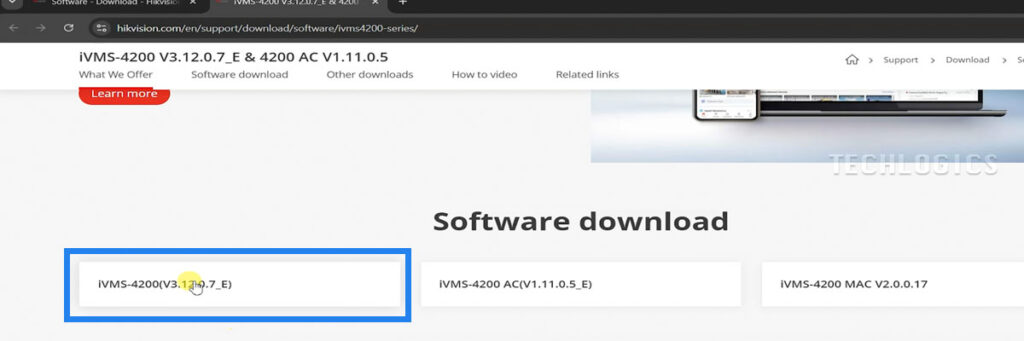
- Under the Software category, locate the iVMS-4200 tab.
- Select the first file listed for Windows installation—this is typically the latest version with the most recent features and updates.
- Review and accept the Materials License Agreement before clicking the Download button.
The download time will depend on your internet speed and file size. Once complete, the setup file will be ready in your Downloads folder.
Installing iVMS-4200 on Your PC
With the software downloaded, follow these steps to install it:
- Locate the File: Find the iVMS-4200 setup file in your Downloads folder (or wherever your browser saves files).
- Run as Administrator: Right-click the file and select Run as administrator to ensure the installation has the necessary permissions.
- License Agreement: Accept the License Agreement when prompted.
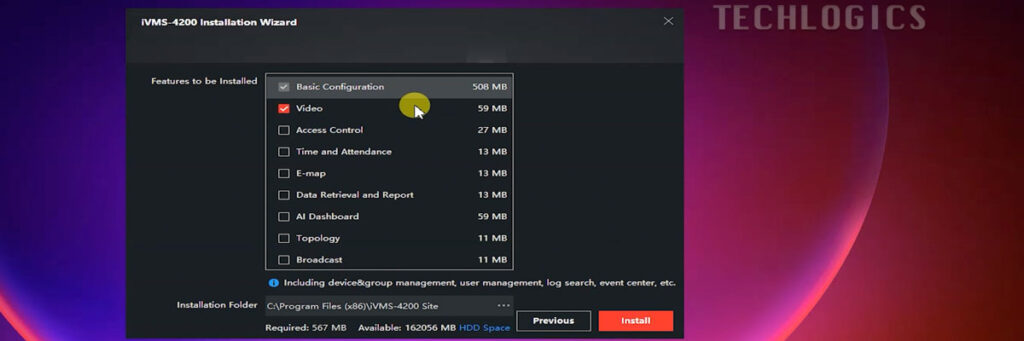
- Choose Installation Location: Stick with the default folder or select a custom one if preferred.
- Customize Features: Deselect any unnecessary features during installation. For a basic setup, enable only the Basic configuration and video features.
- Install: Click Install to begin the process.
Once installation finishes, you’ll see a few handy options:
- Check Launch client to open iVMS-4200 immediately.
- Select Create a desktop icon for quick access later.
Initial Setup of iVMS-4200
When you launch iVMS-4200 for the first time, here’s what to expect:
Upgrade Detection Popup
A small window labeled Upgrade Detection may appear. Decide whether to:
- Enable it for automatic update checks (recommended for staying current).
- Disable it if you prefer manual updates.
Creating a Super User Account
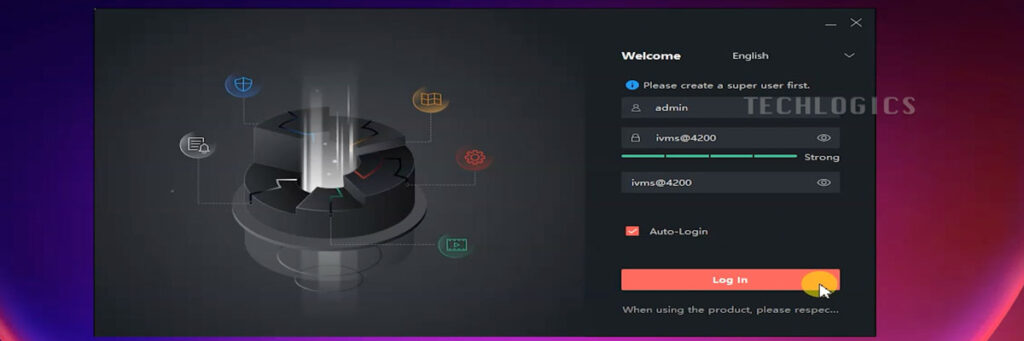
The software will prompt you to set up a Super User account for security:
- Choose a strong username and password.
- Answer the provided security questions—these will help recover your account if you forget your credentials.
- Optionally, enable Auto login to skip entering your details each time you open the software.
With your account set up, you’re ready to configure iVMS-4200 for your Hikvision cameras.
Connecting Your Hikvision 4G Cameras via Hik-Connect
To link your Hik-Connect-enabled cameras to iVMS-4200, follow these steps:
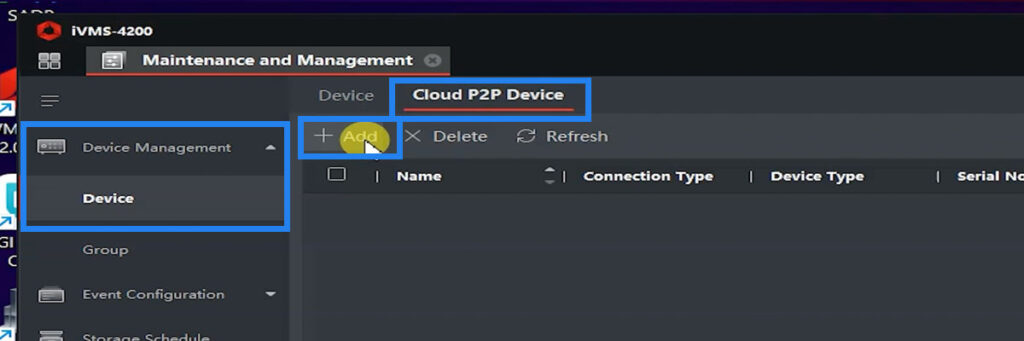
- Device Management: In the iVMS-4200 interface, go to the Device Management section.
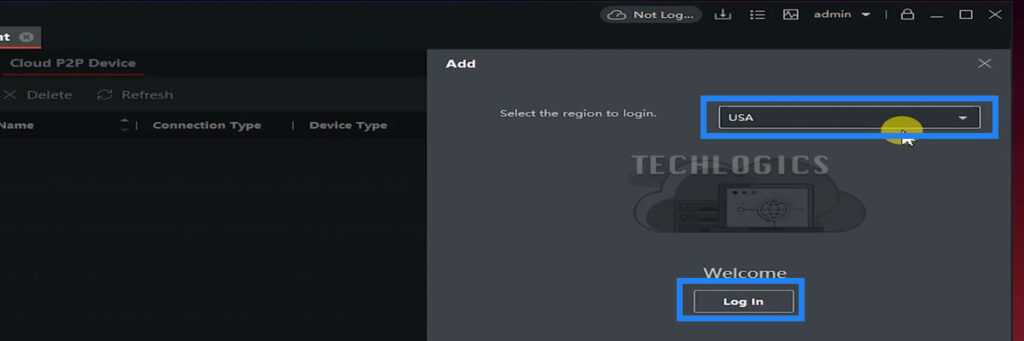
- Cloud P2P Device: Under the Device tab, select Cloud P2P Device to open the Add Device screen.
- Log In to Hik-Connect:
- Select your region (this should match the region set in your Hik-Connect mobile app).
- Enter your Hik-Connect username and password—the same credentials used in the mobile app.
- Click Login.
Once logged in, iVMS-4200 will automatically retrieve the cameras linked to your Hik-Connect account, making them available for live viewing and management.
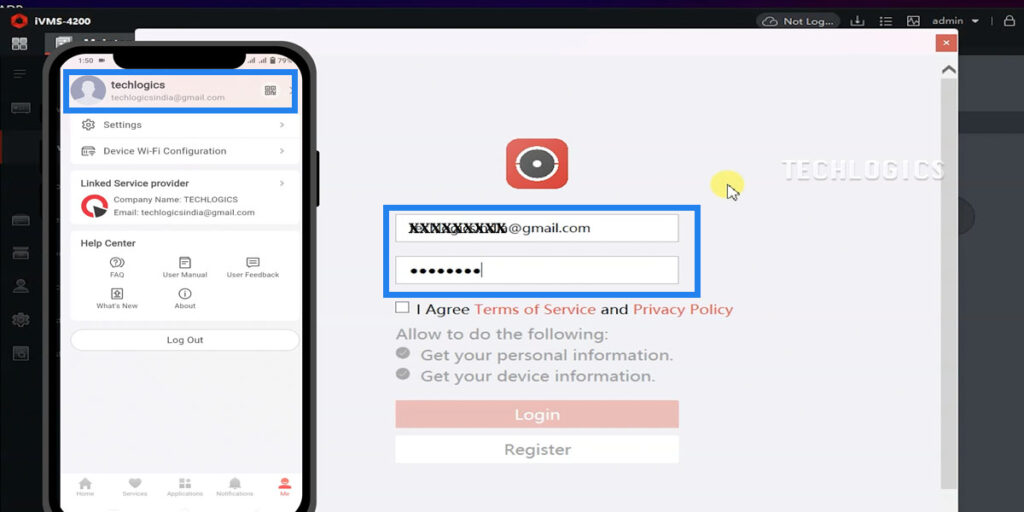
Finding Your Hik-Connect Details
Not sure about your region or username? Check the Hik-Connect mobile app:
- Open the app and tap Me (bottom right).
- Click your account name at the top to view your region and username.
Now you can view and manage the devices that are already linked to your Hik-Connect account directly in iVMS-4200 for live viewing and playback.
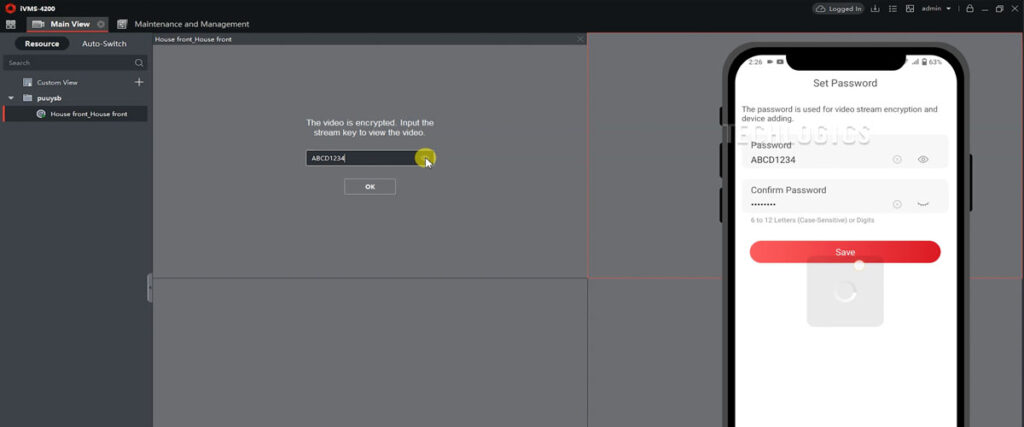
When you click on a camera to view the live stream in iVMS-4200, you may be prompted to enter the Device Verification Code. This code is the one you set when you added the camera to your Hik-Connect account. Enter that code in the provided field to access the live stream.
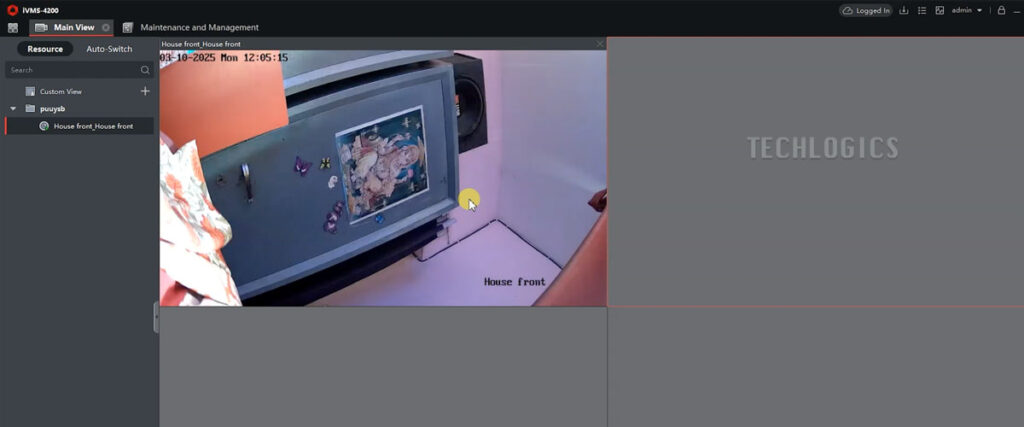
Viewing Your Cameras in iVMS-4200
With your cameras added, you can now monitor them:
- Single Camera: Select a window and click a camera name to view its live stream.
- Multiple Cameras: Click the group name to display live feeds from all cameras simultaneously—perfect for efficient multi-camera monitoring.
Logging In and Out
- If you close iVMS-4200 without logging out of Hik-Connect, your cameras will remain accessible on the next launch.
- If you log out and reopen the software, you’ll need to re-enter your Hik-Connect credentials to reconnect.
Final Thoughts
You’re now set up to manage your Hikvision 4G Smart network cameras with iVMS-4200! This powerful tool simplifies remote monitoring and puts control at your fingertips.
For more tips or troubleshooting, check out additional segments in our video series. If this guide helped you, we’d love your support—whether it’s a like, share, or subscription. Your encouragement helps us create more valuable content for you. Thanks for reading!


