Welcome to TECH LOGICS! This step-by-step guide will walk you through installing and configuring the latest Hikvision iVMS-4200 PC client software to access live video feeds from your Hikvision IP camera. Whether you’re connecting via a local LAN or directly to your PC without a router, this tutorial has you covered.
Step 1: Download iVMS-4200 Software
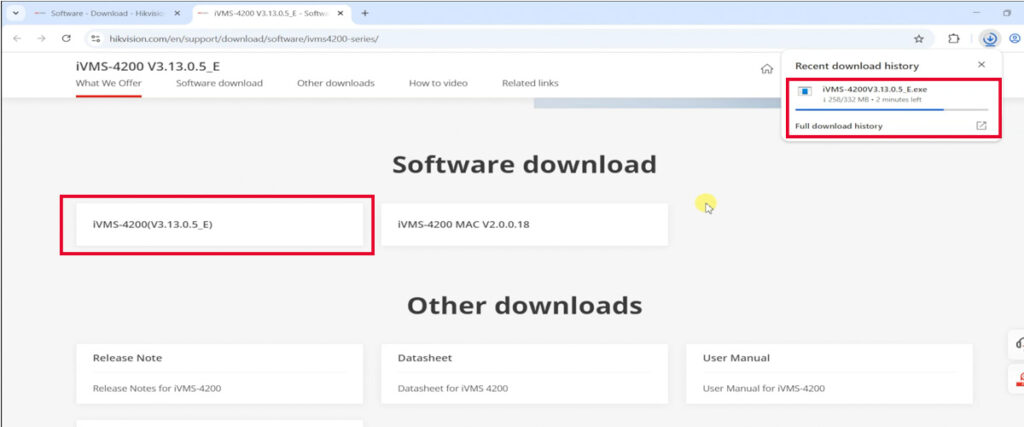
To get started, download the iVMS-4200 software from the Hikvision official website. Navigate to the Support page, then go to the Download section and select Software. Under the iVMS-4200 tab, choose the first file listed for Windows.
- Requirements: An internet connection (e.g., mobile hotspot or existing network).
- Tip: Save the setup file in advance to streamline the process before connecting your IP camera.
Accept the Materials License Agreement to initiate the download. The file size and your internet speed will determine the download time.
🔗 Download iVMS-4200: https://www.hikvision.com/en/support/download/software/ivms4200-series/
Step 2: Install iVMS-4200
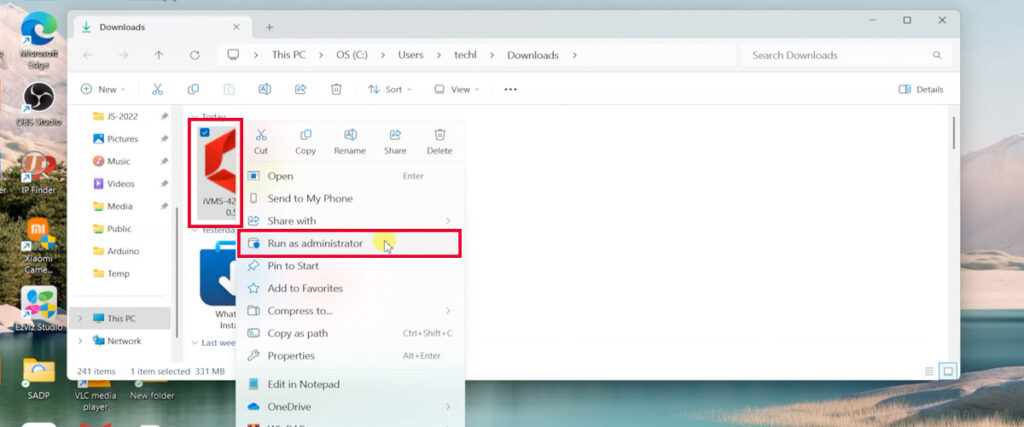
- Locate the downloaded setup file in your Downloads folder.
- Right-click the file and select Run as administrator to avoid permission issues.
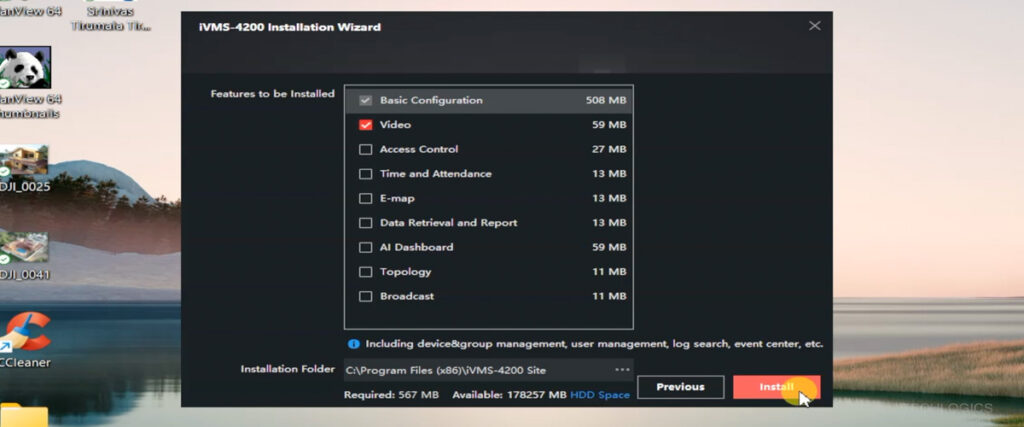
- Accept the License Agreement and choose your installation location (default or custom).
- For initial setup, deselect any unnecessary features and enable only Basic configuration and video features.
- Click Install to begin the installation process.
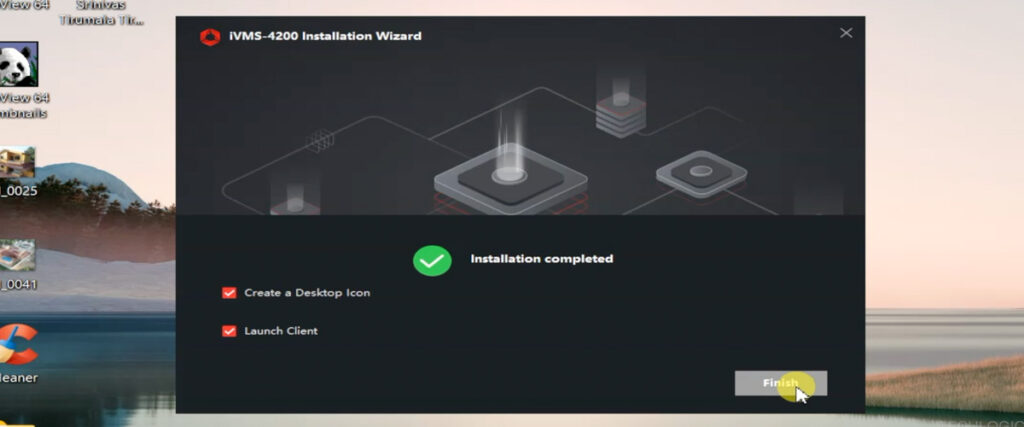
Once installed, check the Launch client box to open iVMS-4200 immediately. You can also select Create a desktop iconfor quick access.
Step 3: Initial Software Setup
Upon launching iVMS-4200, you may see an Upgrade Detection popup. Choose to enable or disable automatic updates based on your preference:
- Enable: Automatically checks for software updates.
- Disable: Allows manual updates.
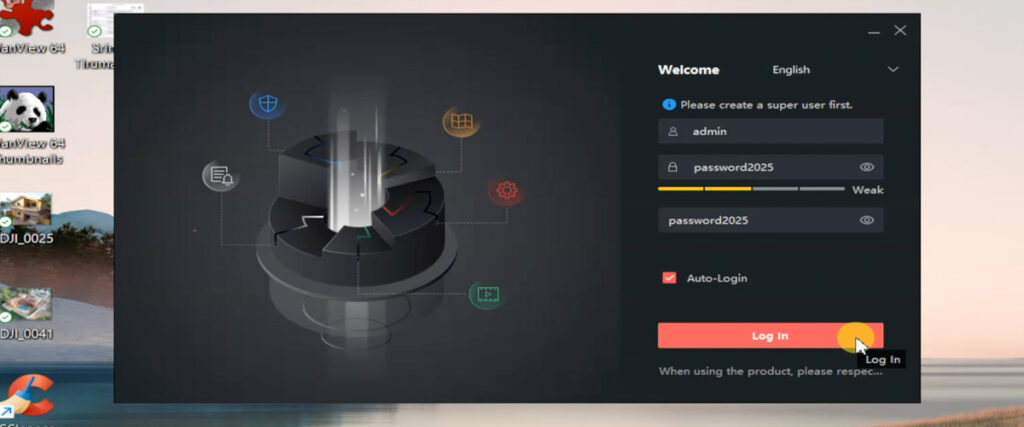
Next, create a Super User account for secure access:
- Choose a strong username and password.
- Set up security questions for account recovery.
- Optionally, enable Auto login for convenience.
Step 4: Connect Your IP Camera via LAN on PC
To access your IP camera locally without an internet connection, connect it directly to your PC using a LAN cable.
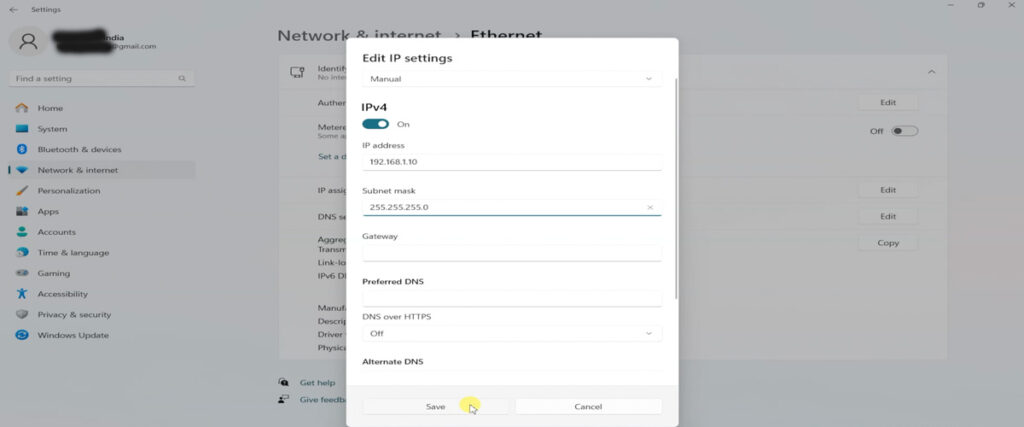
Configure a Static IP Address on PC/Laptop
- Click the network icon in the taskbar (bottom right) and select Network & Internet settings.
- Go to Advanced network settings and select Ethernet.
- Click your active network connection, then select Hardware properties.
- Under IP assignment, click Edit, choose Manual, and enable IPv4.
- Set the IP address to 192.168.1.10 and subnet mask to 255.255.255.0.
- Save your changes.
This ensures your PC and IP camera can communicate on the same network.

Step 5: Add and Activate Your IP Camera in iVMS-4200
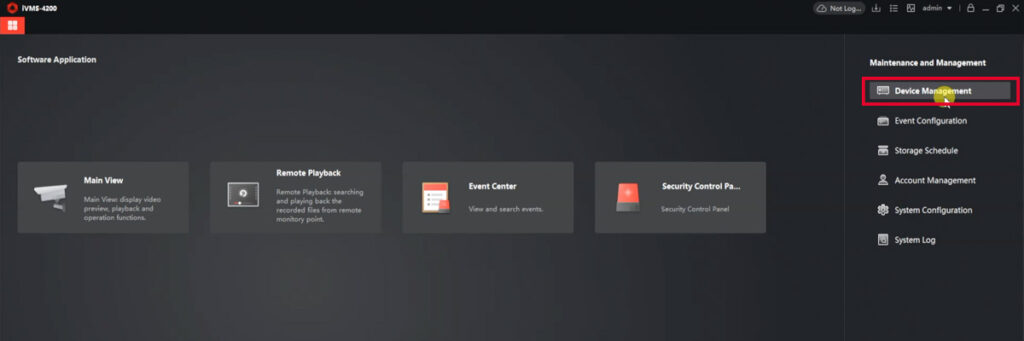
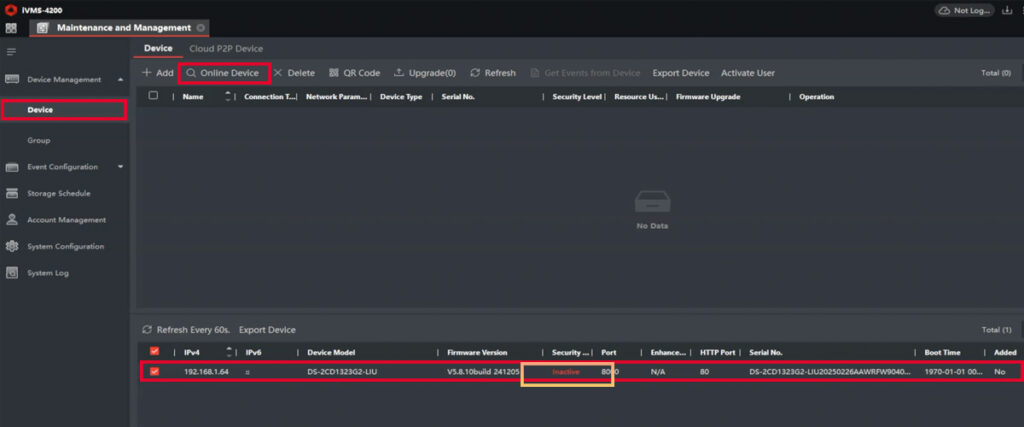
- Open iVMS-4200 and navigate to Maintenance and Management > Device Management > Online Devices.
- Your Hikvision IP camera should appear in the list. If its status is Inactive, select it and click Activate.
- In the pop-up window, enter and confirm a password for the camera, then click OK.
- (Optional) Set a security question and answer for password recovery.


Step 6: Add the Camera to iVMS-4200
- In the Online Devices list, select your activated camera and click Add to Client.
- In the pop-up window:
- Assign a nickname for easy identification.
- Enter the username (default: admin) and the camera’s password.
- Optionally, select Synchronize time to align the camera’s time with your PC.
- Click Add to complete the process.
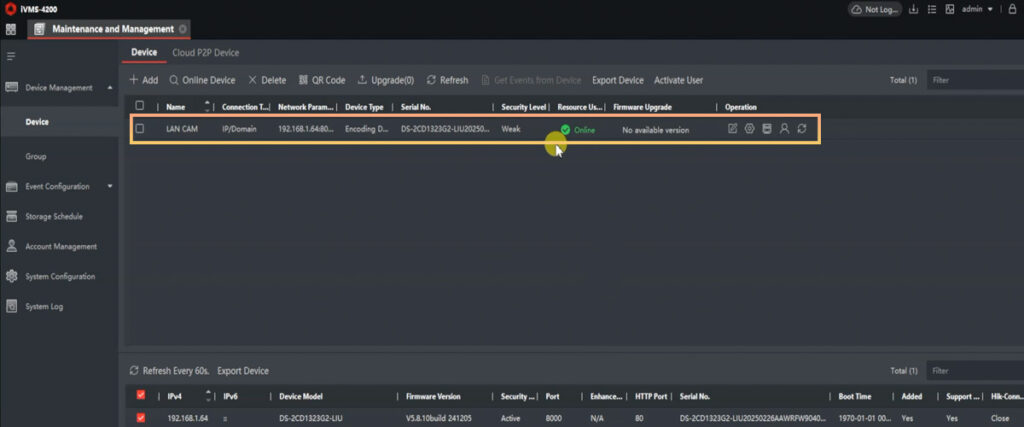
Once added, the camera will appear in the Device Management table with a green icon or Online status, indicating a successful connection.

Conclusion
You’re now ready to use iVMS-4200 to view live feeds from your Hikvision IP camera! For more tutorials on maximizing your Hikvision system, subscribe to our channel and enable notifications to stay updated.


