Welcome back, everyone! If you’ve recently picked up the Hikvision DS-2DE2C400MWG-4G 4 MP PT Network Camera and want to boost its functionality with a SIM card for 4G connectivity and a memory card for reliable storage, you’re in the right place. In this tutorial, we’ll walk you through the simple process of installing both cards to get your camera up and running. Let’s dive in!
Step 1: Power Off Your Camera
Before we begin, safety comes first. Power off your camera to avoid any potential damage to the device or the cards during installation. It’s a quick step that can save you from headaches later—trust us, it’s worth it!
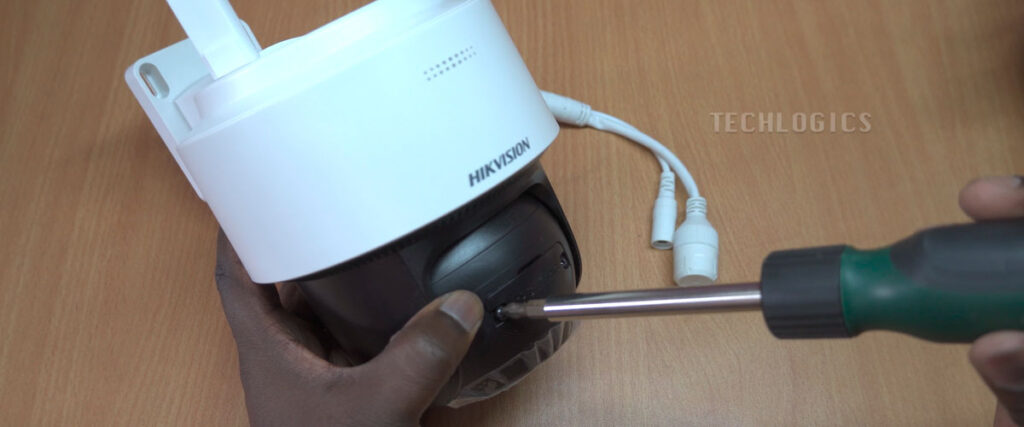
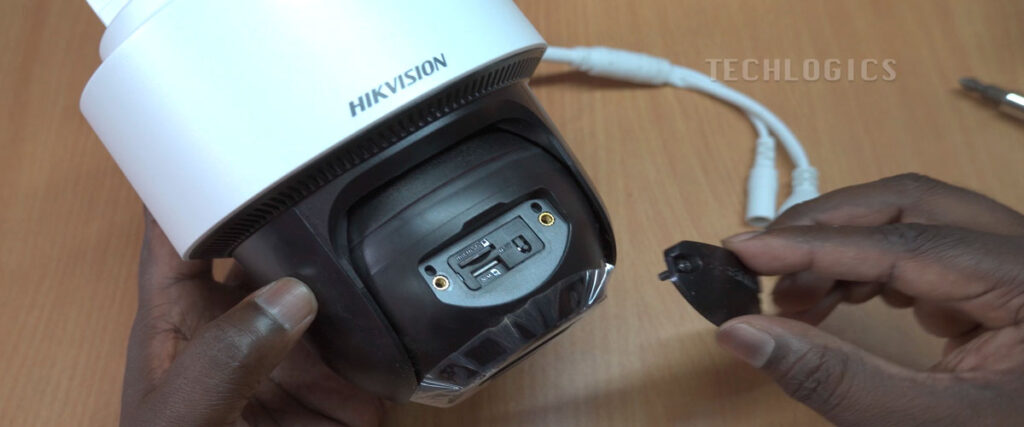
Step 2: Access the Card Slots
The SIM and microSD card slots are cleverly tucked away at the bottom of the rotating lens. To get started:
- Gently lift the camera lens upward to expose the inner components.
- Grab a star screwdriver and carefully unscrew the protective cap covering the card slots. Take your time here to keep everything intact and secure.
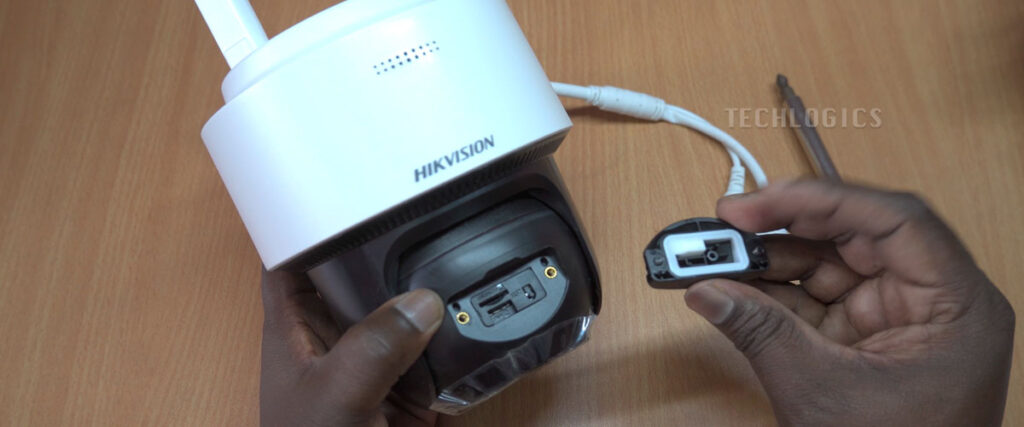
Once the cap is off, you’ll see two slots: the top slot for the memory card and the bottom slot for the SIM card. Handy icons next to each slot show you exactly where each card goes and the correct orientation—super user-friendly!
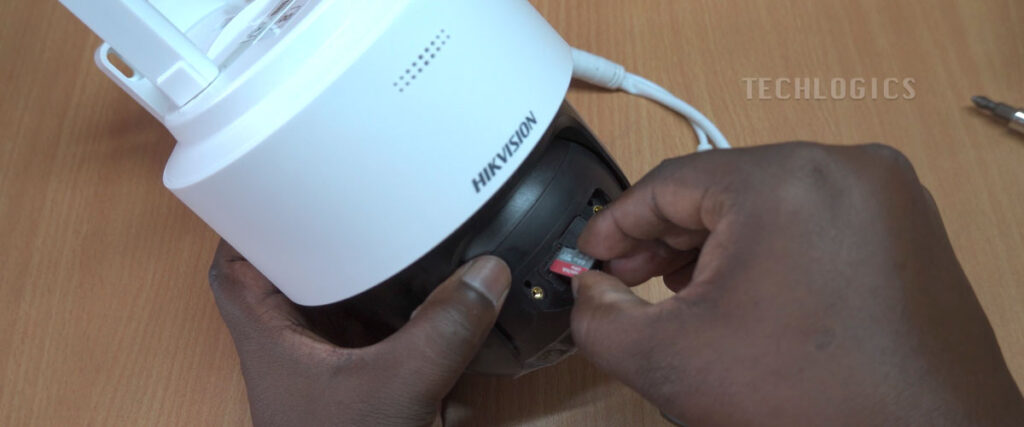
Step 3: Install the Memory Card
For storage, you’ll need a high-quality microSD card. The Hikvision DS-2DE2C400MWG-4G supports cards up to 512 GB, giving you plenty of space for your surveillance footage—perfect for both home and business use.
- Insert the memory card into the top slot.
- Push it in gently until you hear a satisfying click, signaling it’s locked in place.
- To remove it later, just press it again, and it’ll pop out effortlessly.
Pro Tip: With a 512 GB card, you can store up to two weeks of footage, depending on your settings. Factors like video quality, frame rate, and whether you’re using continuous or motion-triggered recording will affect this. Knowing your options helps you optimize storage for your needs!
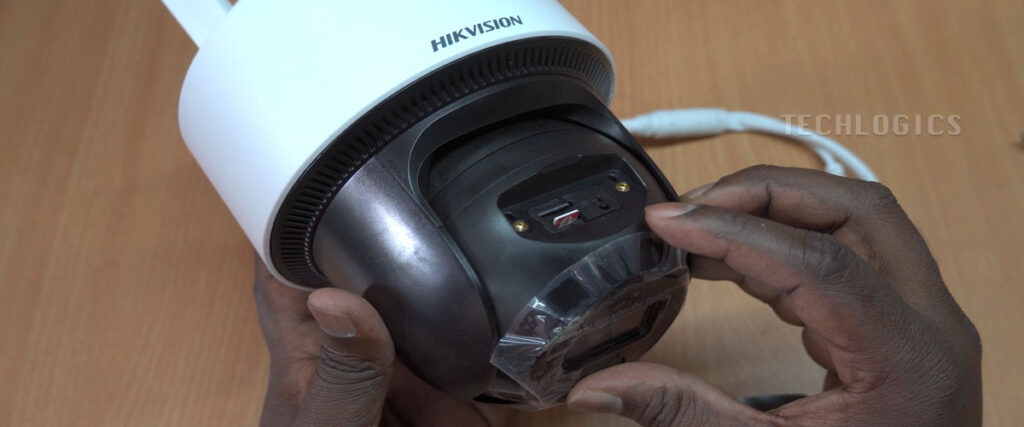
Step 4: Install the SIM Card
Next up is the SIM card, which powers the camera’s 4G LTE connectivity. The slot is right below the memory card slot.
- Insert the SIM card in the correct direction (check the icon or our video for guidance).
- Ensure it’s snug and aligned properly for a stable connection.
Step 5: Double-Check and Secure
Before moving on, verify that both cards are seated correctly. This quick check helps prevent data loss or recording issues down the road. Once confirmed, screw the protective cap back on with your star screwdriver.
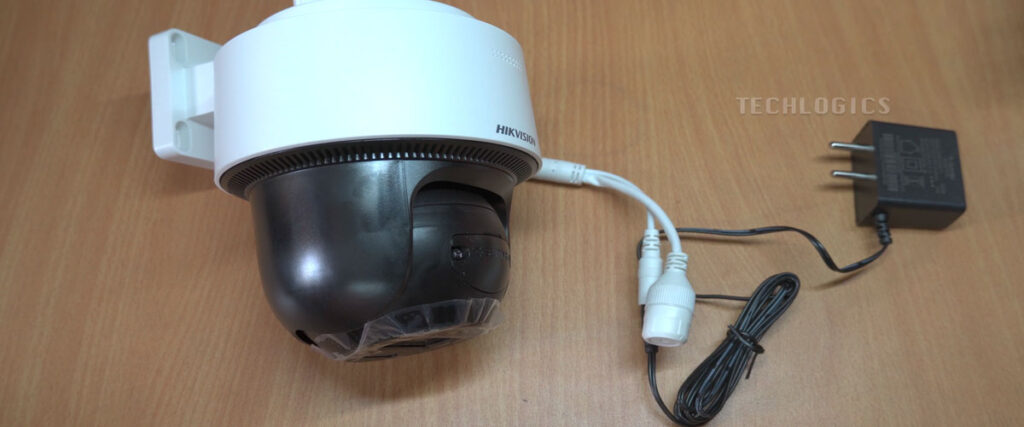
Step 6: Power Up and Go!
Now, connect the DC power adapter included in the box to your camera and turn it on. Just like that, your Hikvision DS-2DE2C400MWG-4G is ready to start monitoring with 4G connectivity and ample storage!
What’s Next?
In our next guide, we’ll show you how to add your camera to the Hik-Connect app, so you can easily view footage and tweak settings right from your smartphone. Stay tuned for that!
Final Thoughts
That’s it for this tutorial! Installing the SIM and memory cards in your Hikvision camera is straightforward and takes just a few minutes. If you found this helpful, please like, subscribe, and hit the notification bell to catch more tips and tricks for your Hikvision devices. Got questions? Drop them in the comments below—we’d love to hear from you! See you in the next post!


