In this continuation of our previous post on the initial setup to configure a P10 display with the Huidu WF4 controller, we take it a step further.
Connecting a Temperature Sensor to Huidu WF4 Controller and Displaying Data on P10 LED Display
In this tutorial, we’ll show you:
- Soldering the Terminals: Step-by-step guide to solder the temperature sensor to the controller.
- Connecting Components: Detailed instructions on connecting the temperature sensor to the Huidu WF4 controller.
- Programming and Configuration: How to configure the program to display temperature and humidity on your P10 LED display.
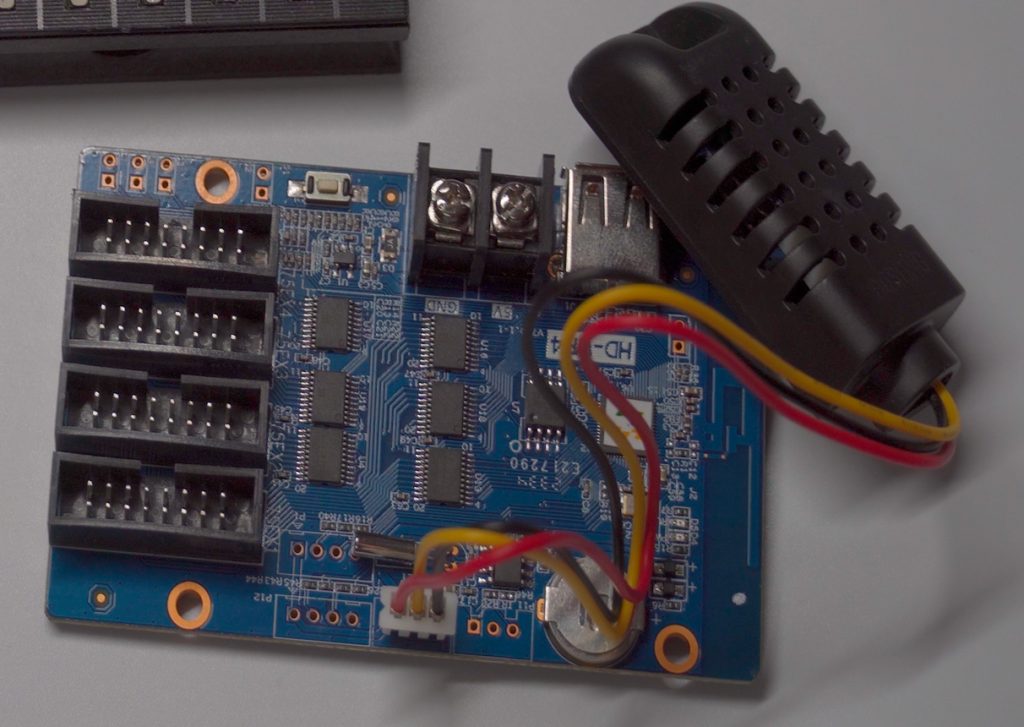
The Huidu WF4 controller has terminals to connect the temperature sensor, and we can use a soldering iron to connect the sensor.
We are using the AM2301 Temperature and Humidity sensor. The sensor has wire ends with a 3-pin connector. You can cut and remove the connector to solder the wires directly to the controller, or solder header pins on the controller to connect the sensor without cutting the 3-pin connector.
Soldering the Terminals
- Prepare the Header Pin: Place the header pin and solder it onto the controller using a soldering iron.
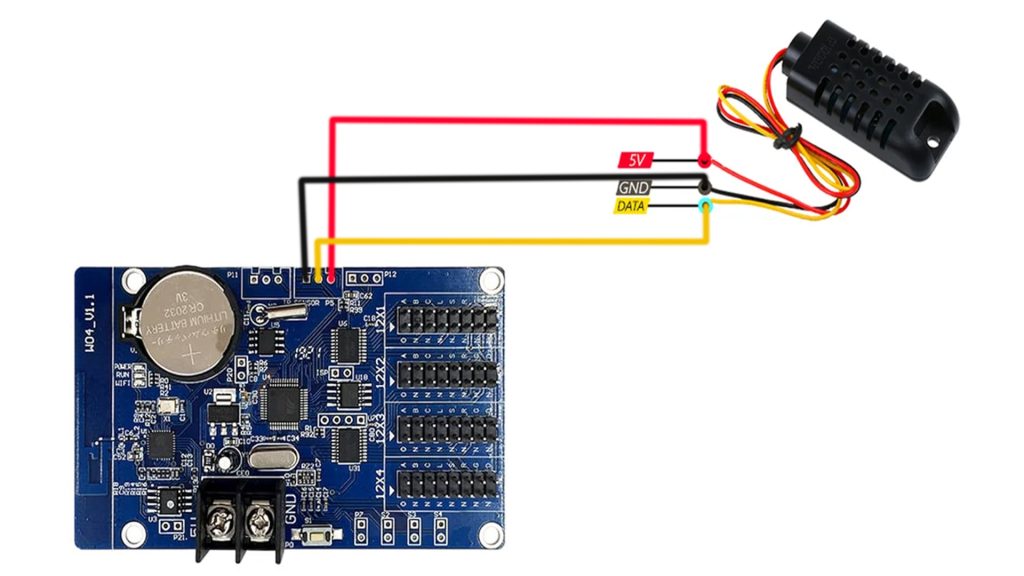
- Connecting the Sensor: These three pins represent 5 volts, temperature, and ground. Match the sensor and controller to ensure proper connectivity.
Connecting Components
- Connect the Sensor: Solder the temperature sensor wires to the controller.
- Power Up: Connect the P10 display panel with the controller and their respective power supply wires, then turn on the system.
Programming and Configuration
In the previous post, we showed how to set up a demo program with text running on the display using the ‘LED Art’ mobile app. Building on that, this time we’ll directly create two programs on the same display: one for temperature and one for humidity.
Displaying Temperature
- Set Up Display Rows: Divide the display into two rows. The first row will display the heading, and the second row will display the sensor readings.
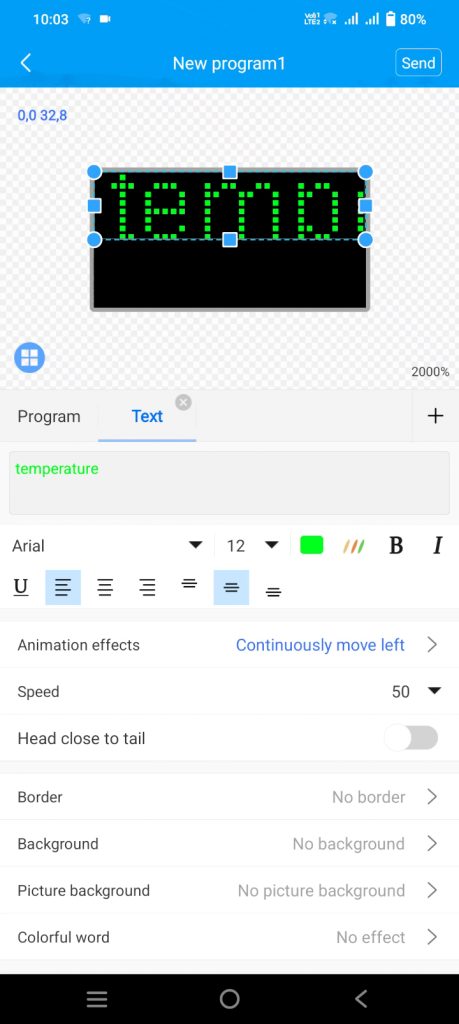
- Create Heading: The first program for the first row will have the heading ‘Temperature’. Set the font type, size, color, and text animation as shown in the video or adjust it to suit your display.
- Add Text: Drag the ‘Text’ to set it on the first row of the display.
- Send to Controller: Once you have created the heading, send that program to the display controller to check if the display properly shows the heading.
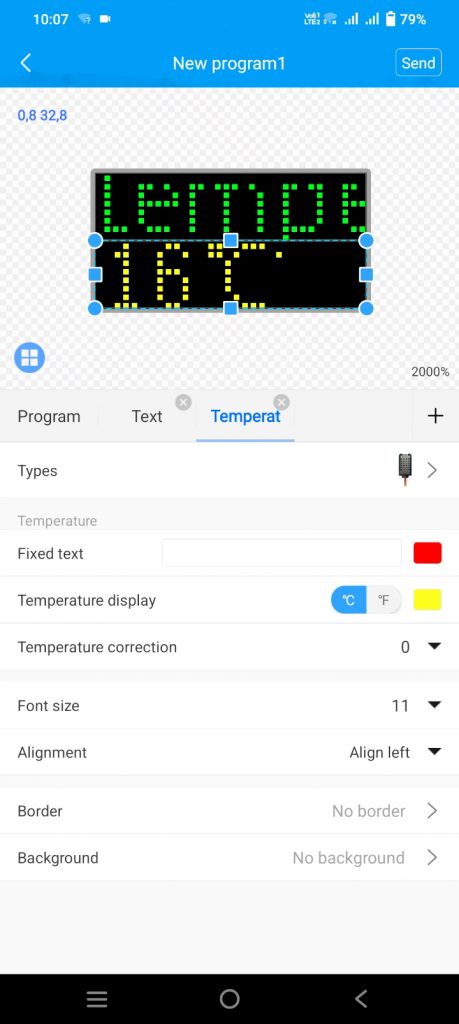
- Add Sensor Value: Click the ‘+’ symbol on the same program to select ‘Temperature and humidity’ to add a sensor value to the second row of the display. Under the ‘Types’ option, select ‘Temperature sensor’, and then choose the Temperature option.
- Adjust Display: Delete the ‘Temperature’ heading to make the temperature reading visible. Resize the ‘temperature reading’ by adjusting the font size and dragging it into the second row of the display. Ensure the text alignment is set to ‘Align Left’.
- Verify Display: Send the program to the display controller to verify that the temperature display appears correctly on the P10 display panel.
- Calibrate Reading: You can calibrate the temperature reading by adjusting it plus or minus using the ‘Temperature correction’ option. Additionally, change the temperature reading to Celsius or Fahrenheit as needed.

Displaying Humidity
- New Program: Start a new program on the same display for humidity readings.
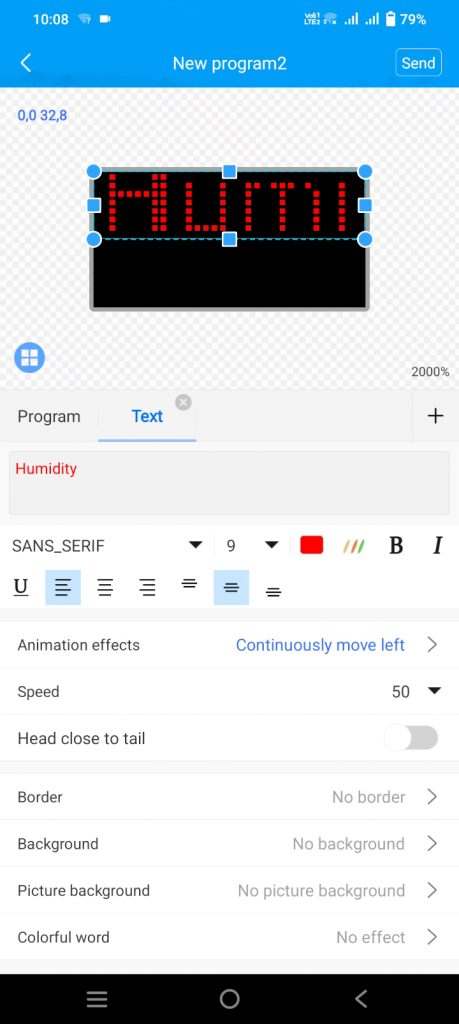
- Create Heading: Set the heading as ‘Humidity’ and choose the font type, size, color, and text animation as shown in the video, or adjust them to suit your display.
- Add Text: Drag the ‘Text’ to set it on the first row of the display. Send the program to the display controller to check if the display properly shows the heading.
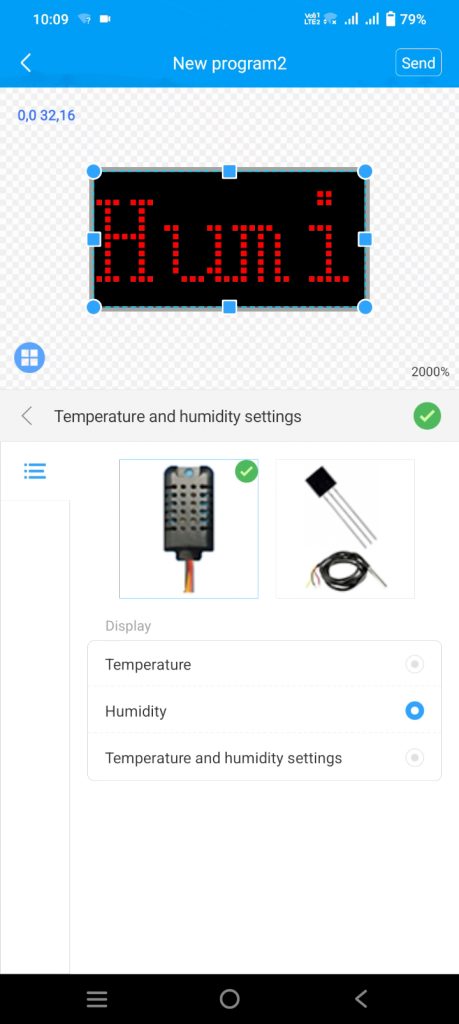
- Add Sensor Value: Click the ‘+’ symbol on the same program to select ‘Temperature and humidity’ to add a sensor value to the second row of the display. Under the ‘Types’ option, select ‘Temperature sensor’, and then choose the humidity option.
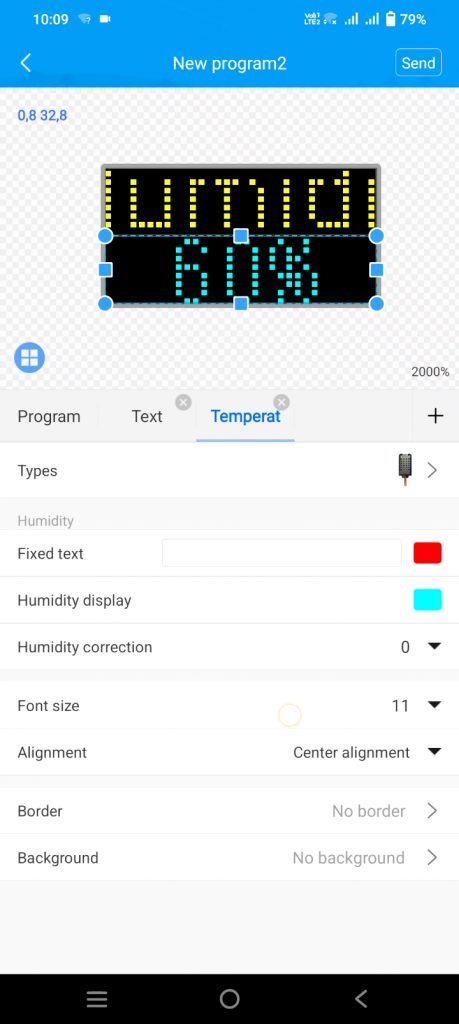
- Adjust Display: Delete the ‘Humidity’ heading to make the humidity reading visible. Resize the ‘Humidity reading’ by adjusting the font size and dragging it into the second row of the display. Ensure the text alignment is set to ‘Center Alignment’.
- Verify Display: Send the program to the display controller to verify that the humidity display appears correctly on the P10 display panel.
Final Steps
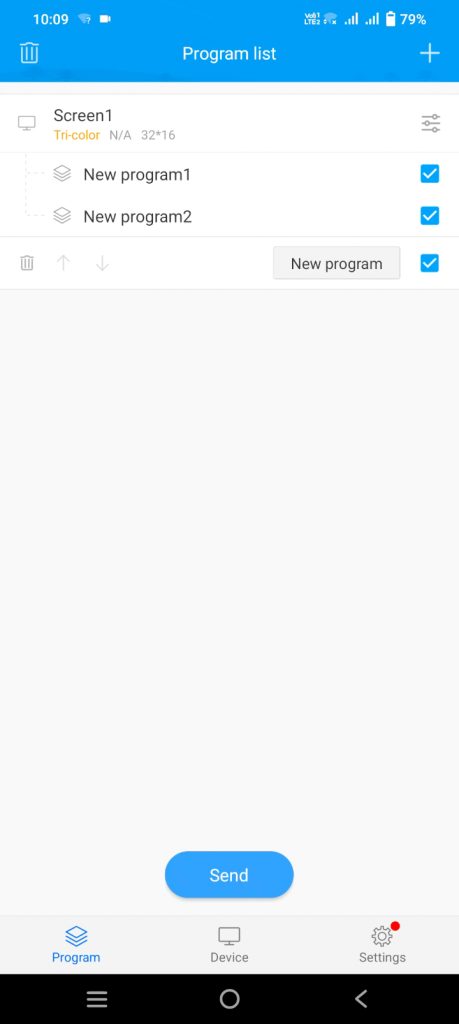
- Combine Programs: Tick Program 1 and Program 2, then send the programs to the display controller to display both the temperature and humidity readings in a loop for each.
- Additional Content: Using this method, you can display the temperature and humidity readings along with your other text, clock, and image programs according to your preference.
Conclusion
If you found this post useful, please consider supporting us. Your support helps us create more informative content like this and enables us to continue providing valuable resources to our audience. Whether it’s through liking, sharing, or subscribing to our channel.


