In this post, we’ve covered the EZVIZ C1C B fixed lens indoor Wi-Fi security camera, including setting up the memory card, installing the EZVIZ app, and adding the camera to the app.
Introduction :
The EZVIZ C1C B is one of the best indoor security cameras designed to provide reliable surveillance for your home, shop, or small office. Its compact design, high-definition video recording capabilities, night vision, motion detection, and two-way audio make it a versatile and reliable option for keeping an eye on your space. The camera captures video footage in 720p or 1080p HD recording resolution depending on the model that you have. It has built-in infrared LEDs that capture up to a 12-meter night vision range.
When detecting motion, the camera can be configured to start recording automatically. This ensures that any movement within the monitored area is captured and recorded. Additionally, you can set up the camera to send notifications to your mobile app or email when motion is detected.
These cameras are equipped with a built-in microphone that captures audio from the camera’s surroundings. Additionally, they come with a built-in speaker that enables users to transmit audio from the connected device. Users can engage in real-time two-way audio communication with individuals on the other end of the camera.
The EZVIZ app allows you to access the camera’s live view, playback, and event notifications from anywhere. This EZVIZ C1C camera is very useful for monitoring various spaces like baby rooms, kitchens, door fronts, halls, and indoor office spaces.
This camera comes with the following accessories:
3-meter USB cable,
DC power adapter,
Foam sticker,
Metal plate for mounting on the wall or ceiling
Regulatory information.

Memory Card Installation :
Before you install or remove the memory card from the camera, ensure that the camera is powered off to safeguard both the card and the camera itself.
Insert the memory card as shown in the video. The camera will support up to 256GB of memory, use accordingly.
To insert or eject the memory card from the camera, gently push on the card.
Note : The newly inserted memory card must be configured for the first time.

Installing EZVIZ Mobile App :
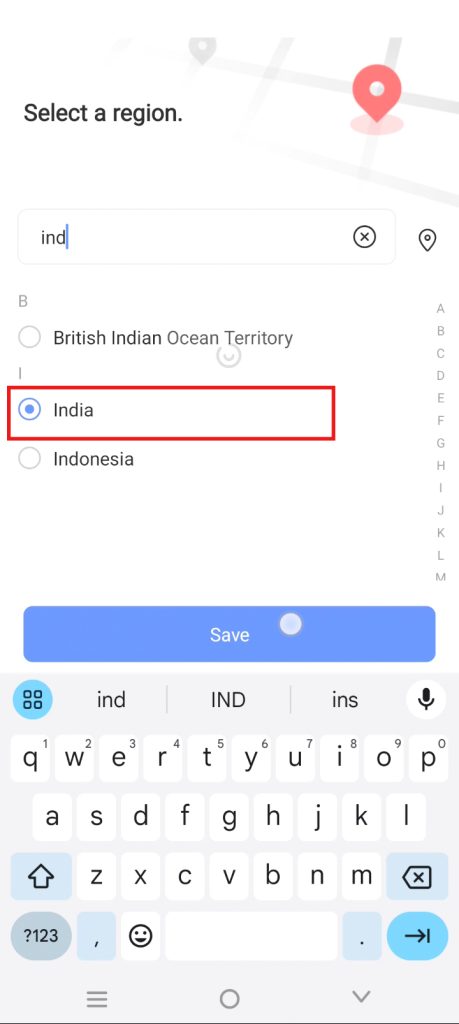
Install the ezviz app from the Play Store or the App Store. Open the app once it’s installed. Select your region according to your location.
If you’re new to the ‘Ezviz’ app, you’ll need to create an account with them. There are two types of account creation methods available: email or mobile number. Choose any one of them based on your convenience.
For example, we have chosen email address registration. Enter your email address, then set your password. Agree to the terms and conditions, then click the ‘continue’ button, then enter the verification code shown on the screen.
Verify your email address by receiving the verification code in your inbox. You may choose to optionally link your phone number to this app by clicking on the ‘Link phone’ button. Additionally, you can configure face or biometric authentication to unlock the app instead of logging in using a password. Enable or allow the receipt of camera event notifications.


Power up the camera :
Note : When configuring the WiFi, keep the camera near the internet modem or router to set up the WiFi and mobile app. Afterward, fix their location.
Connect the given DC power adapter and USB cable to power up the camera. When powering up the camera, you will hear a voice announcement instructing you to connect to the network. Also, the camera’s blue LED starts flashing. Once you hear the voice prompt or see the flashing blue LED, start adding the camera on the app.

Make sure your phone is connected to a Wi-Fi internet network before adding the device.
Adding Device to App :
You can add the camera by clicking on ‘Add Device’ or the ‘+’ symbol to head to Add device. Select the device type model. Then camera scanner will open for scanning the QR code from the camera.
Check that the ‘Device is powered on’ is selected, then click on the ‘Next’ button.
Click on the ‘Start’ button and select the option ‘Indicator Flashes Blue’ to configure the Wi-Fi.
Allow the app to access your location.
Select your WiFi network, which should be 2.4GHz, and enter the WiFi password. then click on the ‘Connect’ option to connect the device’s Wi-Fi and complete the Wi-Fi configuration.
Enter or select your desired device name.
Successful configuration, the voice prompt will confirm this, and the camera’s blue LED will remain stable.


Note : The newly inserted memory card must be configured for the first time.
During the setup process, the camera typically guides you through initializing the memory card. This usually involves selecting the “initialize” option from the camera’s menu or setup wizard. By clicking on this option, the camera will begin the process of formatting the memory card, preparing it for use with the camera’s recording system.
Also, make sure to configure the camera’s time zone, date and time settings in the camera settings menu.
And configure the storage status recording mode based on your preferences, choosing between activity-based recording or continuous, all-day recording.


The camera is now fully operational, offering live streaming, playback, and event notification features accessible from anywhere via mobile data or WiFi internet connections worldwide.


