Welcome to TECH LOGICS! In this detailed guide, we’ll walk you through every step to set up the ieGeek 3MP 2K CCTV Camera for home security. Perfect for beginners to experts, we’ll cover WiFi connection, SD card storage, Canny Cam app configuration, and troubleshooting—everything you need for crystal-clear 2K monitoring of kids, pets, or any room.
Why Choose ieGeek 3MP 2K Camera?
The compact white ieGeek camera (3.5″ diameter) delivers stunning 2K QHD video clarity (2304×1296) with 8X digital zoom to see every detail day or night. Its advanced 360° pan and tilt (340° horizontal + 115° vertical) eliminates blind spots, while smart motion tracking and PIR human detection automatically follow movement, send instant phone push alerts, and trigger a 110dB siren to deter intruders.
Key Features:
- 10m infrared night vision (6 LED lights) for complete 24/7 surveillance
- Built-in mic + speaker for two-way audio (family chats or remote warnings)
- Alexa/Google Assistant integration for hands-free “Show me living room”
- 128GB microSD storage—stores weeks of footage without monthly fees!
Complete Package Contents:
| Item | Details |
|---|---|
| Camera | 3MP 2K white unit (lens + mic) |
| Power Adapter | 5V/1A DC with 1.5m black cable |
| Mounting Kit | 4 screws, 4 anchors, adjustable base |
| User Manual | 20-page guide + QR code on cover |

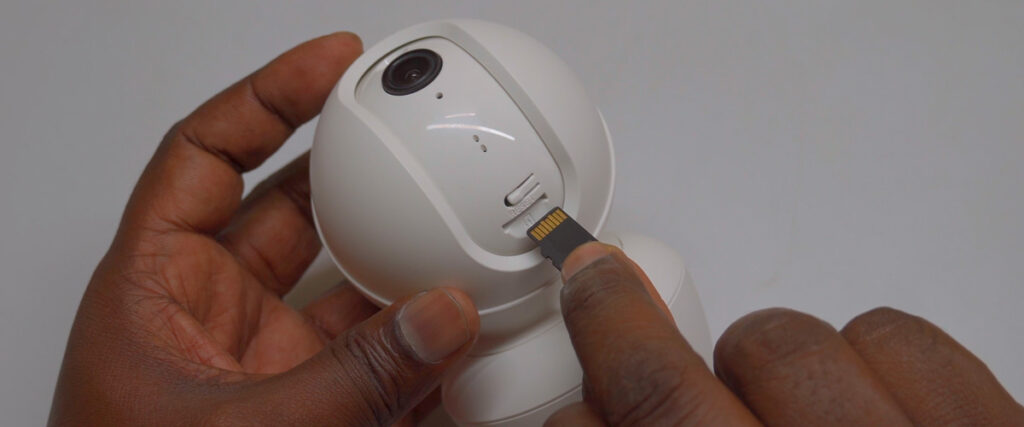
Step 1: Memory Card Installation
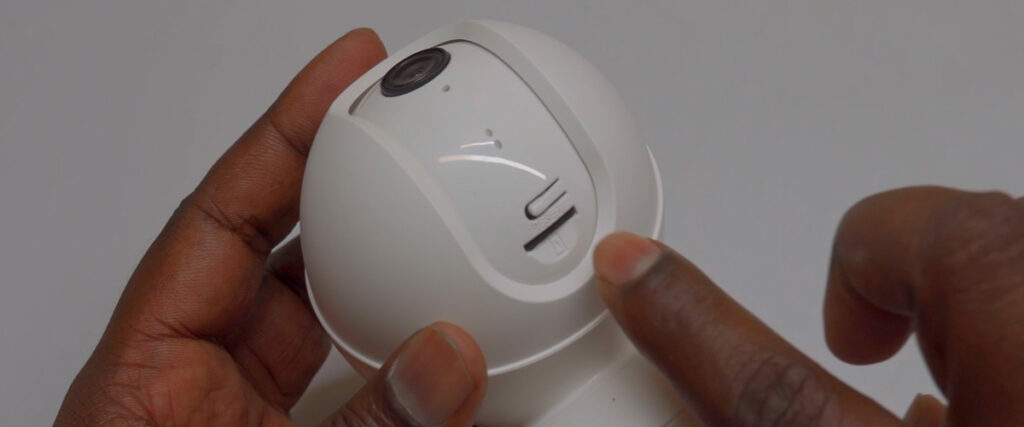
Power OFF camera completely (unplug adapter) before installing to avoid damage. Locate the microSD slot on the bottom or side near base (gently tilt camera 45° to see small rectangular opening).
Detailed Insertion: Hold microSD card with gold contacts facing UPWARD and notched corner aligned with slot guide. Push gently straight in (use fingernail on edge) until you feel it click/lock (don’t force—1mm resistance normal). Supports up to 128GB, Class 10/UHS-I recommended (SanDisk/Samsung brands work best).
To Remove: Press center of exposed card edge until it pops out 2mm, then pull carefully with fingers.
Storage Capacity:
| Card Size | Continuous Recording | Motion-Only Alerts |
|---|---|---|
| 32GB | 2-3 days | 1-2 weeks |
| 64GB | 5-7 days | 2-3 weeks |
| 128GB | 10-14 days | 4-6 weeks |
Pro Tip: Format card in app after WiFi setup (takes 20 seconds). Check storage monthly via app dashboard.

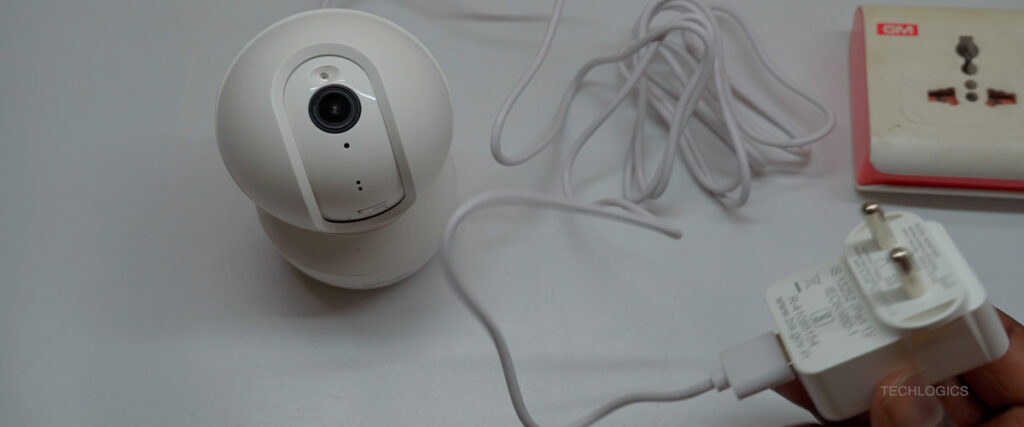
Step 2: Power On Camera
Simple 2-Step Process:
- Align DC adapter’s round barrel connector firmly to camera’s power port (side, next to reset hole)—twist gently until secure
- Plug flat end into stable wall outlet (avoid power strips/extension cords during setup)
Complete Startup Sequence:
- Red infrared lights (6 dots) glow immediately around lens
- Lights turn OFF after exactly 50 seconds (internal self-test complete)
- Total initialization: 2-3 minutes (fan whirs softly)
- Listen carefully: Distinct water ticking sound (like dripping faucet) or English voice “Network ready” = READY for WiFi!
Critical: Place camera within 2 meters of router on table (don’t mount yet). Signal strength bars show in app later.
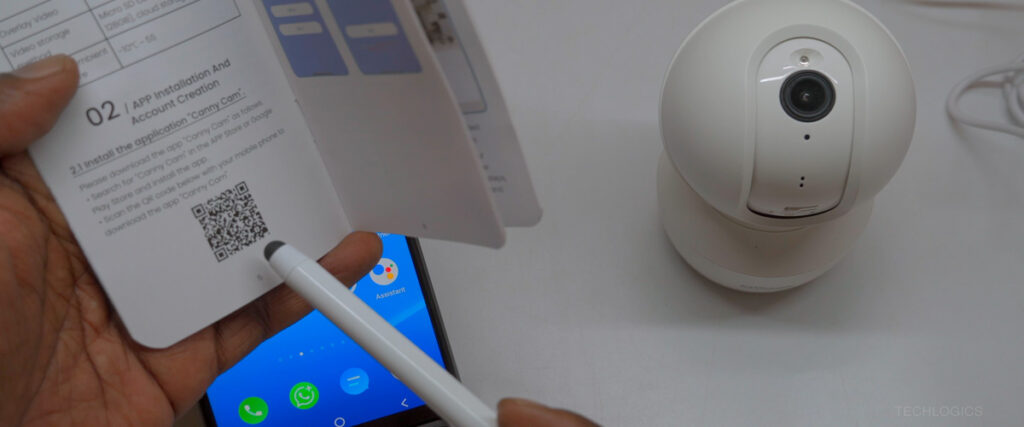
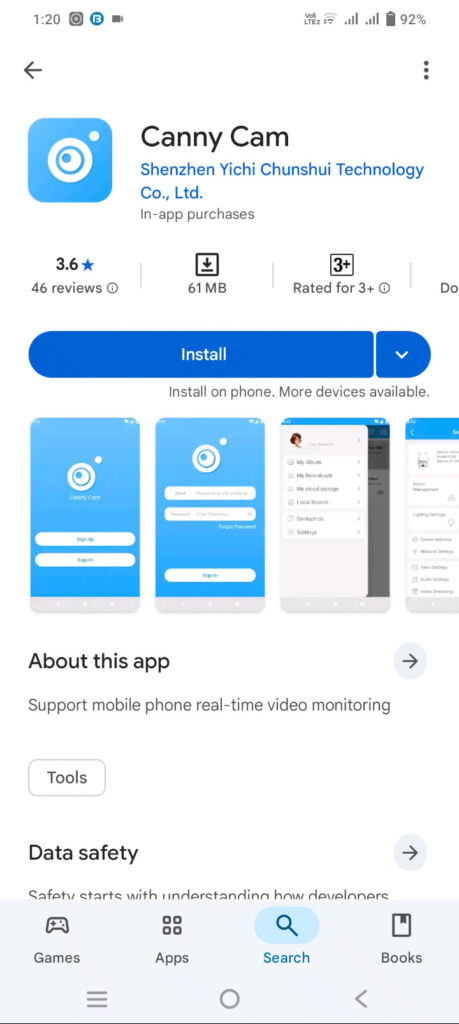
Step 3: Download Canny Cam App
Fastest Method (30 seconds): Open user manual cover → Scan large black/white QR code with phone camera (or built-in scanner) → Auto-opens correct store.
Direct Download (1 minute):
- Open Google Play Store (Android 5.0+) or App Store (iOS 11.0+)
- Search exactly: “Canny Cam” (no quotes)
- Verify developer: Shenzhen Yichi Technology co ltd (blue icon)
- Tap bright green Install (45MB download, 2-3 minutes on WiFi)
First Launch Sequence:
- Tap app icon (white camera logo)
- Read Terms of Use + Privacy Policy (scroll 30 seconds)
- Tap blue ‘Continue’ button to accept both
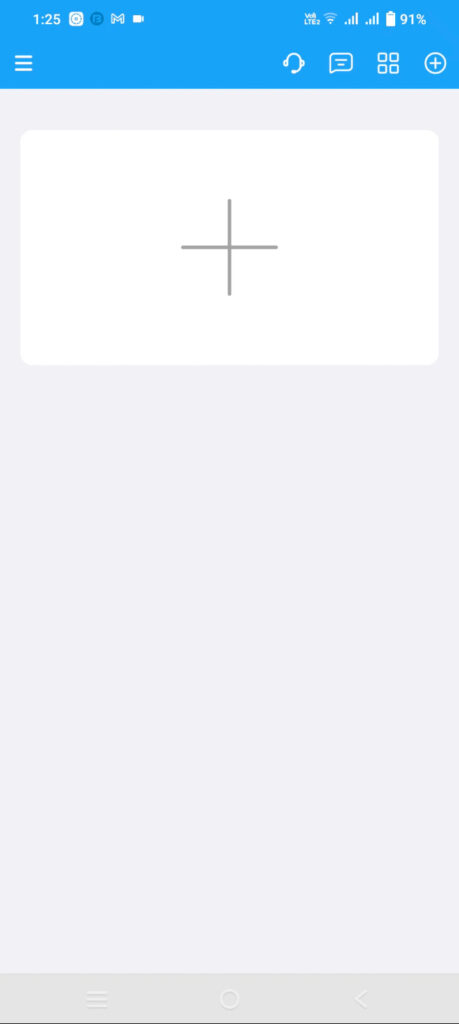
- Home screen loads with big + Add Device button
Note: App requires Android 5.0+ or iOS 11.0+. Update if needed.
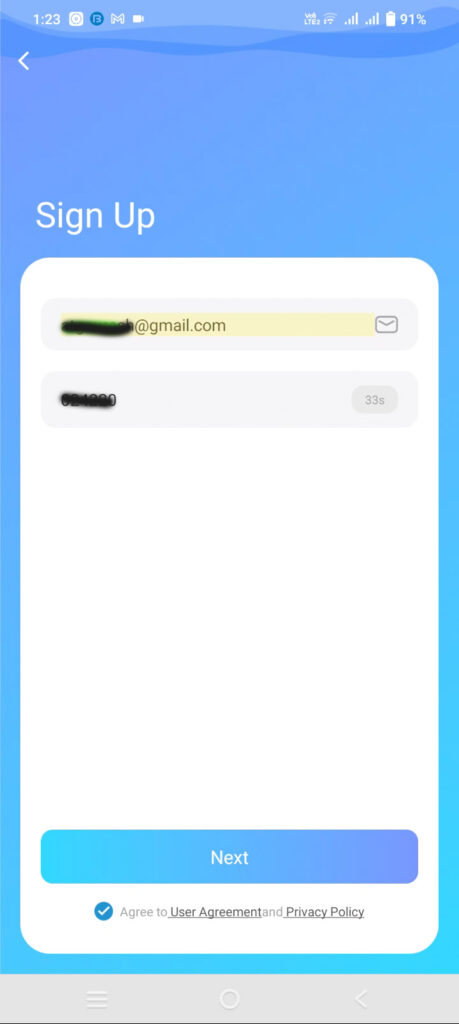
Step 4: Create Account
For New Users (2 minutes):
- Tap bright blue “Sign Up” on welcome screen
- Enter valid email (Gmail/Yahoo/Hotmail/Outlook—no spaces!)
- Tap ‘Send Verification’ → Check email inbox for 6-digit code (arrives in 10 seconds, check spam too)
- Enter code in white box → Auto-continues
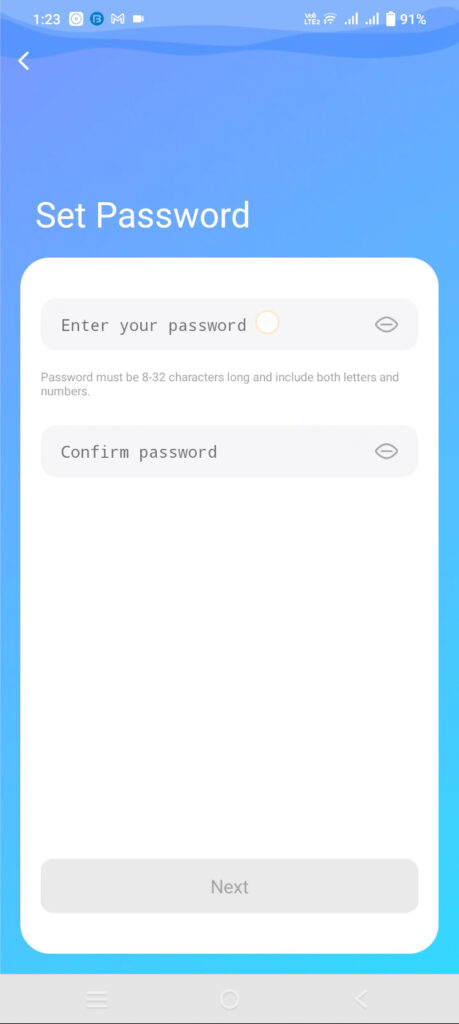
- Create strong password (must have):
- 8+ characters
- 1 Uppercase (A-Z)
- 1 Lowercase (a-z)
- 1 Number (0-9)
- 1 Symbol (!@#$)
- Example: MyCam2025!
- Check gray ‘Privacy and Terms’ box → Tap green ‘Confirm’
Login: Enter email + password → Tap Login. Allow 3 permissions:
- 📷 Camera (for QR scanning)
- 📍 Location (for WiFi network detection)
- 🔔 Notifications (for motion alerts)
Success: Dashboard loads with green + Add Device button!
Step 5: Reset & Add Camera to WiFi
Preparation (30 seconds):
- Phone Settings → Bluetooth ON + Location ON
- Keep camera 1-2m from BOTH phone AND router
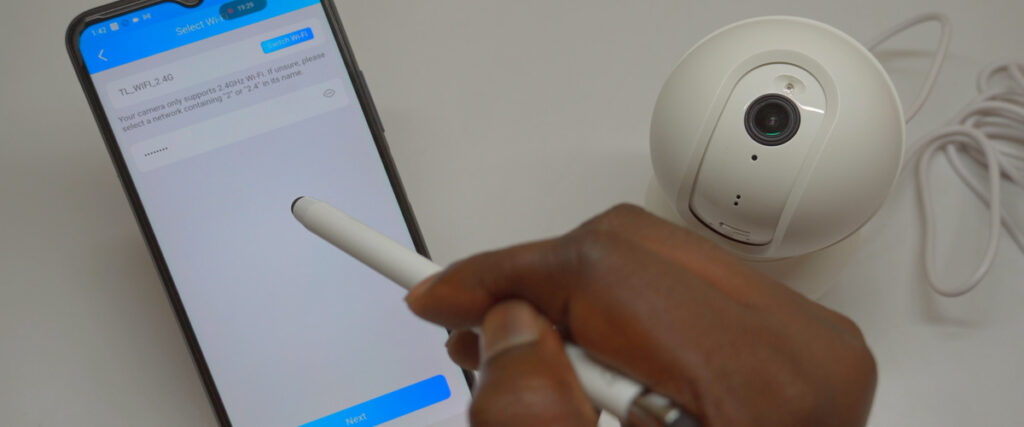
- Phone must connect to 2.4GHz WiFi (check router sticker, NOT 5GHz)
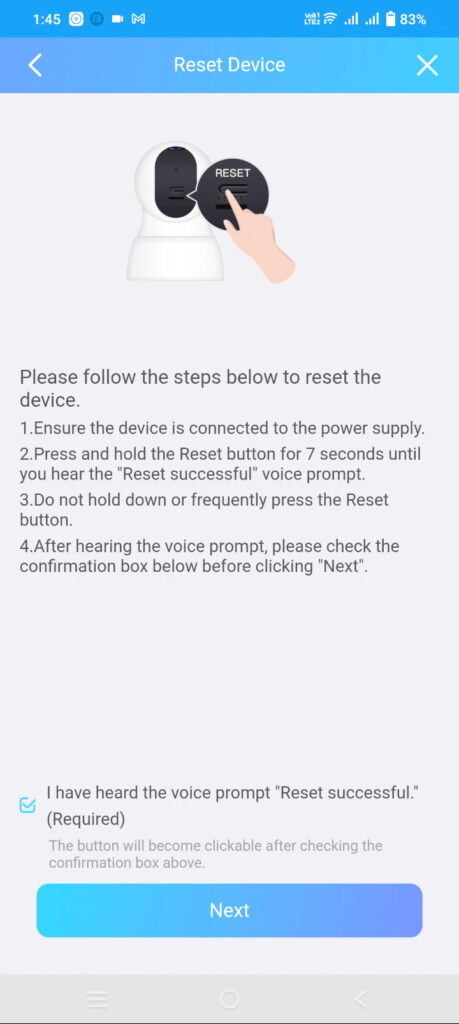
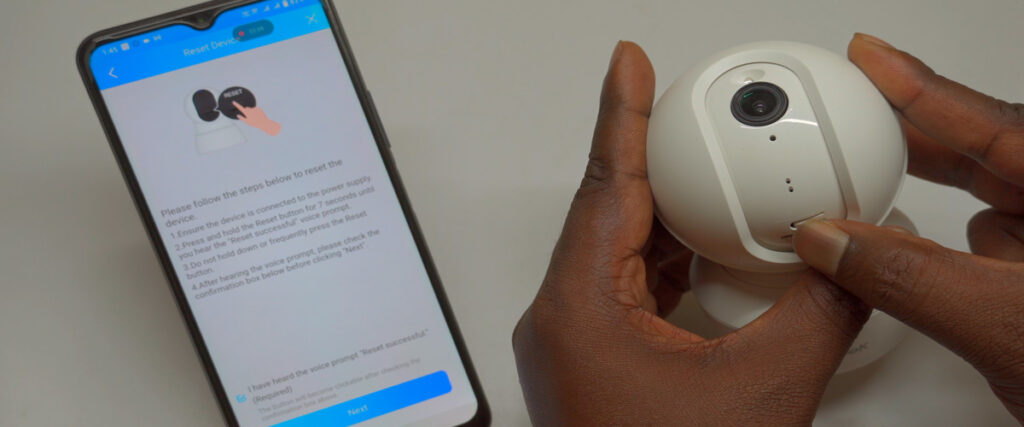
Camera Reset:
- Find tiny pinhole on camera base (next to power port)
- Use straightened paperclip to press firmly and hold 5-10 seconds
- Release when you hear 3x water ticking sounds (drip-drip-drip) = setup mode!
Add Device (3 Proven Methods):
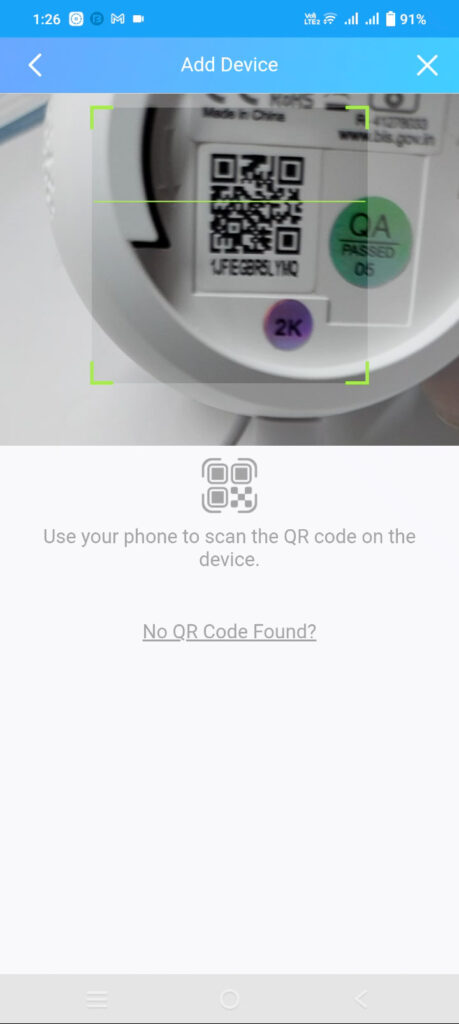
Method 1: QR Scan (Easiest, 80% success)
- Tap big green + Add Device
- Pop-up: Tap ‘Allow’ for camera permission
- Hold phone 15-25cm steady from white sticker QR code on camera base
- Green scanning frame appears → Success beep
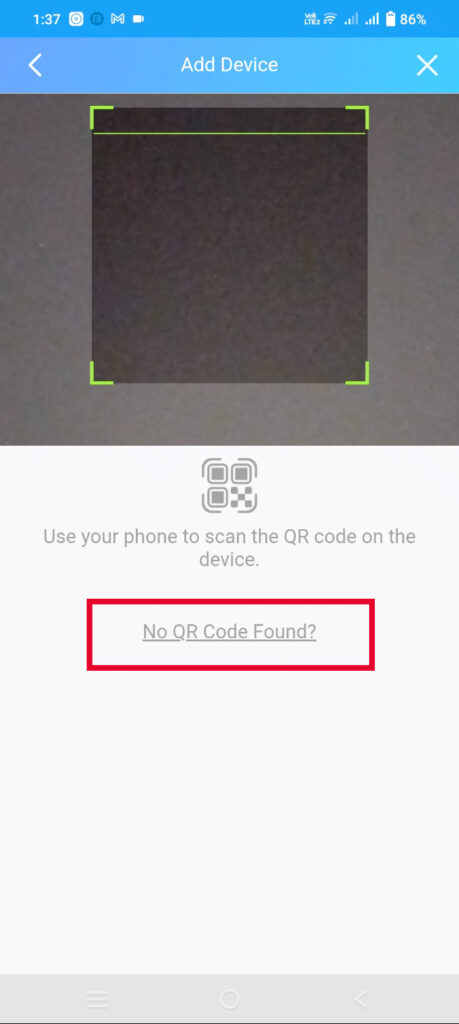
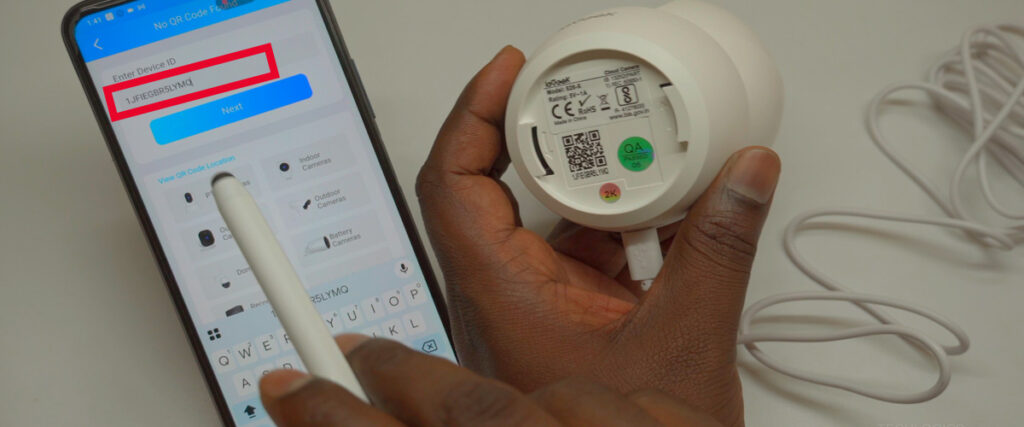
Method 2: Manual Entry (If QR fails—lighting issues)
- Screen says ‘No QR Code Found’ → Tap bottom option
- Enter 8-12 digit ID next to QR (ex: A1B2C3D4E5F6, case-sensitive)
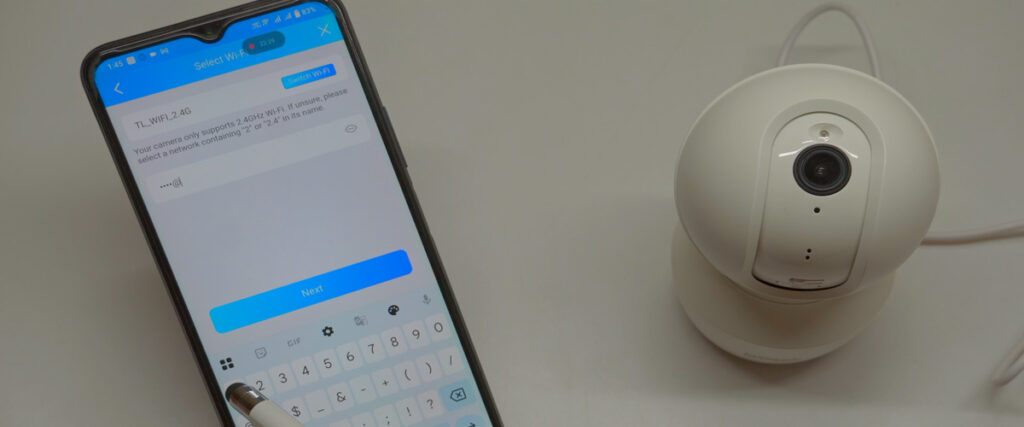
- Select your 2.4GHz network from list → Enter exact password (show Caps Lock!)
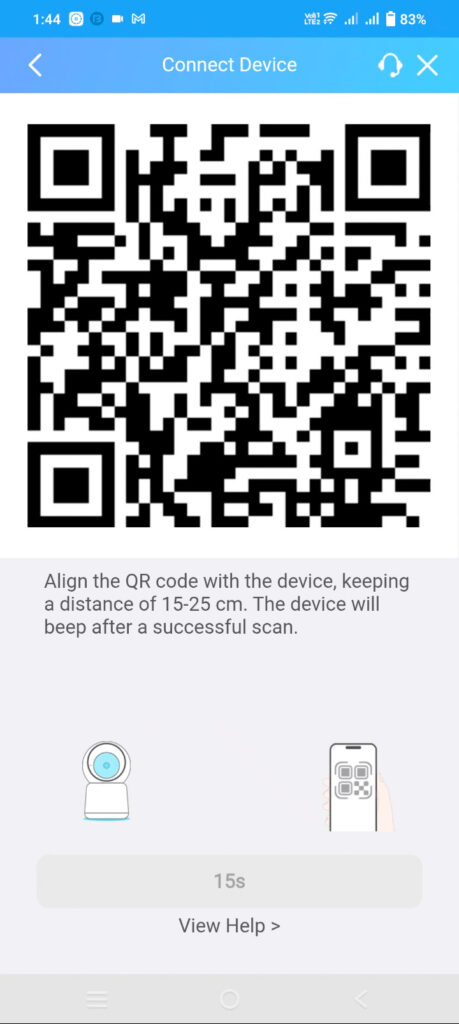
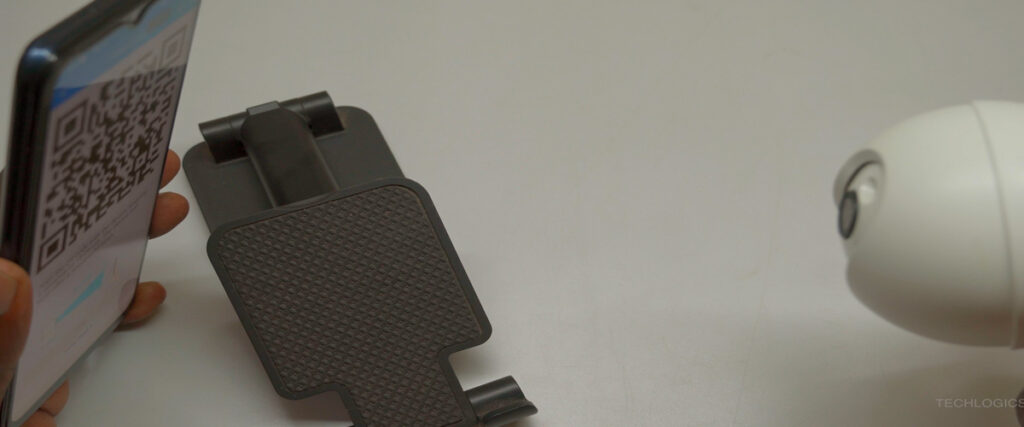
Method 3: Reverse QR Scan (Most Reliable, 95% success)
- After WiFi selection, tap blue ‘Next’
- Phone screen shows large black/white QR code
- Hold phone screen 10-20cm DIRECTLY facing camera lens (good lighting, no glare)
- Wait 5-15 seconds → Hear clear voice: “Connecting to the Wi-Fi network”
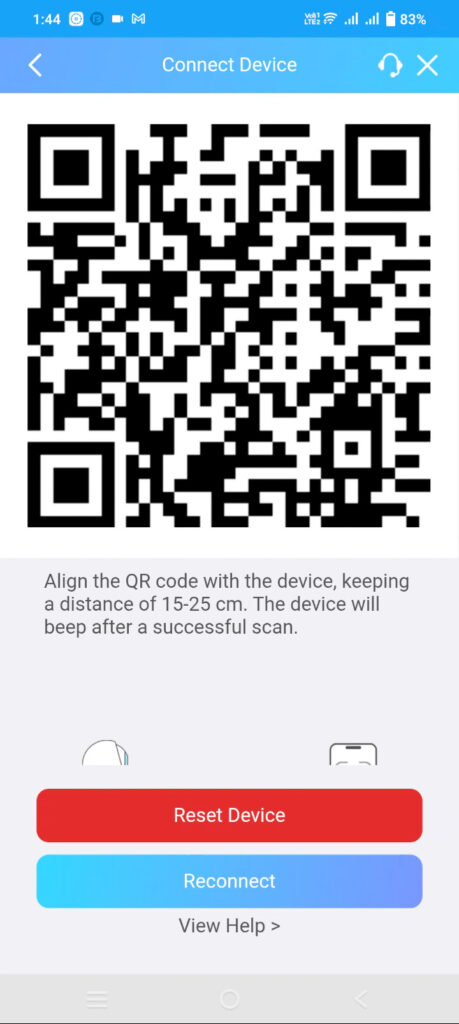
Troubleshooting Order: QR fails? → Method 2 (1 min) Still fails? → Reset again + Method 3 (90 seconds) WiFi error? → Only 2.4GHz works (check router settings)
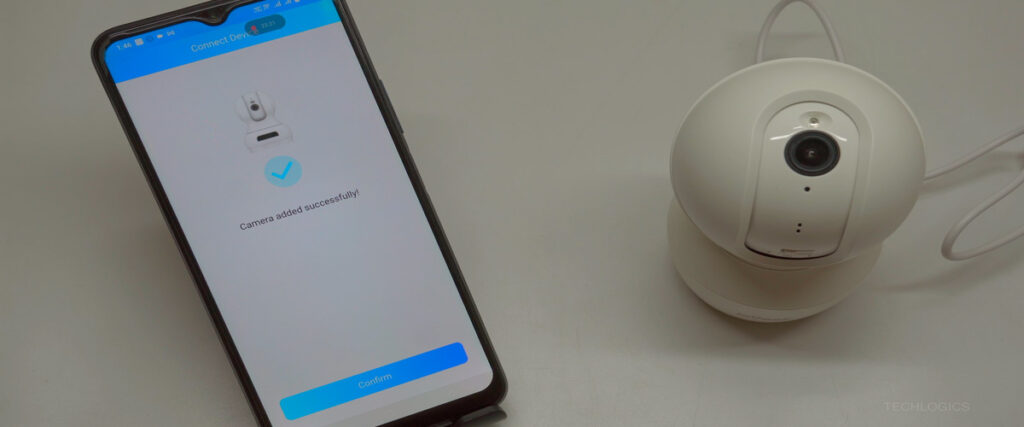
✅ Success Indicators:
- Voice announcement: “WiFi configured successfully!”
- App screen: Green checkmark + 100% progress bar
- Device name screen loads
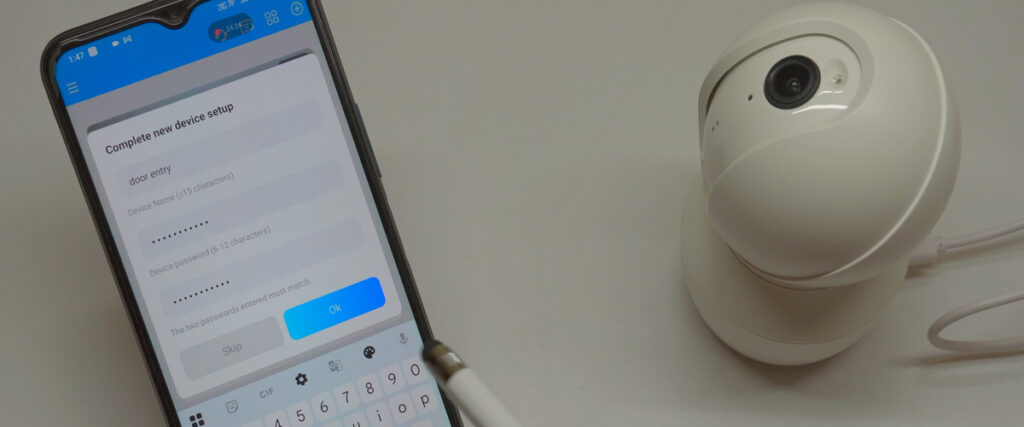
Step 6: Complete Device Setup
Security Password (Extra Protection):
- White field: Enter 8-12 character password (ex: HomeCam2025!)
- Gray field below: Re-enter exactly the same
- Red error if mismatch → Double-check + retry
- Tap green ‘Confirm’ → Green message: “Camera Password Set Successfully!”
Naming Your Camera:
- Type location: “Living Room Cam” / “Baby Room Monitor” / “Front Door Entry”
- Tap blue ‘Complete Setup’
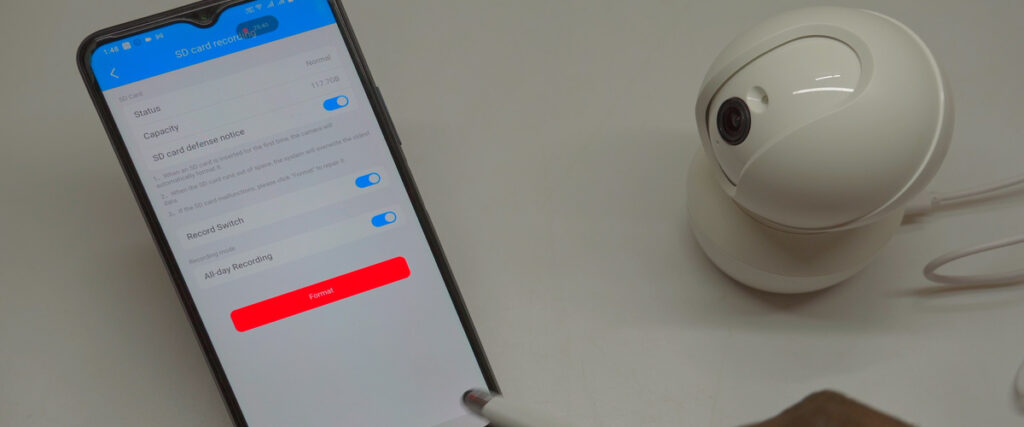
SD Card Formatting:
- Auto pop-up: “Format SD Card?” → Tap green ‘Format’
- OR Manual: Tap gear icon → Storage → Format Now
- Warning: “All data will be erased” → Tap ‘Yes’
- Progress bar 10-30 seconds → Success beep! → “120.5GB Ready”
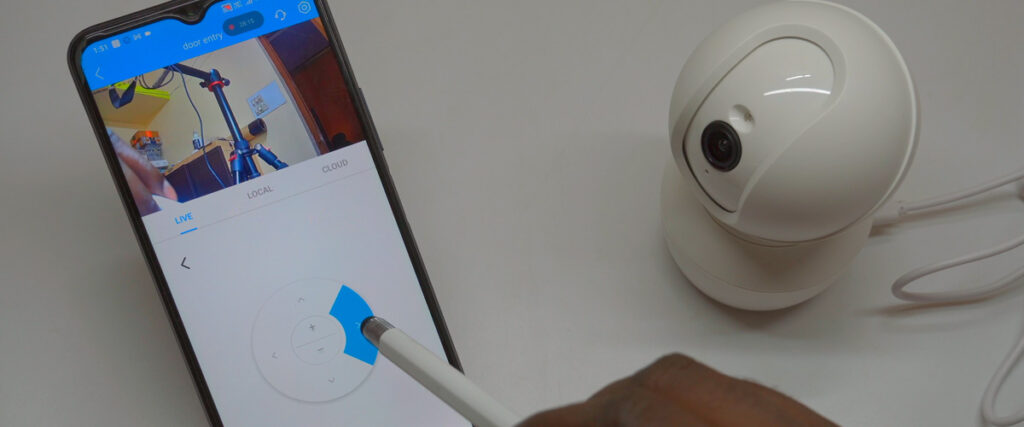
First Live Feed: Tap camera thumbnail → 2K video loads in 3-5 seconds (smooth 25fps).
Step 7: Test Features & Mount Camera
Complete Feature Testing:
| Feature | How to Test | Expected Result |
|---|---|---|
| PTZ Control | Drag left joystick | Pans 340° left/right, tilts 115° up/down |
| 8X Zoom | Pinch fingers on screen | Zooms from 1x to 8x, stays clear |
| Two-Way Audio | Tap microphone icon + speak | Voice plays through camera speaker (2-3 sec delay) |
| Motion Tracking | Walk slowly left to right | Camera pans to follow you automatically |
Mounting Instructions:
- Shelf: Place base flat, adjust lens 30° down
- Wall: Mark holes → Drill + insert anchors → Screw base tight
- Ceiling: Rotate base 180° → Secure with 4 screws
Final Settings Menu:
- Gear icon → Device Info: Set exact time zone (ex: GMT-5) + current date
- Recording Settings: Medium motion sensitivity (avoids false alerts) + Auto-overwrite old files
Step 8: Remote Access & Daily Use
Worldwide Viewing: Open app anywhere → tap device name (works on mobile data 4G/5G or any WiFi). Battery usage: 5% per hour.
Smart Alert System:
- Person detected → Phone vibrates + sound
- Tap notification → Live view opens instantly
- Tap red siren icon → 110dB alarm blasts 30 seconds
Daily Playback: Tap calendar icon → scrub timeline to see yesterday’s motion clips.
Troubleshooting Tips
| Problem | Cause | Step-by-Step Solution | Time |
|---|---|---|---|
| QR Won’t Scan | Poor light/angle | Method 2: Tap ‘No QR’ → Enter ID manually | 1 min |
| WiFi Fails | Wrong band | Router settings → Enable 2.4GHz → Reconnect phone | 30s |
| No Ticking Sound | Short press | Hold pin 10 FULL seconds → Try again | 10s |
| SD Not Detected | Loose insert | Power off → Remove → Reinsert firmly → Power on | 20s |
| Choppy Video | Weak signal | Move camera 1m closer to router | 1 min |
Monthly Maintenance Routine:
- Format SD card (Settings → Storage → 20 seconds)
- Test siren (tap icon—LOUD 110dB!)
- Clean lens with soft microfiber cloth (no chemicals)


