Welcome back to TECH LOGICS! In our ongoing series on Hikvision 4G PT Network Cameras, we’re diving into a critical step to maximize your camera’s potential: adding it to the iVMS-4200 client software on your PC. This allows you to view live footage and playback recordings within your local network—no internet connection required. If you missed our previous post on initial setup, memory card configuration, storage scheduling, and installation, be sure to check it out for a comprehensive guide.
In this third installment, we’ll walk you through the process of integrating your Hikvision camera with iVMS-4200. Let’s get started!
Prerequisites
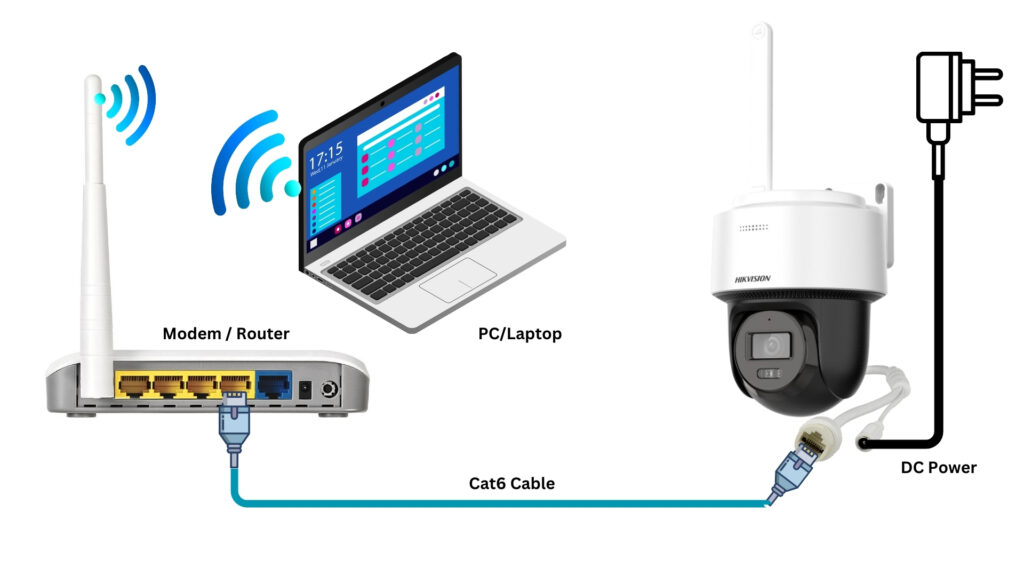
Before you begin, ensure the following:
- Your Hikvision camera is powered on.
- Your PC/laptop and the camera are connected to the same router or modem.
- The camera has been activated (refer to our earlier guides for activation steps if needed).
Step 1: Install iVMS-4200
First, download and install the iVMS-4200 client software from the official Hikvision website. If you need detailed instructions for downloading and installing the software, check out the guide linked in our resources section below. For this tutorial, we’ll assume the software is already installed.
Download Link : https://www.hikvision.com/en/support/download/software/ivms4200-series/
Step 2: Add Your Camera to iVMS-4200
Follow these steps to add your camera to the software:
- Open iVMS-4200: Launch the software and navigate to the Control Panel.
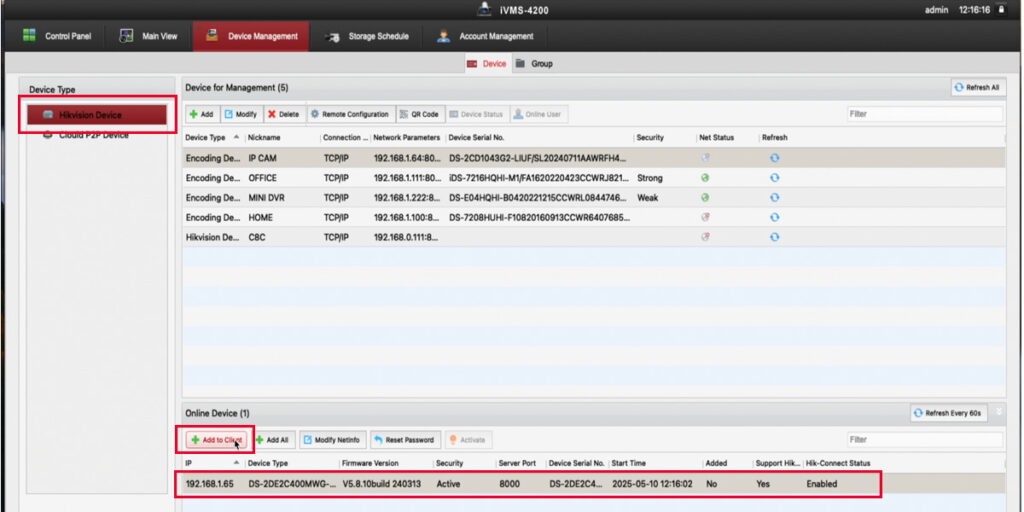
- Go to Device Management: Locate the Hikvision Device Type section and click on Online Device. This will display a list of all Hikvision devices connected to your local network.
- Select Your Camera: Identify your camera in the list, select it, and click the Add to Client button.
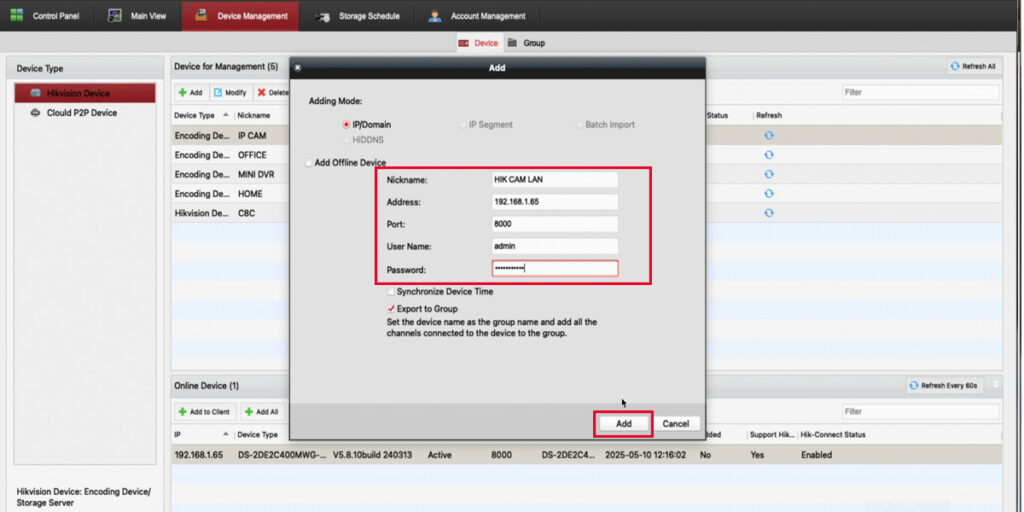
- Enter Camera Details: A pop-up window will prompt you to:
- Assign a nickname for your camera (choose a name that suits you).
- Enter the username (default is typically “admin”).
- Enter the password you set during camera activation (e.g., via the SADP tool).
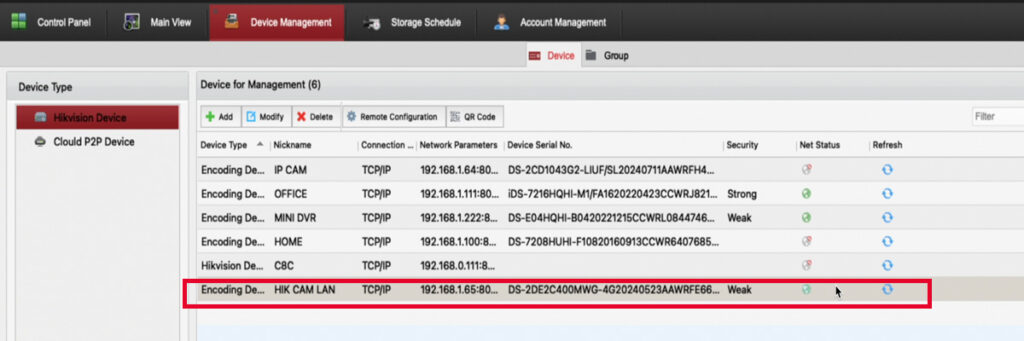
- Complete the Process: Click Add to finalize. Your camera will now appear in the Device Management table, showing its IP address, network status, and other details. A green icon or “Online” status confirms a successful connection.
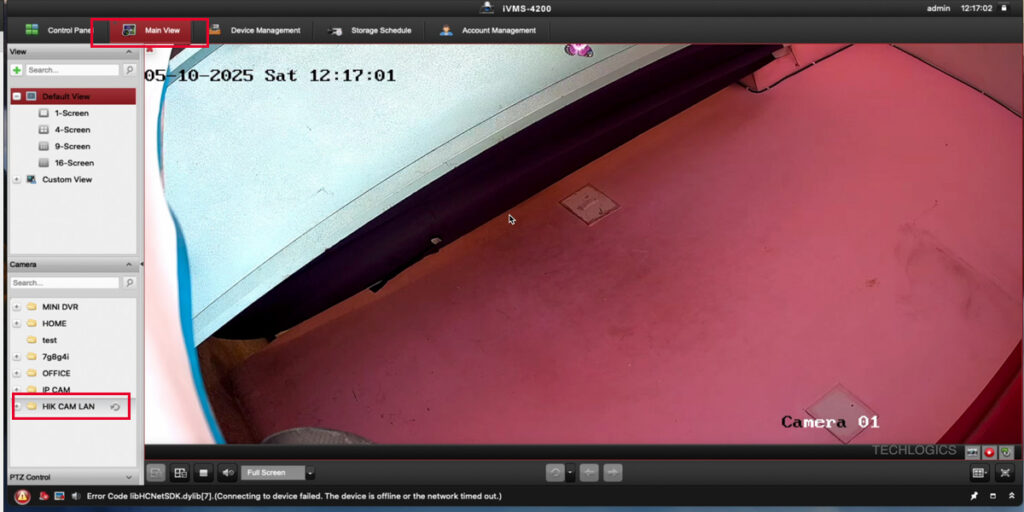
Step 3: View Live Footage
Once added, you can start monitoring your camera in real-time:
- In the Main View panel on the left, locate the folder named after your camera’s alias.
- Drag or double-click the camera icon into the right window to display the live feed.
- Explore additional features like PTZ control (Pan, Tilt, Zoom) for enhanced monitoring.
Step 4: Access Recorded Footage
To review footage, iVMS-4200 offers two convenient options:
- Instant Playback: Right-click the live view screen and select Switch to Instant Playback to quickly access recent footage without navigating menus.
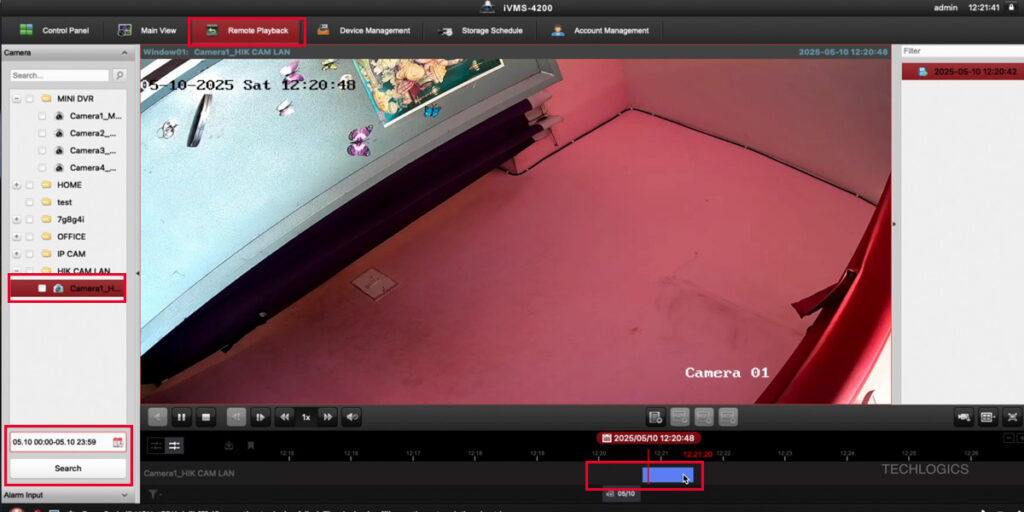
- Remote Playback:
- Go to the Control Panel and select Remote Playback.
- Choose the desired date and time period, then click Search.
- Adjust the timeline to navigate through recorded videos and view them as needed.
Why This Matters
Adding your Hikvision camera to iVMS-4200 unlocks powerful monitoring capabilities, from real-time viewing to seamless playback of recorded footage. Whether you’re securing your home or business, this setup ensures you stay in control—all within your local network.
Resources
- Missed our previous guides? Check out our series on Hikvision 4G PT Network Camera setup and installation.
- For a detailed iVMS-4200 installation guide, visit the link in our resources section.
Support Our Community
If you found this guide helpful, please consider supporting TECH LOGICS! Your likes, shares, and subscriptions fuel our mission to deliver valuable tutorials. Every bit of feedback helps us create more content to empower you with the latest tech insights.
Thank you for being part of our community! Stay tuned for the next installment in our Hikvision series.


