Hello, everyone! Today, we’re thrilled to bring you a detailed tutorial on installing and configuring the Trueview Dual Lens 4G Solar Outdoor Pan-Tilt Camera. Whether you’re a first-time user or just need a quick refresher, this guide will walk you through every step—from inserting the SIM and memory cards to setting up the Truecloud mobile app for seamless integration. Our goal is to make this process as straightforward as possible with clear, easy-to-follow instructions. So, let’s dive in and get started!
Step 1: Power Off the Camera
Before you begin, ensure the camera is powered off. This simple step is critical to avoid damaging the camera or the cards during installation. It only takes a moment but can save you from headaches later.
Step 2: Install the SIM and Memory Cards
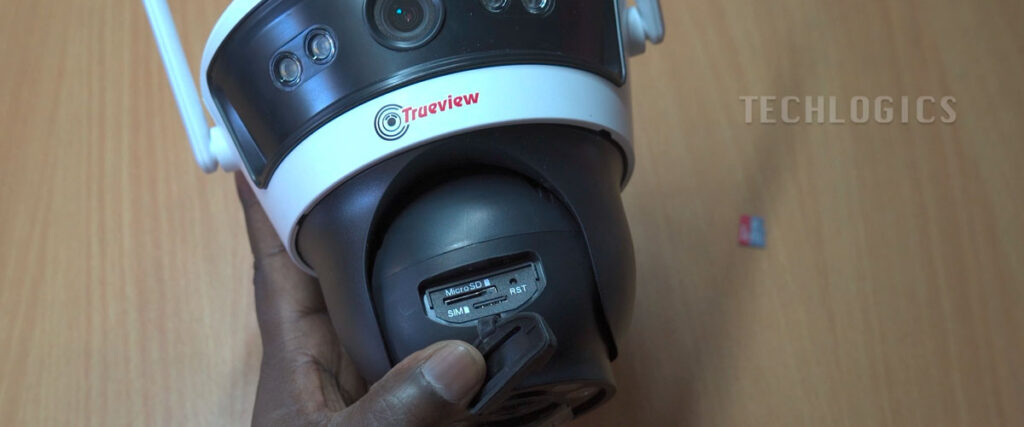
The SIM and microSD card slots are located at the top of the rotating lens. Here’s how to access and install them:
- Lift the Lens: Gently tilt the camera lens upward to reveal the internal components.
- Remove the Cap: Carefully take off the protective cap covering the card slots. Take your time to keep everything intact.
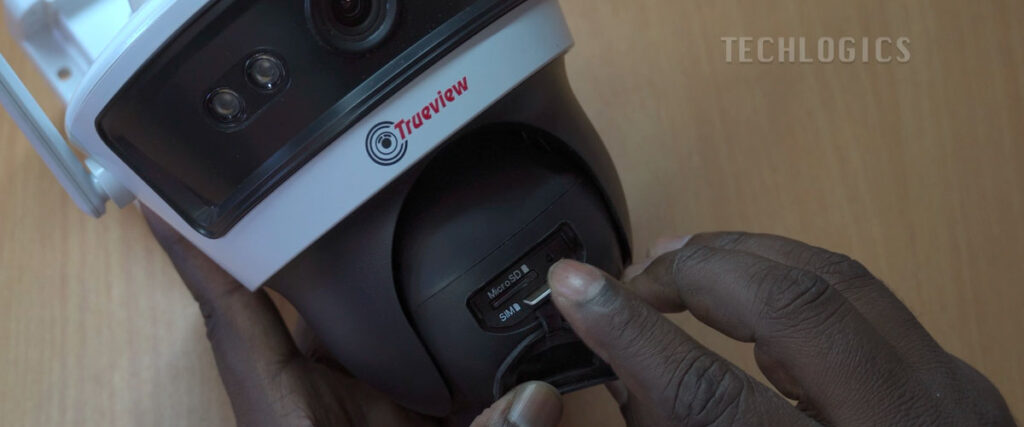
- Locate the Slots: You’ll see two slots—the top one is for the memory card, and the bottom one is for the SIM card. Handy icons next to each slot show the correct orientation.
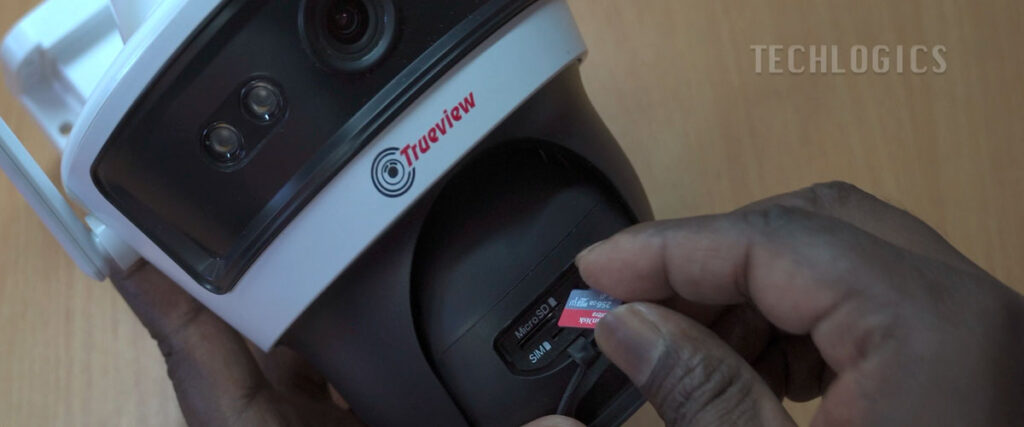
Inserting the Memory Card:
Use a high-quality microSD card (up to 256 GB supported) for ample storage—perfect for residential or commercial surveillance. Slide the card into the top slot until it clicks into place. To remove it later, just press gently, and it’ll pop out.
Memory Card Capacity:
With a 256 GB card, you can record 7–10 days of footage, depending on settings like video quality, frame rate, and recording mode (continuous or motion-triggered). Understanding these factors will help you optimize storage.
Inserting the SIM Card:
Slide the SIM card into the bottom slot, ensuring proper alignment as indicated by the icons. Double-check both cards to ensure they’re secure—this prevents data loss or recording issues.
Step 3: Power Up the Camera
Before configuring the app, ensure the camera is fully charged or connected to its solar panel. A steady power source is key to avoiding setup interruptions.
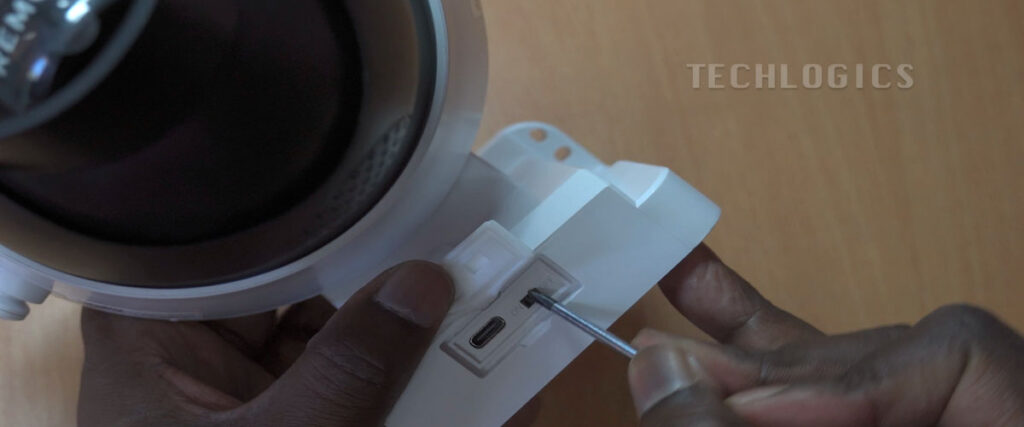
- Toggle the Switch: Find the ON/OFF switch at the bottom of the mounting panel and flip it to “ON.”
- Listen for Confirmation: Once powered on, the camera will announce, “Network connection is succeeded,” signaling it’s connected to the 4G network and ready for setup.
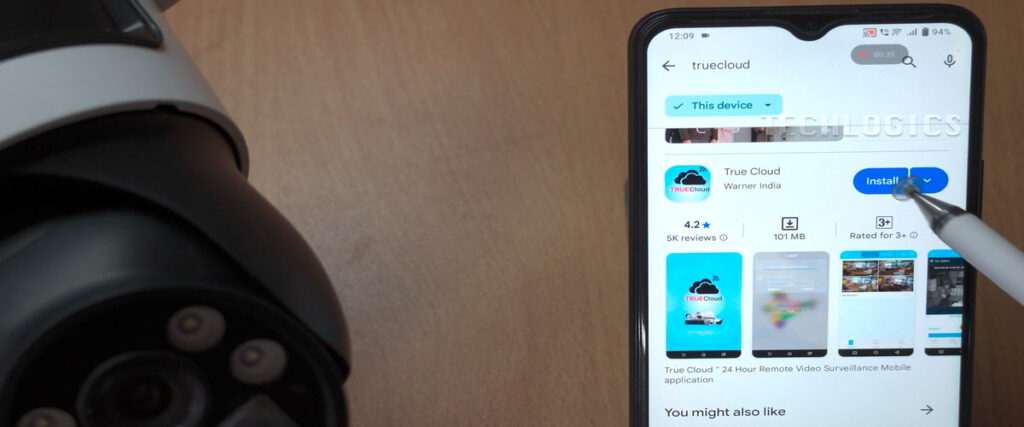
Step 4: Download and Install the Truecloud App
To control your camera, you’ll need the Truecloud app by Hikvision. Here’s how to get it set up:
- Download the App: Open the Play Store, search for “Truecloud,” and select the Hikvision version. Tap “Install” and accept any permissions.
- Launch the App: Once installed (it takes just a few minutes), tap “Open” or find the app icon on your home screen.
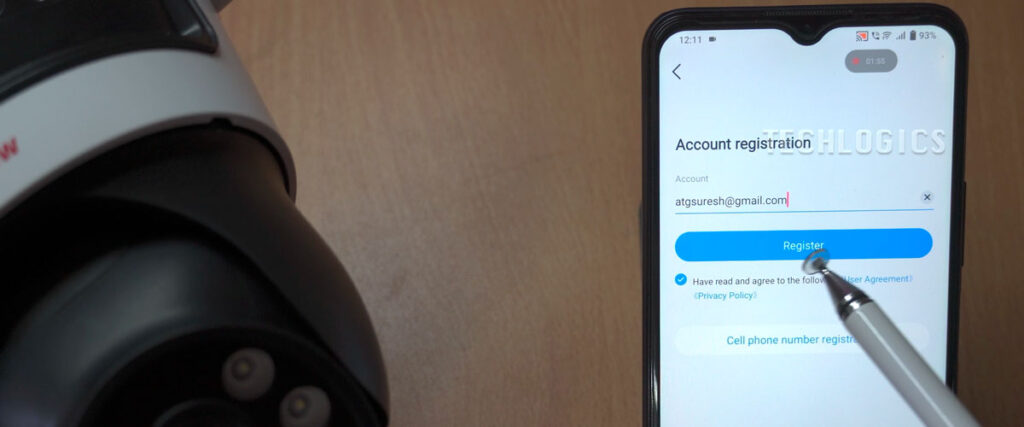
Logging In:
- Existing Users: Enter your phone number or email and password, then tap “Login.”
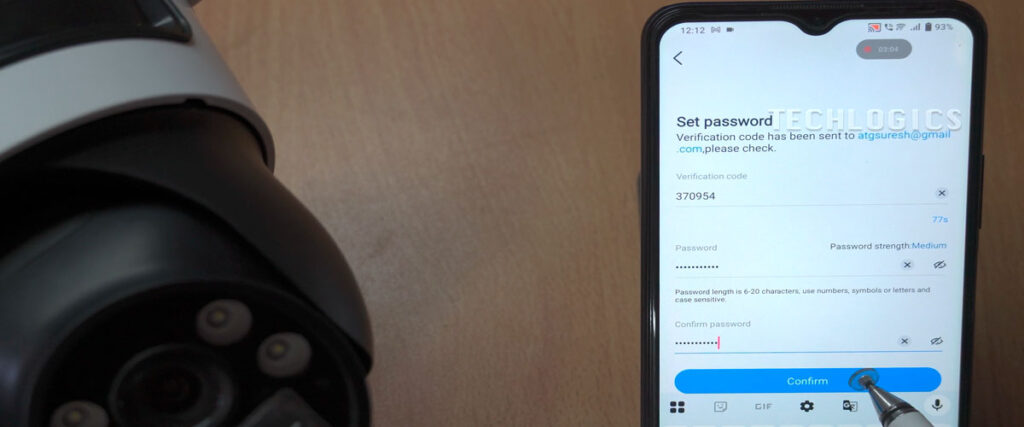
- New Users: Choose “Register” on the login screen. Opt for email or phone registration, enter your details, and complete the safety certification (drag the tennis ball to the racket). After registering, verify your account with the code sent to your email and create a password.
Optional Phone Link: Link your phone number for easier logins in the future.
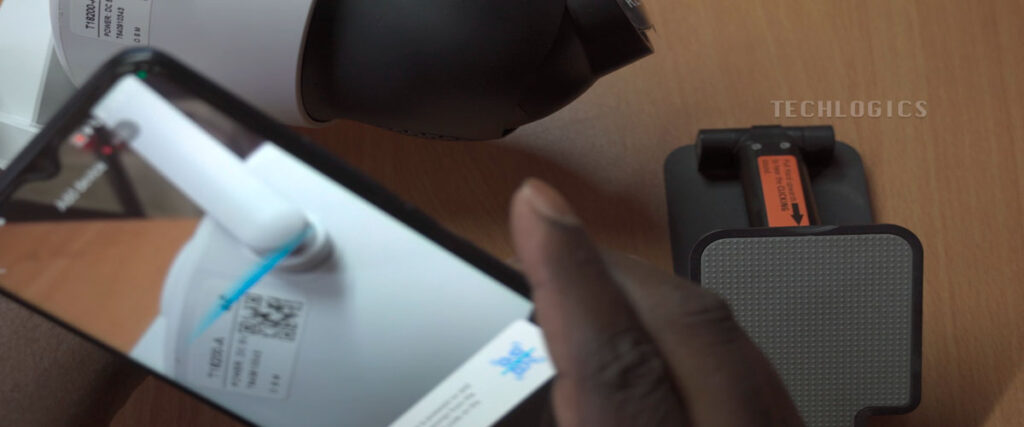
Step 5: Configure the Camera in the App
For a smooth setup, keep the camera near your phone during this step. If needed, press the reset button to activate network connection mode.
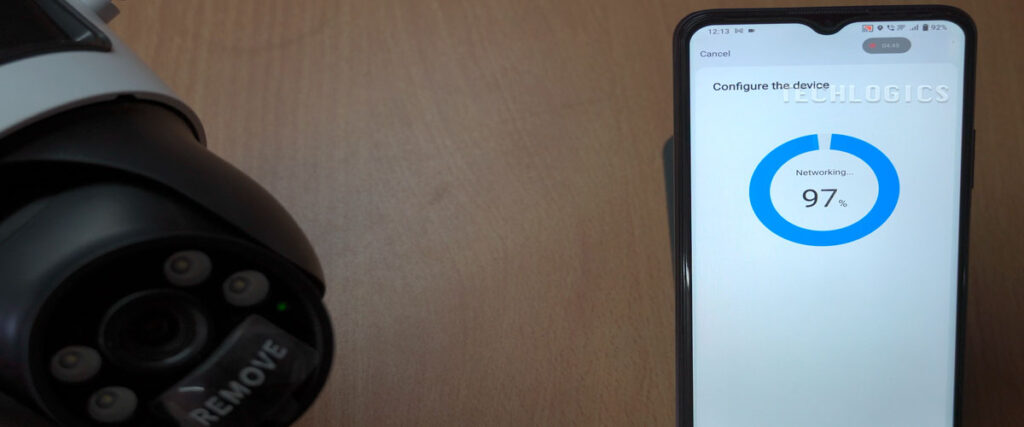
- Add the Camera: In the Truecloud app, tap “Add Device” or the “+” symbol, then choose “Scan QR Code.”
- Grant Permissions: Allow access to your phone’s camera to scan the QR code (found on a sticker on the camera body).
- Scan the Code: Position your phone to capture the QR code clearly. The app will process it and guide you through connecting to the 4G network.
Once connected, you’ll hear a voice prompt or see a notification confirming the camera is online. Customize settings like date, time, device name, and location. You can also enable audio recording (disabled by default) and save the QR code for future reference.
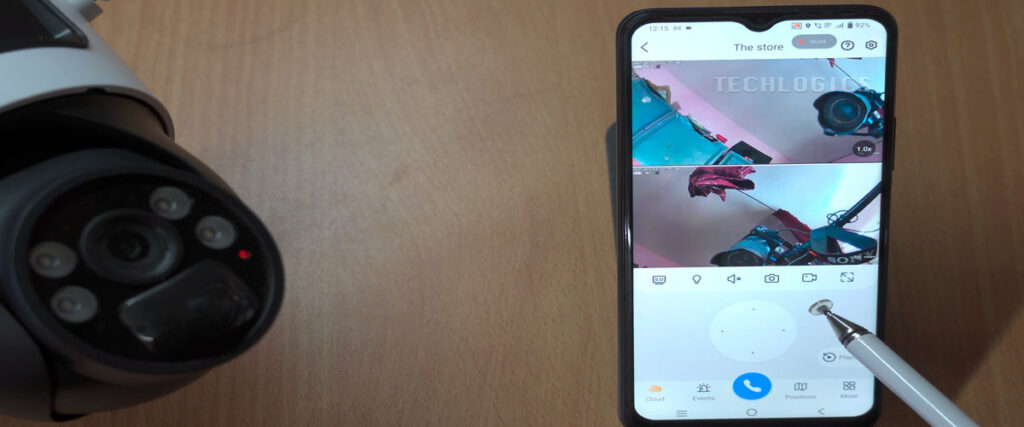
Step 6: Mount and Test the Camera
With the camera configured, mount it in your desired location for optimal coverage. Once installed, it’s fully operational with features like:
- Live Streaming: View real-time footage from anywhere via the app.
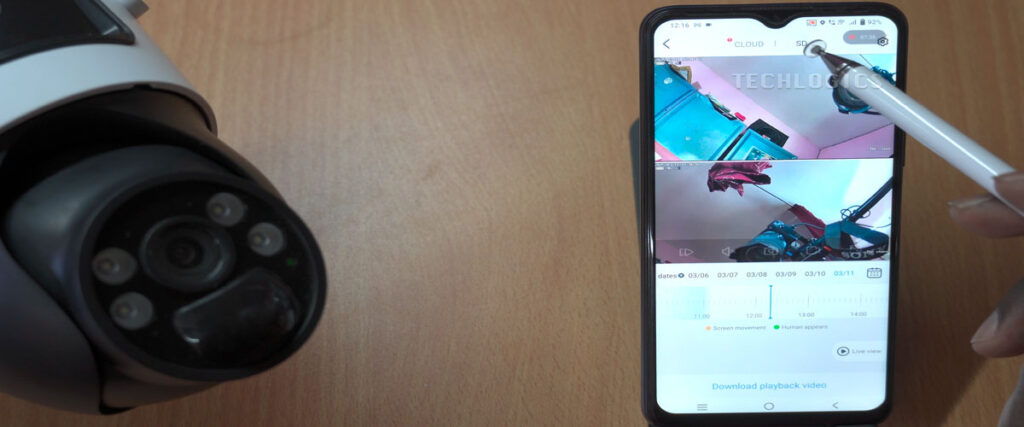
- Playback: Access recorded footage from the SD card.
- PTZ Control: Adjust the camera’s pan, tilt, and zoom remotely.
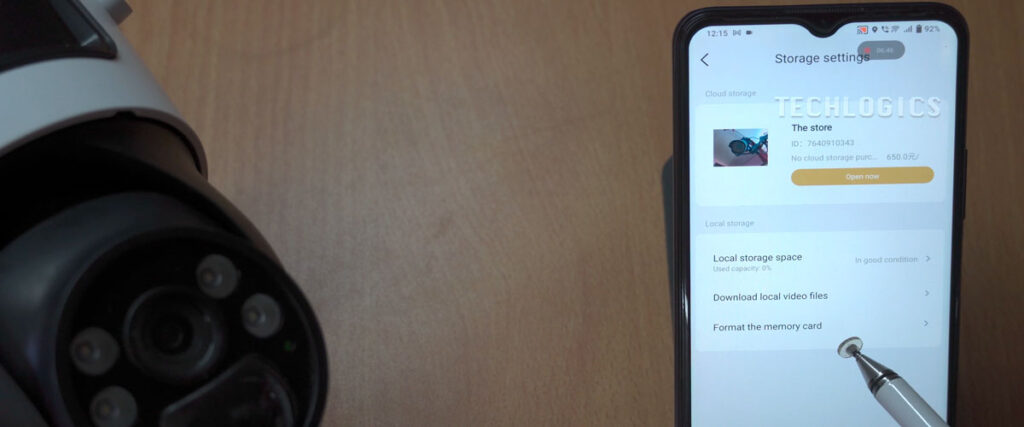
Check the Memory Card:
In the app, go to “Settings” > “Record List” > “Storage Settings.” If the card is “Uninitialized,” select “Storage Medium” and tap “Initialize” to format it. Once “In Use,” you can view storage capacity and playback footage by switching to “SD” mode.
Step 7: Explore Advanced Features
The Truecloud app works over mobile data or Wi-Fi worldwide, offering flexibility to monitor your property anytime, anywhere. Customize recording modes (e.g., motion detection) and explore features like:
- Storage Settings: Manage how footage is saved.
- Event Alerts: Get notified of detected activities.
- Two-Way Audio: Communicate through the camera.
For more details, check out additional resources in our video series.
Final Thoughts
We hope this guide has made setting up your Trueview Dual Lens 4G Solar Outdoor Pan-Tilt Camera a breeze! If you found it helpful, please support us by liking, sharing, or subscribing—it keeps us motivated to create more content like this. Thank you for being part of our community, and stay tuned for more tips to maximize your camera’s potential!


