Welcome to TECH LOGICS! In this guide, we’ll walk you through the menu operations of the Honeywell Impact Analog Video Door Phone (VDP) as part of our ongoing series. Previously, we covered how to connect the indoor screen and door station using a CAT6 cable. Today, we’ll focus on configuring the date and time, setting ringtones, and adjusting ring volume schedules to customize your VDP system for optimal use. Let’s get started!
Setting the Date and Time
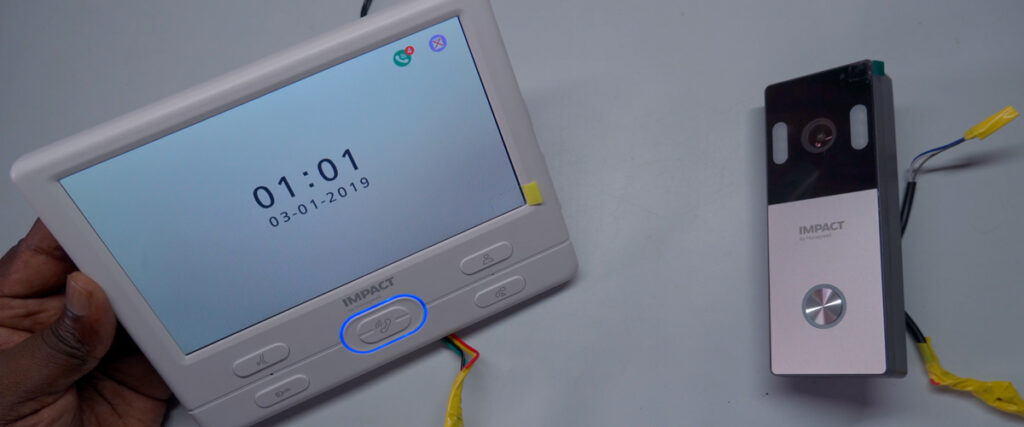
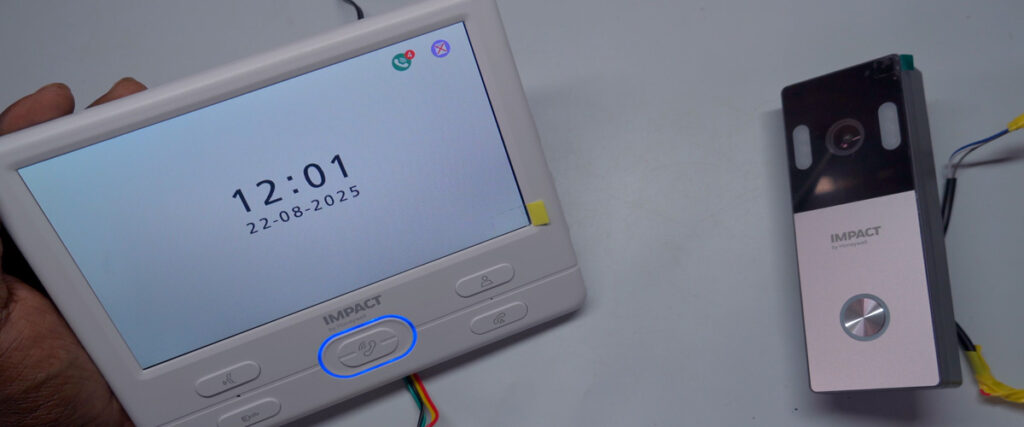
When you first power on your Honeywell Impact Analog VDP, you may notice that the date and time are incorrect. Setting the correct date and time is essential for proper system functionality, and it’s done through the indoor screen’s menu.
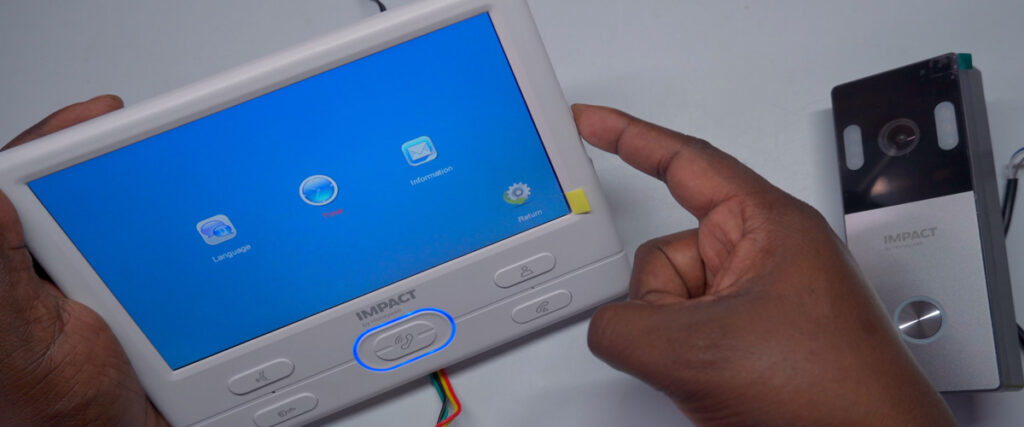
Menu Navigation Basics
All menu operations are performed using the buttons on the indoor screen panel:
- Main Menu Button (right side, middle): Displays all system configurations.
- Scroll Button (below Main Menu): Moves the cursor and adjusts values.
- Hang Up Button (front panel): Returns to the previous page or exits the menu.

Steps to Set Date and Time
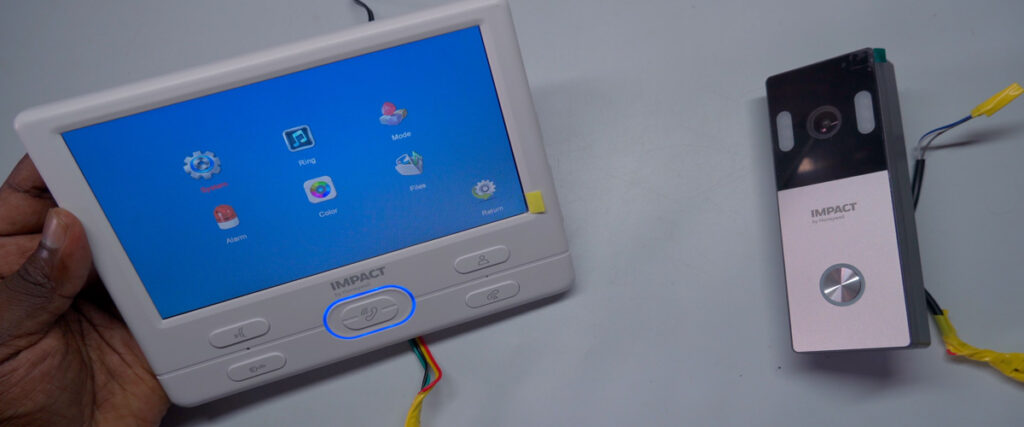
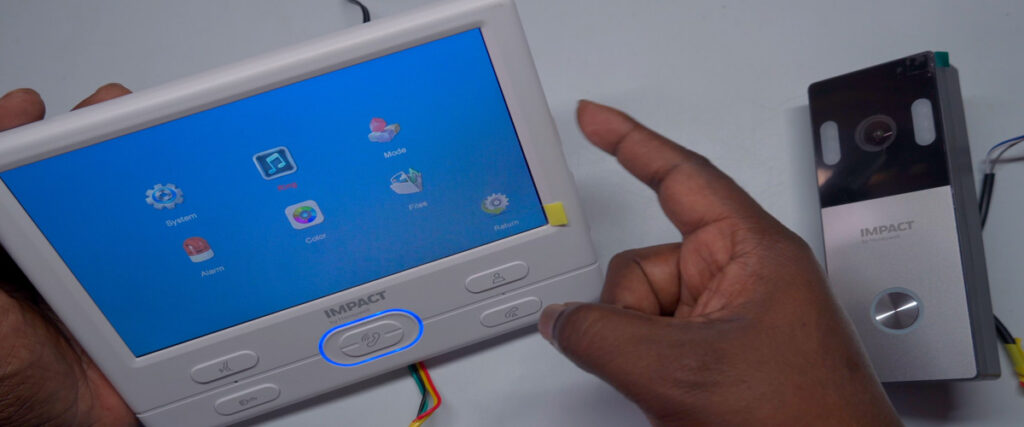
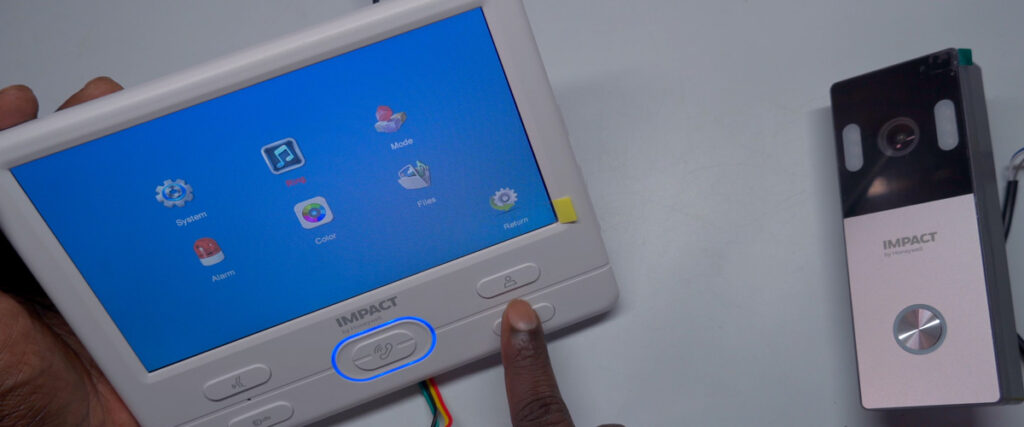
- Access the Main Menu: Press the Main Menu button to display the menu options on the indoor screen.
- Navigate to System Settings: Use the Scroll button to highlight the System menu option, then press Main Menuto enter.
- Select Time Settings: In the System menu, scroll to the Time option and press Main Menu to access the date and time setup page.
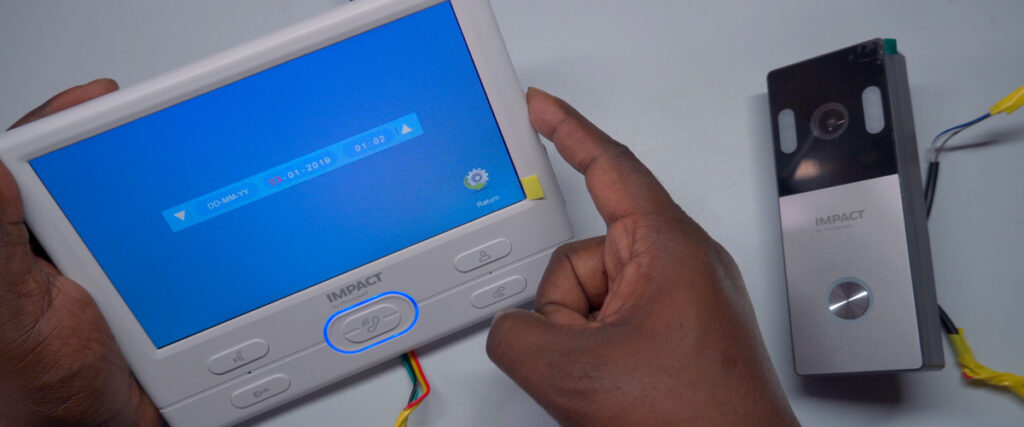
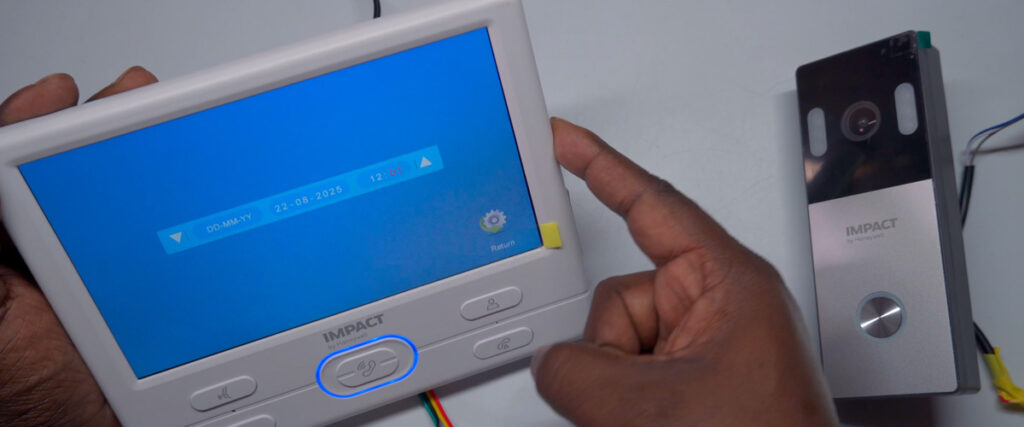
- Adjust Date and Time Fields: The setup page displays fields for year, month, date, and time.
- Press Main Menu to select a field (the value will flash, indicating it’s editable).
- Use the Scroll button to adjust the value to the correct setting.
- Press Main Menu again to save the value.
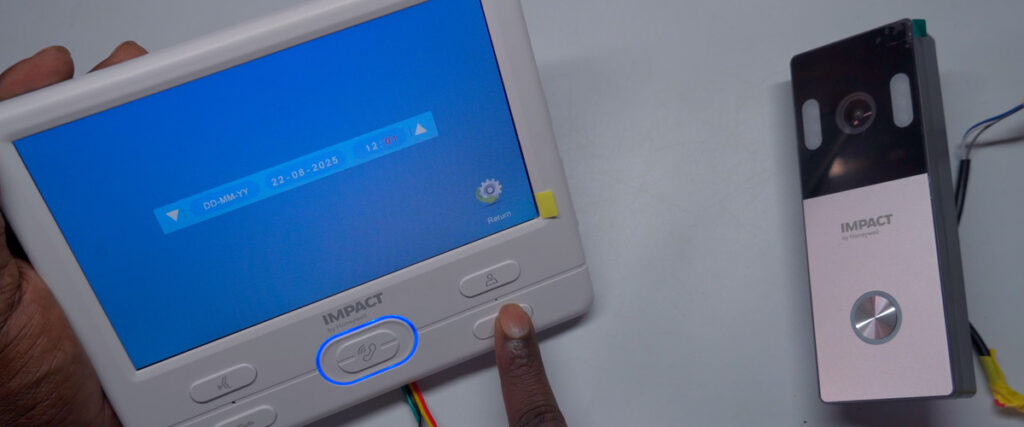
- Save and Exit: Repeat for each field (year, month, date, time). Once all fields are set, press the Hang Up button to exit the menu.
After exiting, the updated date and time will be displayed on the indoor screen, ensuring your VDP system is properly configured.
Customizing Ringtones
The Honeywell Impact Analog VDP comes with 12 pre-installed ringtones, allowing you to personalize the system to your preference. You can also adjust the ring volume and duration for added convenience.
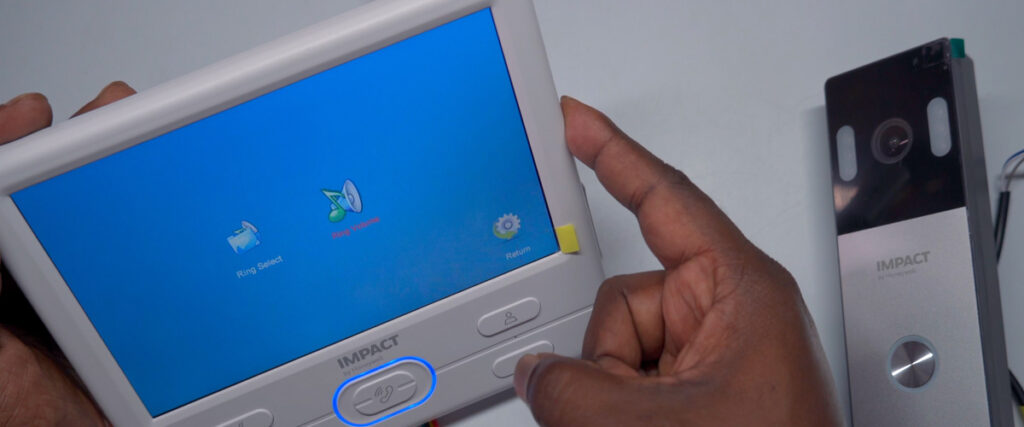
Steps to Set the Ringtone
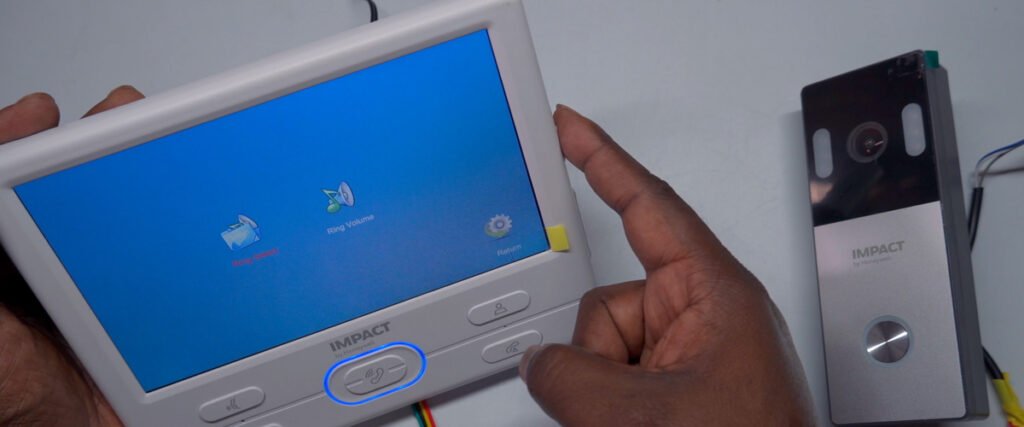
- Enter the Ring Menu: From the main menu, use the Scroll button to select the Ring option, then press Main Menu to enter.
- Choose Door 1: Since your setup uses only Door 1, select the Door 1 option using the Scroll button and press Main Menu.
- Select a Ringtone: Scroll through the 12 available ringtones, choose your preferred one, and press Main Menu to save.
- Exit the Menu: Press the Hang Up button to return to the previous page.
Your selected ringtone for Door 1 is now set!
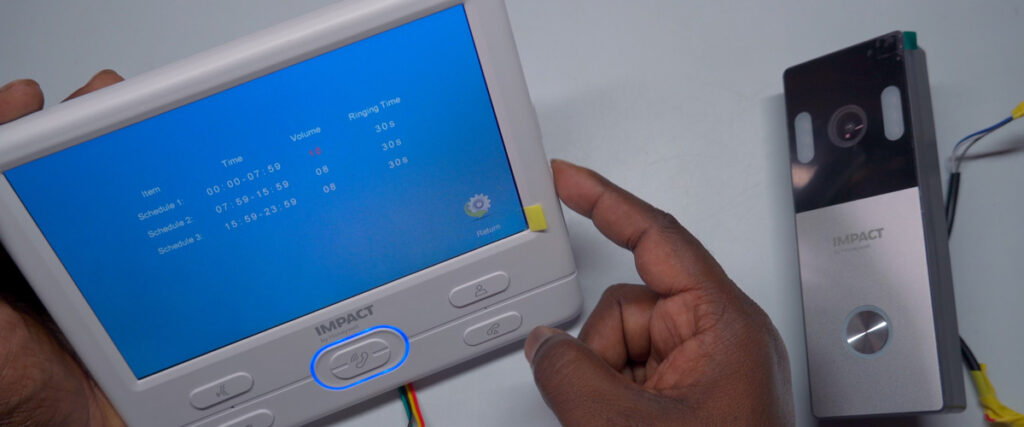
Adjusting Ring Volume and Schedules
The VDP system allows you to customize the ring volume and ring duration for different times of the day, with three programmable schedules. For example, you can set a louder volume and longer ring duration in the morning and a quieter, shorter ring at night.
Steps to Adjust Ring Volume
- Access the Ring Volume Settings: In the Ring menu, scroll to the Ring Volume option and press Main Menu.
- Select a Schedule: Choose one of the three time periods (e.g., morning, afternoon, night) using the Scroll button.
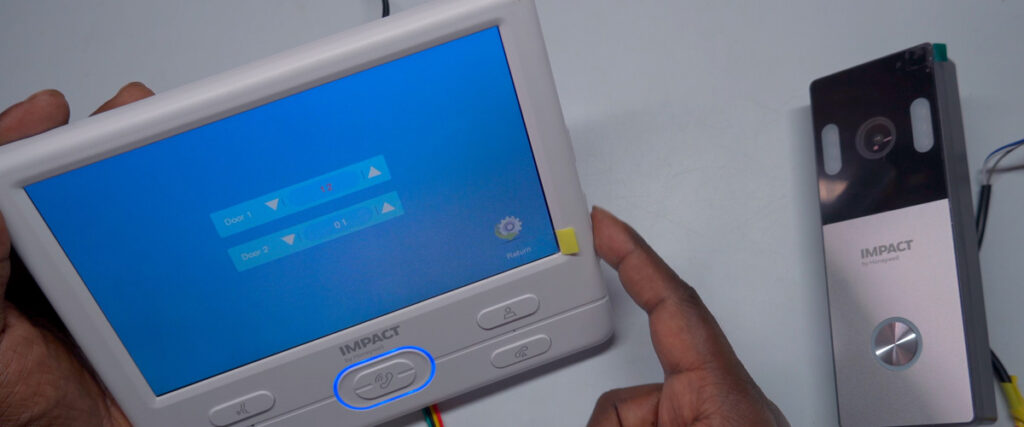
- Adjust Volume and Duration:
- Use the Scroll button to set the desired volume and ring duration.
- Press Main Menu to save each setting.
- Repeat for Other Schedules: Customize additional schedules as needed for different times of the day.
- Save and Exit: Press Hang Up to return to the previous menu.
This scheduling feature ensures your VDP system adapts to your daily routine, offering both flexibility and convenience.
What’s Next?
In our upcoming guides, we’ll dive deeper into additional menu options, including:
- Mode: Explore different operational modes for your VDP.
- Alarm: Configure alarm settings for enhanced security.
- File: Learn how to access visitor entry screenshots and other stored data.
These features will help you unlock the full potential of your Honeywell Impact Analog VDP, tailoring it to your specific needs.
Stay Connected with TECH LOGICS
We hope this guide has helped you confidently configure your Honeywell Impact Analog VDP. Stay tuned for more step-by-step tutorials in our series to maximize your system’s functionality. If you found this post helpful, share it with others and subscribe to TECH LOGICS for more DIY electronics tips and tutorials. Have questions? Drop them in the comments below, and we’ll be happy to assist!
Thank you for reading, and we’ll see you in the next guide!