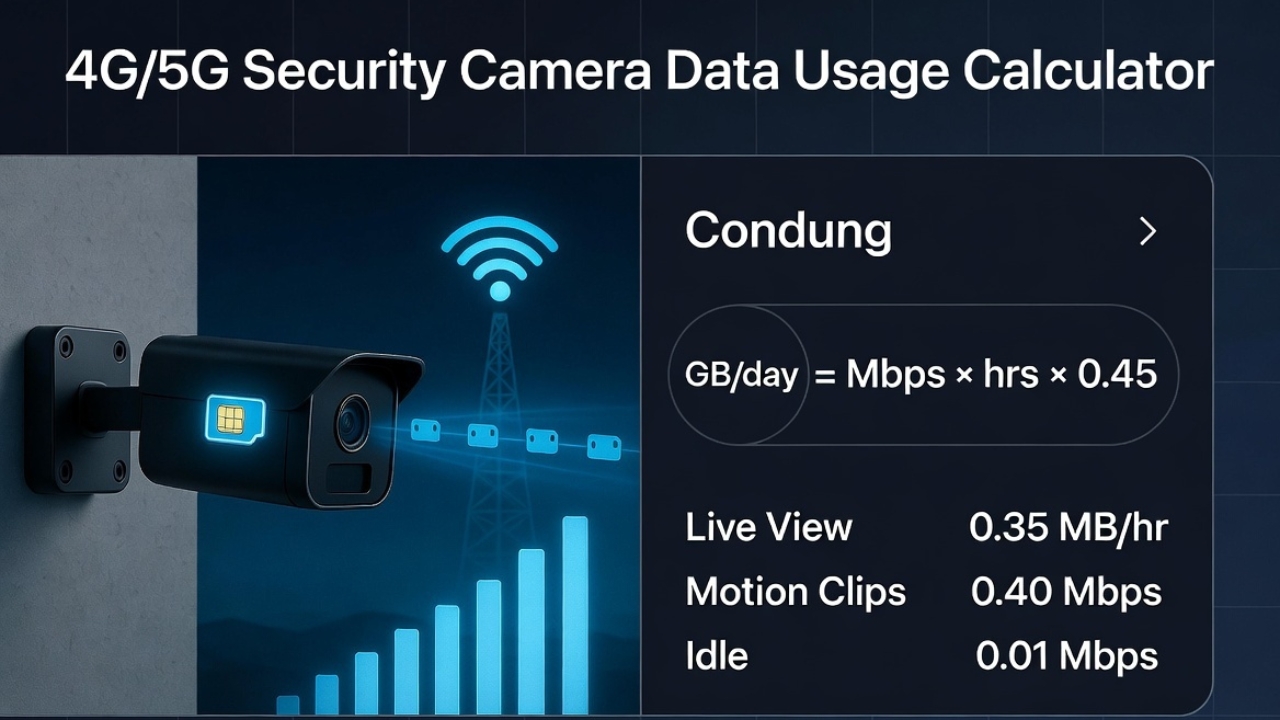
Welcome to TECH LOGICS! In this guide, we’ll walk you through the process of setting up your TP-Link Vigi IP camera using just your smartphone or tablet. No PC or laptop is required! We’ll cover how to find the camera’s IP address, activate it, and configure a custom IP address for seamless integration with your network storage or streaming devices.
Step 1: Connect the Camera to Your Network
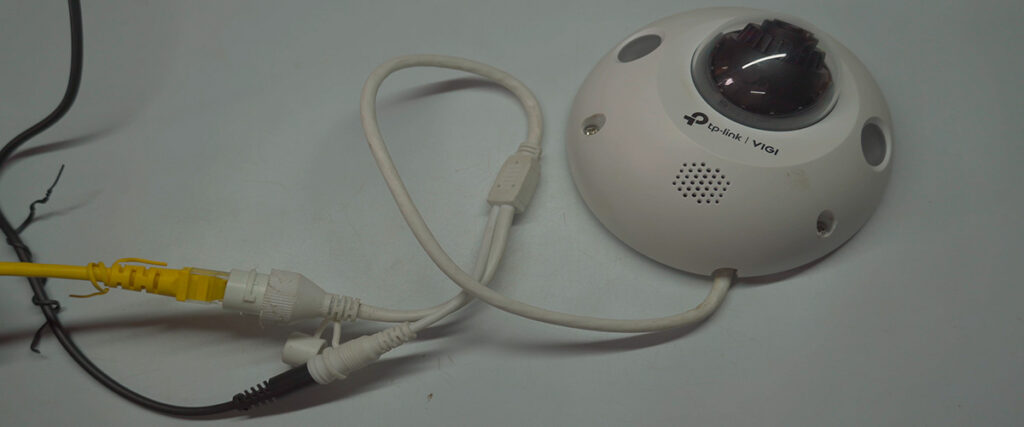
To get started, connect your TP-Link Vigi IP camera to your LAN network (e.g., a modem or router) and power it on. Ensure the camera is properly connected and powered before proceeding.
Step 2: Download and Install the VIGI App
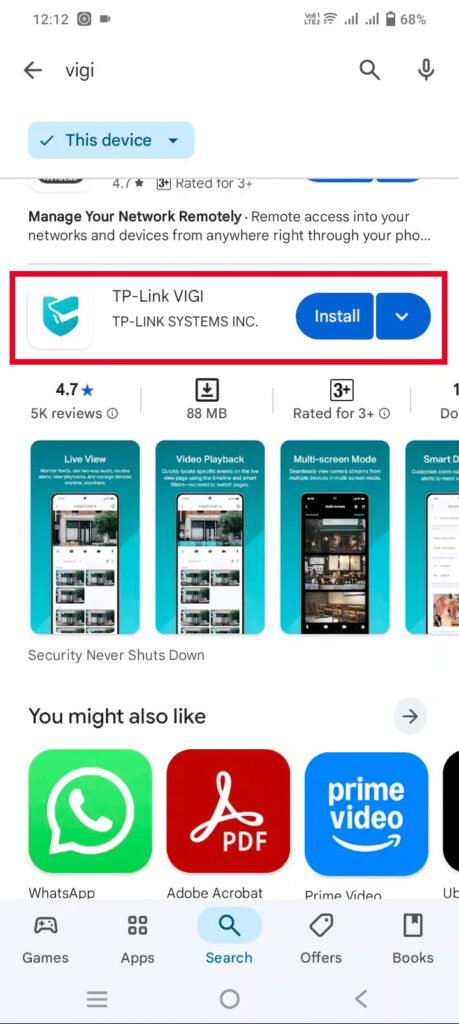
- Open the Google Play Store (for Android) or Apple App Store (for iOS).
- Search for “VIGI” and locate the app developed by TP-Link Systems INC.
- Tap the app icon, then click Install. The installation time depends on your internet speed, so ensure you have a stable Wi-Fi or mobile data connection.
- Once installed, open the VIGI app to begin the setup process.
Upon launching the app, you’ll be prompted to review the Terms of Use and Privacy Policy and to allow notification permissions. You may also see a login screen. You can log in with an existing TP-Link ID, create a new account, or skip the login for now, as it’s not required for finding the camera’s IP address or activating it.

Step 3: Find the Camera’s IP Address
To locate your Vigi camera on the network:
- Ensure your phone is connected to the same Wi-Fi network as the camera.
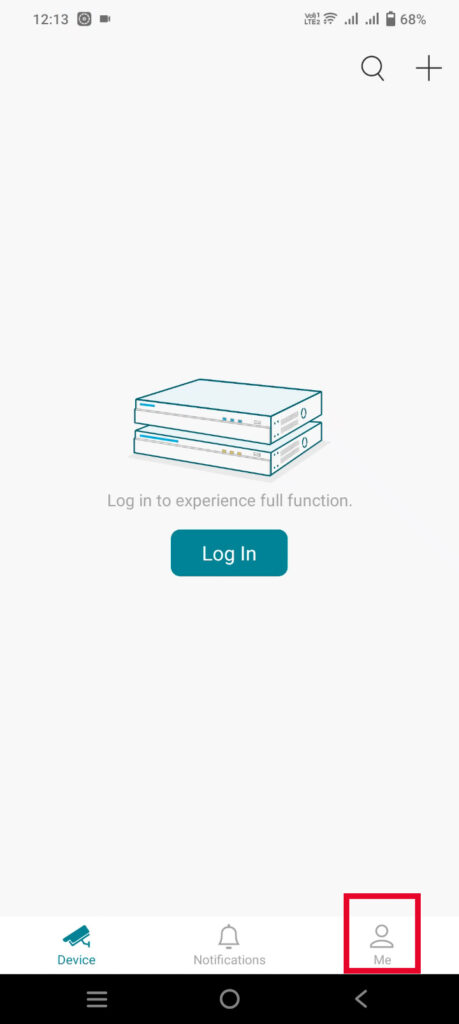
- In the VIGI app, tap the “Me” icon at the bottom.
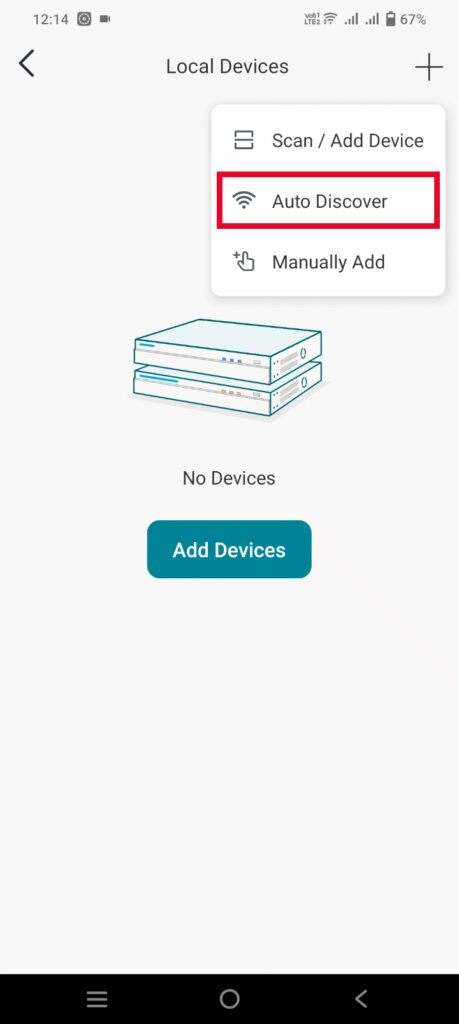
- Select “Local Devices”.
- Tap the “+” symbol or “Add Devices”, then choose “Auto Discover”.
- The app will scan and display all VIGI cameras, NVRs, and other devices connected to your LAN, along with their IP addresses.
Step 4: Activate the Camera
To activate or initialize a camera:
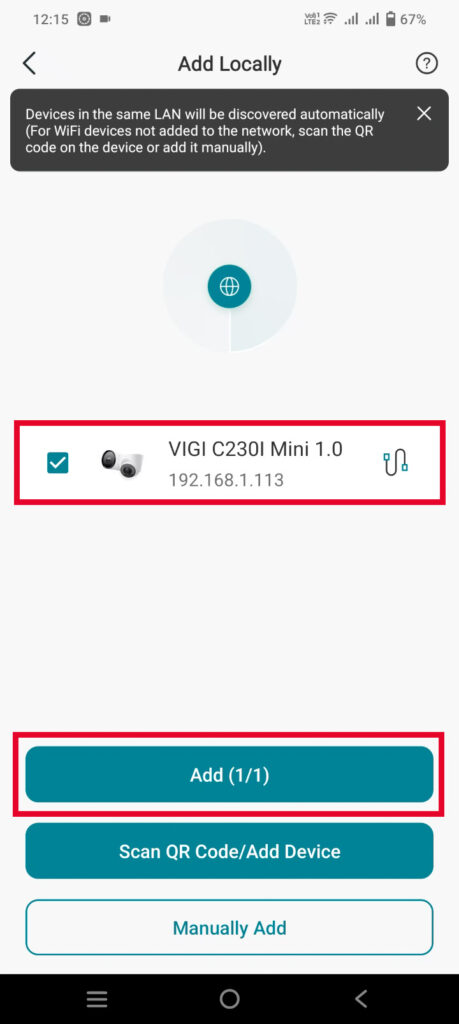
- From the list of discovered devices, select your camera and tap “Add”.
- Set a secure password for the camera:
- Enter the password in the Password and Confirm Password fields.
- Use a combination of capital letters, numbers, characters, and symbols for enhanced security.
- Provide an email address for password recovery in case you forget it.
- Click “Save” to proceed.
- Select your country and time zone from the provided lists, then tap “Next” (you may need to tap “Next” again to finalize).
- Once activated, you can view the camera’s live feed, access device details, and adjust general settings directly in the app.

Step 5: Set a Static IP Address
By default, VIGI cameras use DHCP mode, where the camera’s IP address is dynamically assigned by your router. This can cause the IP address to change after reboots or network refreshes. For consistent access, setting a static IP address is recommended.
To configure a static IP:
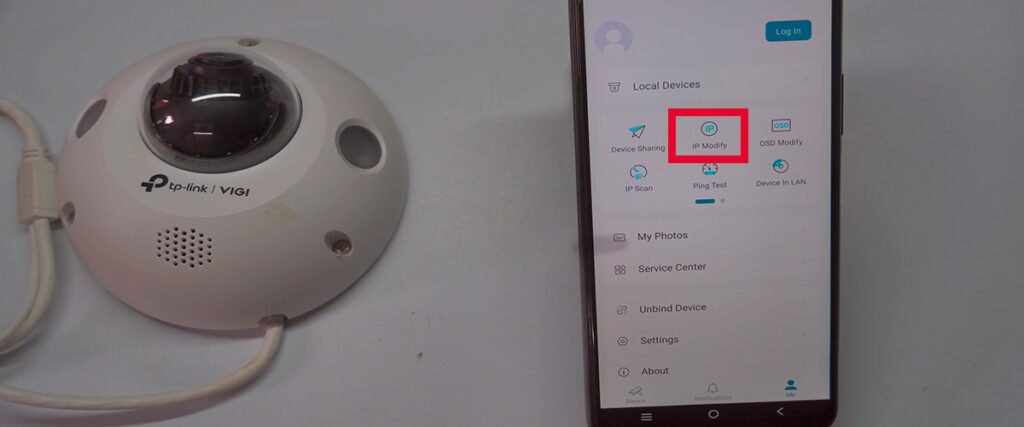
- In the VIGI app, go to the “Me” section and select “IP Modify”.
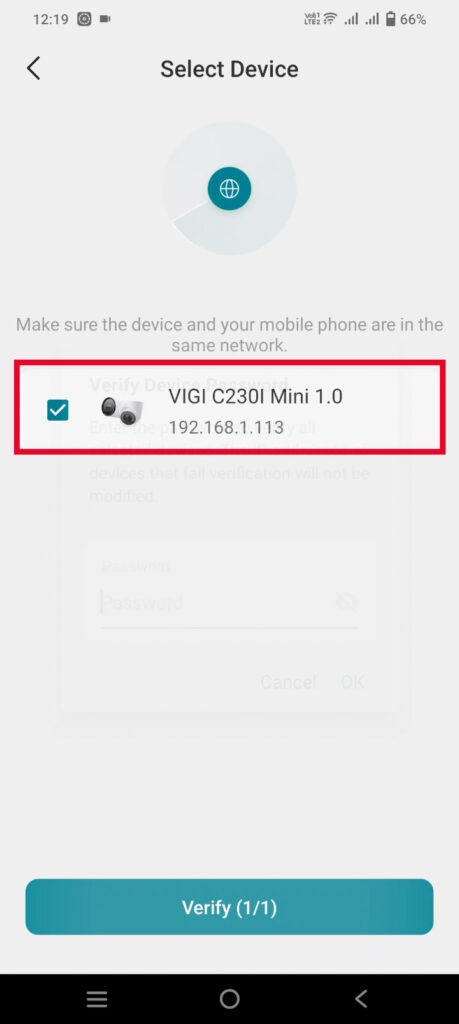
- Choose the camera you want to configure and tap “Verify”.
- Enter the password you set during activation to authorize changes.
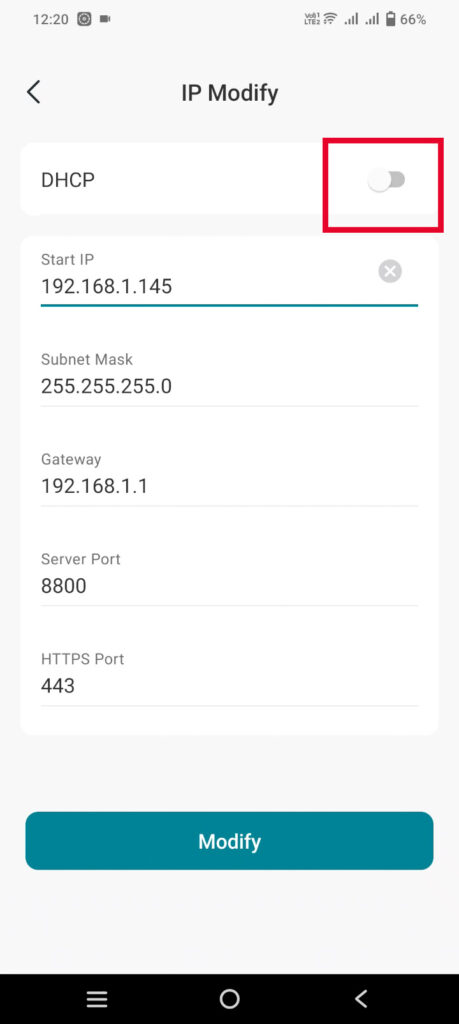
- On the “IP Modify” page, disable the DHCP option to switch to static IP mode.
- Manually enter your preferred IP address, gateway, and other network details.
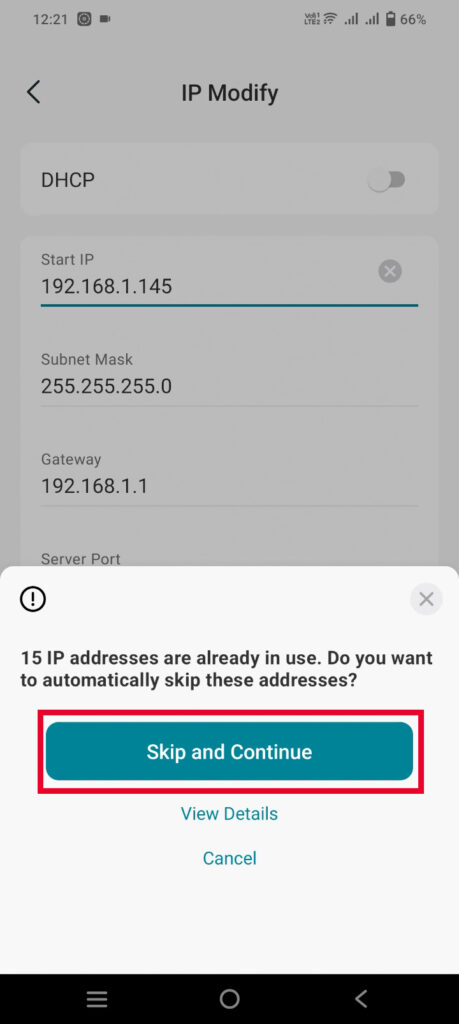
- Tap “Modify” to save the settings. You may need to select “Skip and Continue” to finalize.
- A success message will confirm the new static IP address, which will now be listed in the app.
- Tap “Complete” to finish.
Bonus Feature: View All Devices on Your LAN
The VIGI app includes a handy “Devices on LAN” feature. This lists all devices (VIGI and non-VIGI) connected to your network, displaying their names and IP addresses. This makes it easy to manage and monitor all devices within your LAN.
Conclusion
With the TP-Link VIGI app, setting up and managing your Vigi IP camera is a breeze. You can find the camera’s IP address, activate it, set a static IP, and monitor live feeds—all from your mobile device. For more in-depth tutorials on maximizing the VIGI app’s features, check out additional resources in our video series.
If you found this guide helpful, please like, share, or subscribe to our channel to support more content like this. Stay connected for more tech tips and tutorials!