Welcome back to TECH LOGICS! If you’re following our series on Tp-Link VIGI IP Cameras, you’re in the right place. In Part 1 of this series, we covered how to initialize your VIGI camera and set a static LAN IP address using the VIGI Config Tool. If you missed it, be sure to check it out for a complete setup guide.
In this second installment, we’ll walk you through the process of adding a Tp-Link VIGI IP camera to your Hikvision DVR using the ONVIF protocol. This setup allows you to record footage directly to the DVR’s storage and view live feeds alongside your existing cameras.
Prerequisites for a Seamless Setup
Before diving in, ensure your VIGI IP camera and Hikvision DVR are connected to the same modem or router via LAN. This configuration is critical for smooth communication between devices and optimal performance. Refer to the network diagram below for clarity:

Additionally, make sure your camera has a static IP address. Setting a static IP prevents connectivity issues that can arise if DHCP is enabled, as dynamic IP addresses may change periodically. A changing IP can cause the DVR to lose track of the camera, making it inaccessible. A static IP ensures a stable connection and simplifies management.
Note: By default, VIGI IP cameras have the ONVIF feature enabled, so no additional network configuration is required for ONVIF compatibility.
Step-by-Step Guide to Adding the VIGI Camera to Your Hikvision DVR
Follow these steps to integrate your Tp-Link VIGI IP camera with your Hikvision DVR:
- Access the DVR’s Configuration Page
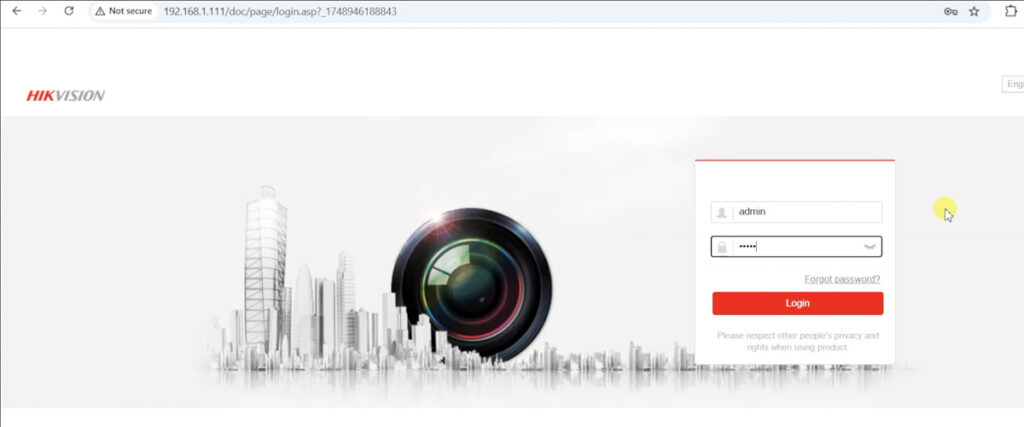
Open your web browser and enter the DVR’s IP address. Log in using your admin credentials to access the DVR’s interface. - Navigate to Camera Management
Once logged in, go to the Configuration page and select Camera Management. Here, you’ll see options for both analog and IP channels.- A typical 4-channel Hikvision DVR includes four analog channels and one IP channel by default.
- An 8-channel DVR typically has eight analog channels and two IP channels.
If you need to add more IP cameras beyond the default, you can disable analog channels by disconnecting their cables, freeing up slots for additional IP cameras.
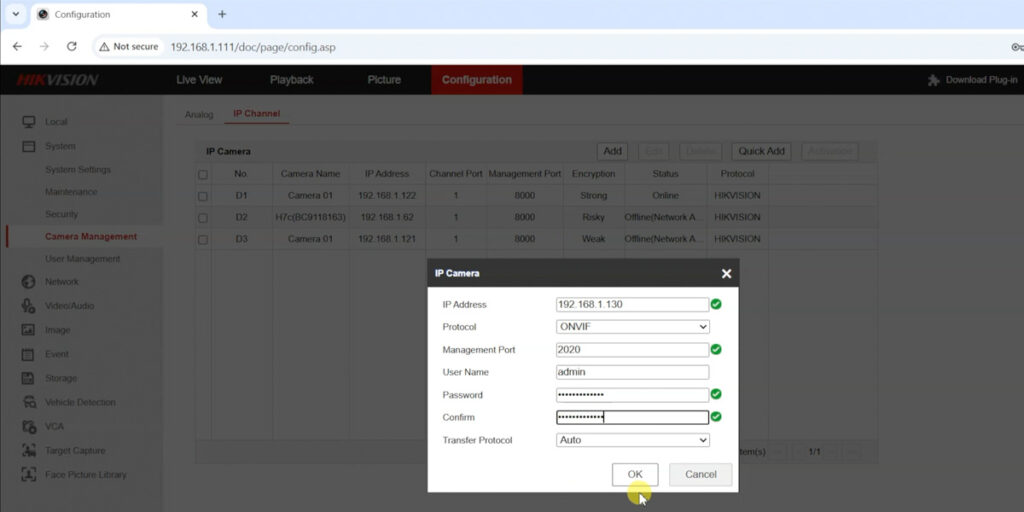
- Add the VIGI Camera
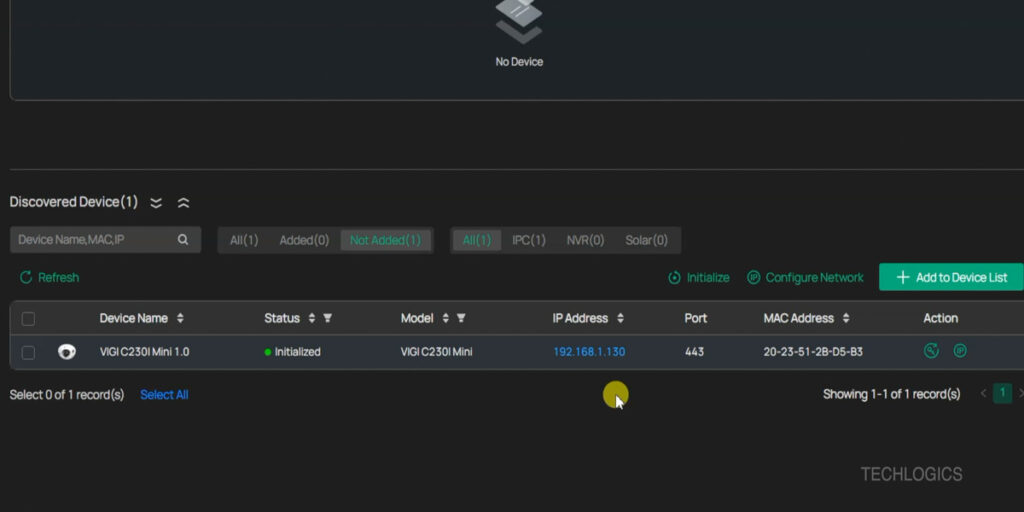
You can add the camera using one of two methods:- Quick Add: This feature allows the DVR to automatically scan the LAN for compatible cameras and list detected devices.
- Manual Add: If the camera isn’t detected automatically, select the “Add” option and manually input the camera’s details.
- In the pop-up window, enter the VIGI camera’s LAN IP address in the IP Address field.
- Set the Protocol to ONVIF.
- Use 2020 as the Management Port (the standard port for VIGI cameras).
- Enter the username as admin.
- Input the password you set during the camera’s initialization in the password and confirm password fields.
- Confirm the Setup
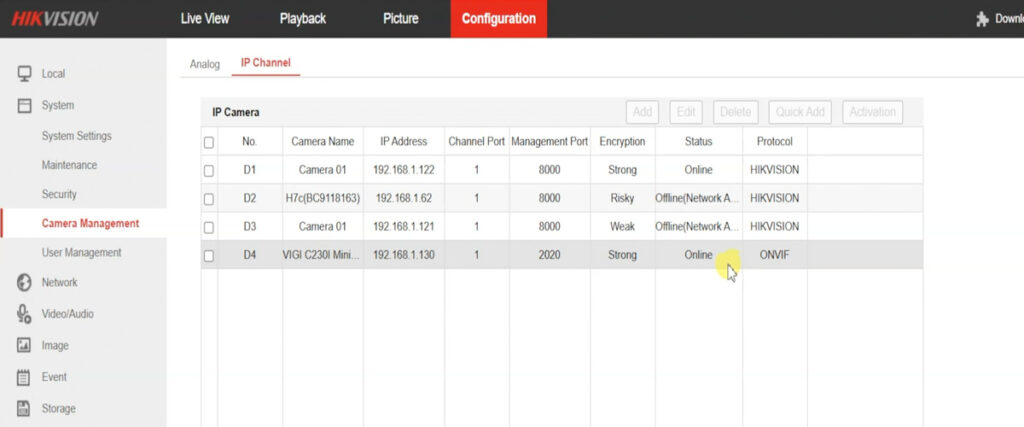
After entering the details, click OK to add the camera. If successful, the camera’s status on the IP Channel page will change to Online, indicating that the DVR is now communicating with the camera. Live feeds and recordings will now be managed through the DVR.
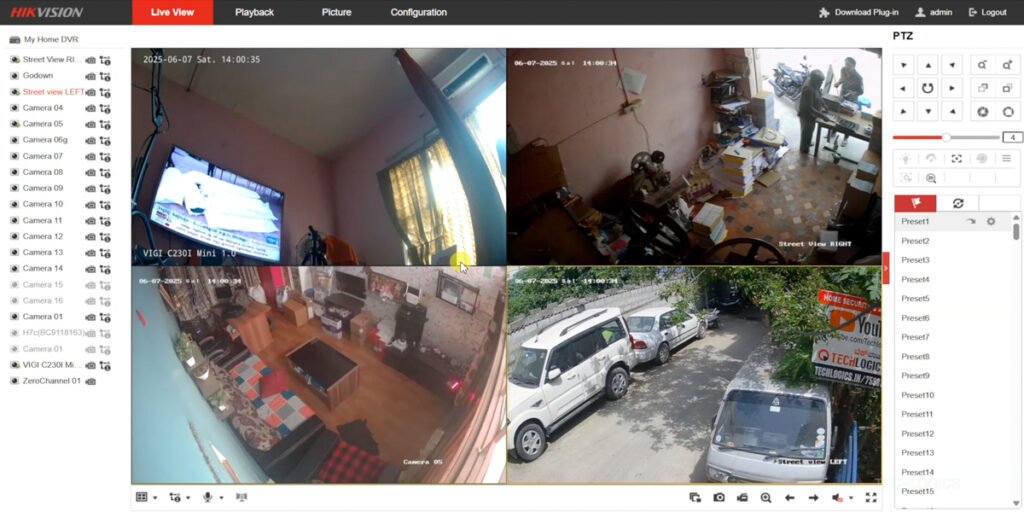
Viewing and Managing Your Camera Feeds
Once added, the VIGI camera will appear in the DVR’s Live View section alongside your existing cameras. This integration provides a unified interface for monitoring multiple feeds, making surveillance straightforward and efficient. You can:
- View all camera feeds simultaneously for comprehensive oversight.
- Switch between individual camera views as needed.
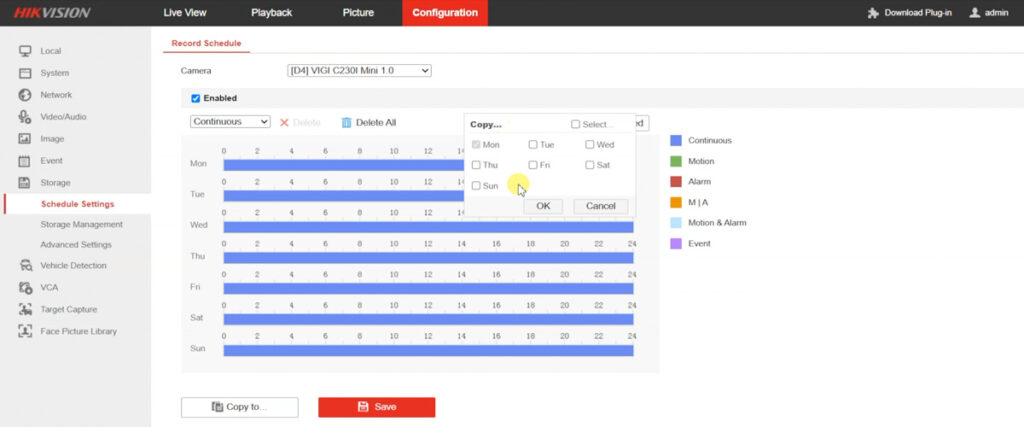
To customize recording options, navigate to the Storage Schedule Settings page. Here, you can:
- Enable continuous recording for nonstop footage.
- Set up motion detection recording to capture footage only when movement is detected.
- Schedule recordings based on weekly or hourly blocks to optimize storage and focus monitoring on specific times.
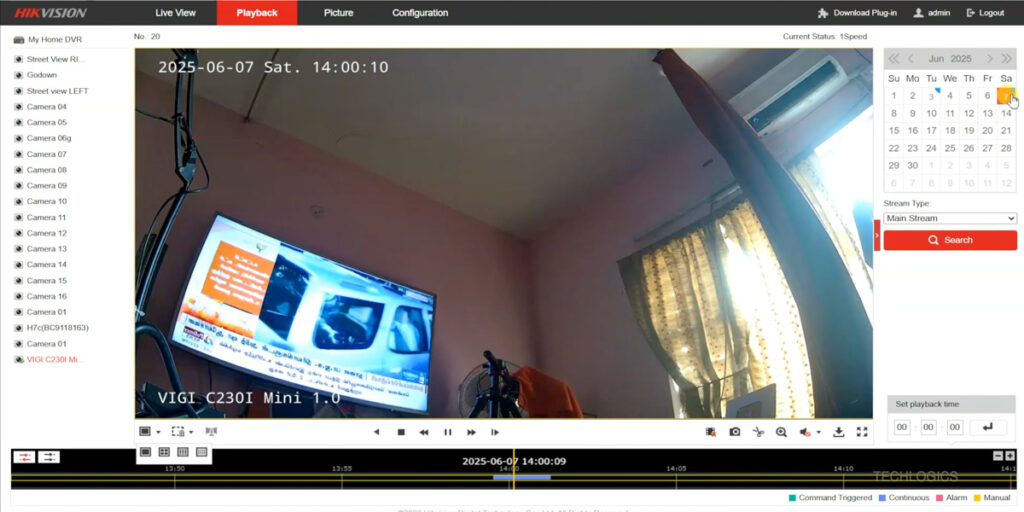
Playback and Remote Viewing
Reviewing recorded footage is easy through the Playback section, where you can access and play back specific videos. For live viewing, you can monitor feeds directly on the DVR’s connected monitor or remotely via the Hik-Connect mobile app.
If the camera doesn’t appear in the app immediately, try:
- Closing and reopening the app.
- Logging out and back in to refresh the connection.
This ensures your VIGI camera is fully accessible for remote viewing on your mobile device.
Why This Setup Matters
Integrating your Tp-Link VIGI IP camera with a Hikvision DVR using the ONVIF protocol offers a robust surveillance solution. With a stable static IP and proper configuration, you can enjoy seamless live viewing, efficient recording, and flexible monitoring options—all from a single interface.
What’s Next?
We hope this guide has been helpful in setting up your VIGI IP camera with your Hikvision DVR. Stay tuned for more tutorials in our Tp-Link VIGI series! If you found this post useful, please share it with others, leave your feedback, or explore more of our content at TECH LOGICS.
Thank you for being part of our community—keep learning and stay secure!