Welcome back to TECH LOGICS! If you’ve been following our series on Hikvision 4G PT Network Cameras, you’re in the right place. In our previous guide, we covered how to install the necessary plugin for the Chrome browser to access your camera’s interface. If you missed it, check it out for a detailed setup guide.
In this fifth installment, we’ll guide you through adding a 4G camera connected via a LAN network to your Hikvision DVR. This setup enables you to record footage to the DVR’s storage and view it live alongside other DVR cameras, creating a unified surveillance system.
Prerequisites for Seamless Integration
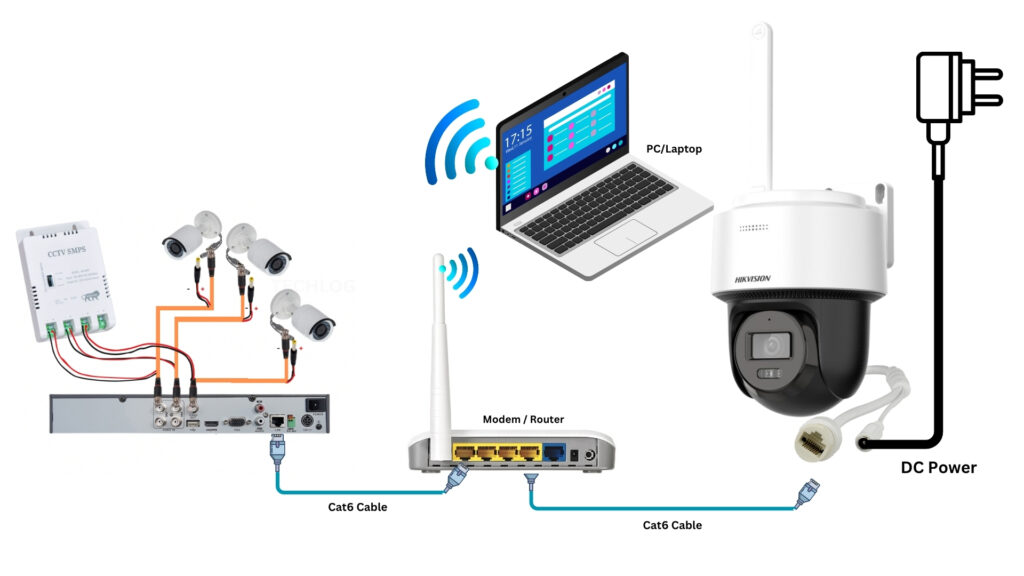
For optimal performance, ensure your 4G camera and DVR are connected to the same modem or router via LAN. This network configuration is essential for effective communication between devices. Refer to the diagram below for clarity:
Step 1: Assign a Static IP Address to Your 4G Camera
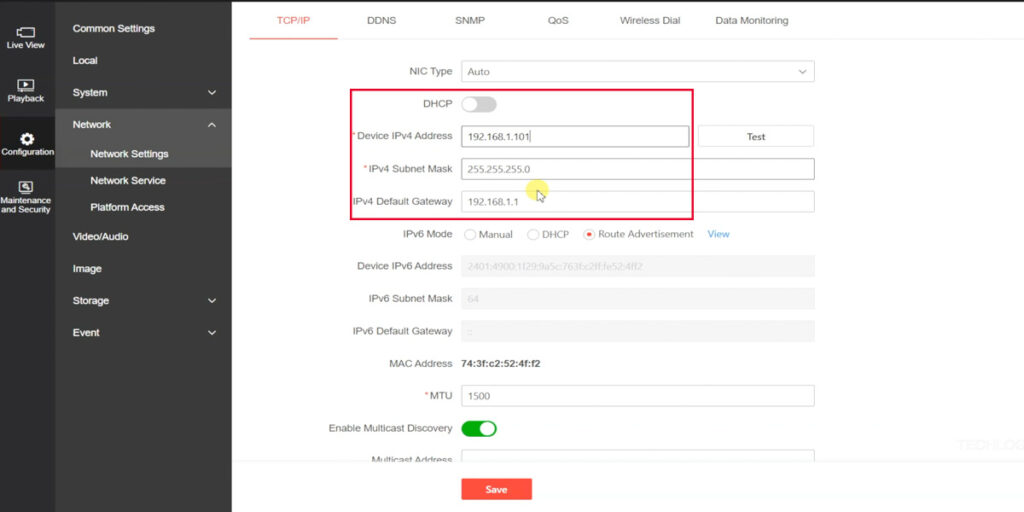
To maintain a stable connection with the DVR, set a static IP address for your camera. Follow these steps:
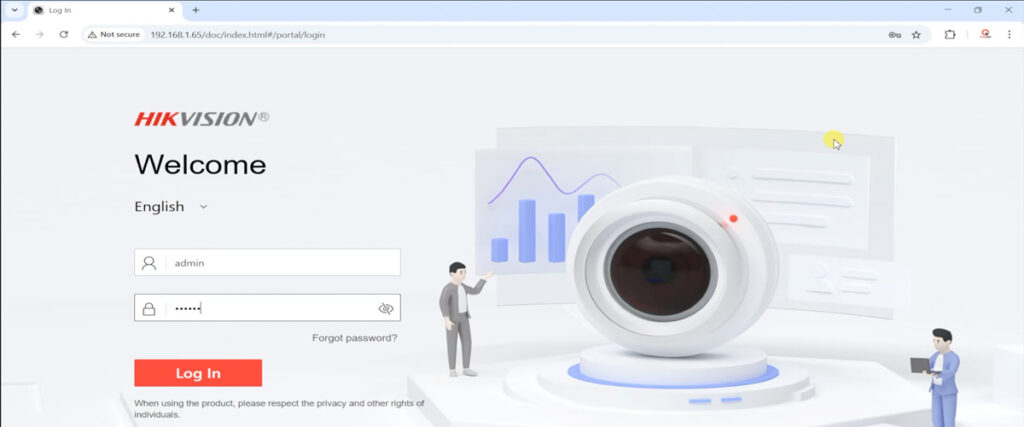
- Access the Camera’s Interface: Open your web browser and enter the camera’s current IP address in the URL bar. Log in with your credentials to access the live view and settings interface.
- Navigate to Network Settings: Go to Configuration > Network > Network Settings > TCP/IP.
- Disable DHCP: By default, the camera uses DHCP to automatically assign an IP address. Uncheck the DHCP option to set a static IP.
- Set the Static IP: Enter an IP address within your router’s IP range. For example, if your router’s IP is 192.168.1.1, set the camera’s IP to 192.168.1.101 or another available address in the same subnet. Set the gateway to your router’s IP address (e.g., 192.168.1.1).
- Save the Configuration: Click “Save” to apply the changes. The camera will reboot, which may take a few minutes.
- Verify the Configuration: After the reboot, enter the new static IP address in your browser. If the camera’s interface loads successfully, the static IP is set correctly.
Why Use a Static IP?
With DHCP enabled, the camera’s IP address may change periodically, causing connectivity issues with the DVR. A static IP ensures the camera remains accessible at the same address, maintaining a reliable connection.
Step 2: Add the 4G Camera to Your Hikvision DVR
With the static IP configured, you can now add the camera to your DVR for live viewing and recording.
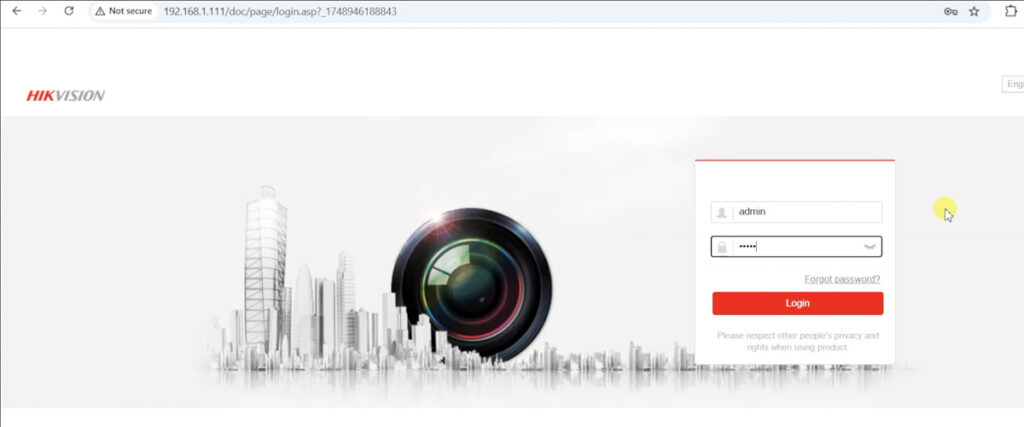
- Access the DVR’s Interface: Open your web browser, enter the DVR’s IP address, and log in using the admin credentials.
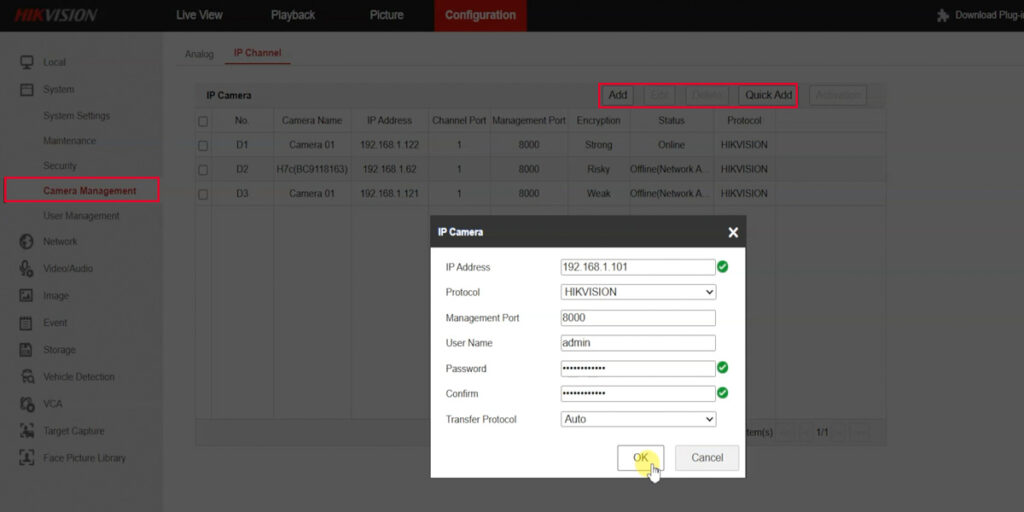
- Go to Camera Management: Navigate to Configuration > Camera Management.
- Understand DVR Channel Limits: A 4-channel Hikvision DVR supports 4 analog channels and 1 IP camera by default, while an 8-channel DVR supports 8 analog channels and 2 IP cameras. To add more IP cameras, disable analog channels by disconnecting their cables, freeing up slots for additional IP cameras.
- Add the Camera:
- Quick Add Option: Select “Quick Add” to allow the DVR to scan the LAN network and list detected cameras.
- Manual Add Option: If the camera isn’t detected, click “Add” and enter the following details in the pop-up window:
- IP Address: Enter the camera’s static IP (e.g., 192.168.1.101).
- Protocol: Select HIKVISION.
- Management Port: Set to 8000.
- Username: Enter admin.
- Password: Use the camera’s password set during activation.
- Confirm Password: Re-enter the password.
- Save and Verify: Click “OK” to add the camera. Check the IP Channel page; if the camera’s status shows as Online, the DVR is successfully communicating with the camera.

Step 3: Configure Live View and Recording Settings
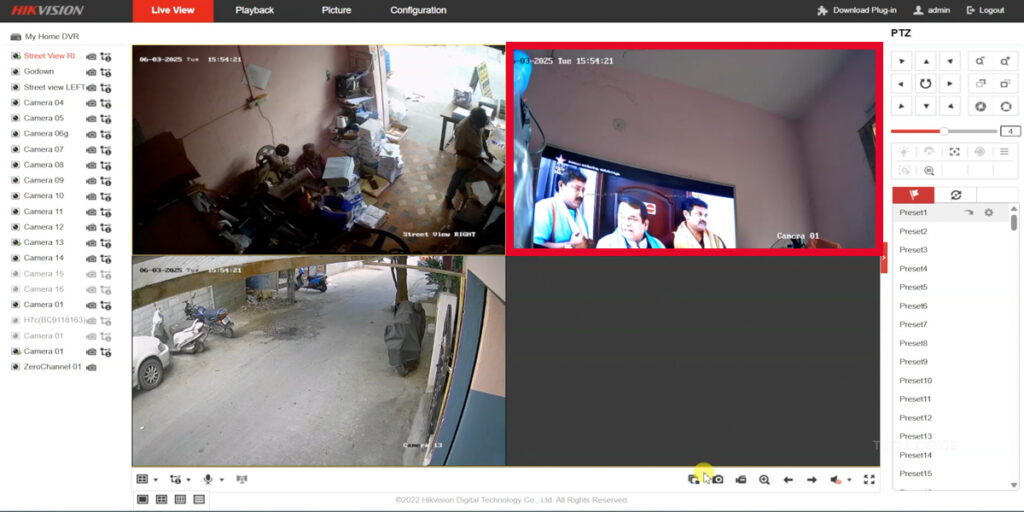
Once added, the 4G camera will appear in the DVR’s Live View section alongside other cameras, enabling you to monitor multiple feeds from a single interface. You can switch between cameras or view them simultaneously for comprehensive surveillance.
Set Up Recording Options
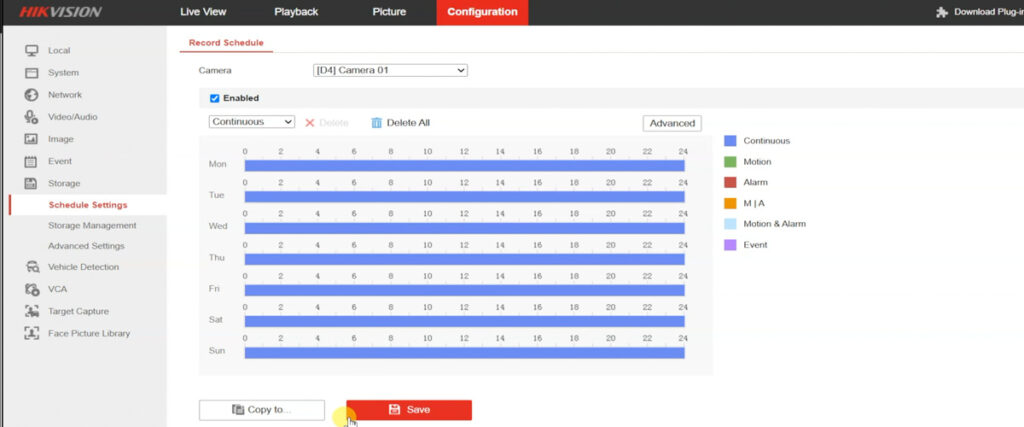
To customize how the camera records, go to Configuration > Storage > Schedule Settings:
- Continuous Recording: Captures footage 24/7.
- Motion Detection Recording: Records only when motion is detected, optimizing storage use.
- Scheduled Recording: Configure weekly or hourly recording blocks to suit your surveillance needs.
Access and Playback Footage
- Playback: Review recorded footage in the DVR’s Playback section, where you can easily locate and view specific videos.
- Monitor Viewing: The camera feed is available on a monitor connected to the DVR.
- Hik-Connect App: Access the camera feed remotely via the Hik-Connect mobile app. If the camera doesn’t appear, try closing and reopening the app or logging out and back in to refresh the connection.

Troubleshooting Tips
- Network Issues: Ensure both the camera and DVR are on the same LAN network.
- IP Conflicts: Verify the static IP is unique and within the router’s subnet.
- Camera Not Detected: If “Quick Add” fails, double-check the LAN connection and use the “Manual Add” option.
- Hik-Connect Issues: Refresh the app connection by logging out and back in.
Conclusion
By following these steps, you can successfully integrate your Hikvision 4G PT camera with your DVR, enabling live viewing and customized recording. This setup enhances your surveillance system, providing a seamless and efficient way to monitor your environment.
We hope this guide was helpful! If you found it useful, please share it, leave a comment, or subscribe to TECH LOGICSfor more tech tutorials. Your support helps us create more valuable content. Stay tuned for the next part of our series!
Related Posts:
- Part 4: Installing the Chrome Plugin for Hikvision Cameras
- More Surveillance Setup Guides
Tags: Hikvision, 4G Camera, DVR Setup, IP Camera Integration, Static IP Configuration, Hik-Connect App, Surveillance Tutorial, Security System Guide, TECH LOGICS, Motion Detection Recording