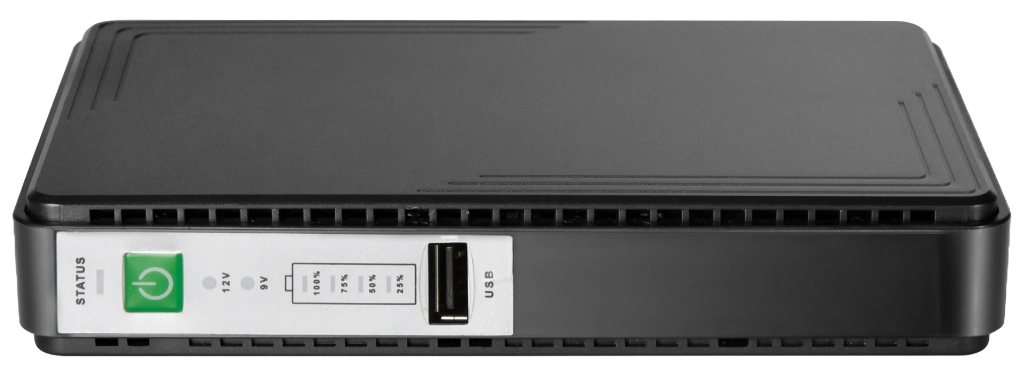
Welcome to TECH LOGICS! In this blog post, we’ll introduce you to the Mini DC UPS, a versatile and compact device designed to keep your wireless CPEs, access points, and IP cameras powered during outages. With a voltage range of DC 9 to 24 volts and support for Power over Ethernet (PoE), this UPS is perfect for applications like elevators or areas prone to frequent power disruptions. Let’s explore its features, setup process, and why it’s a must-have for reliable backup power.
Key Features of the Mini DC UPS
The Mini DC UPS is packed with features that make it an ideal backup power solution:
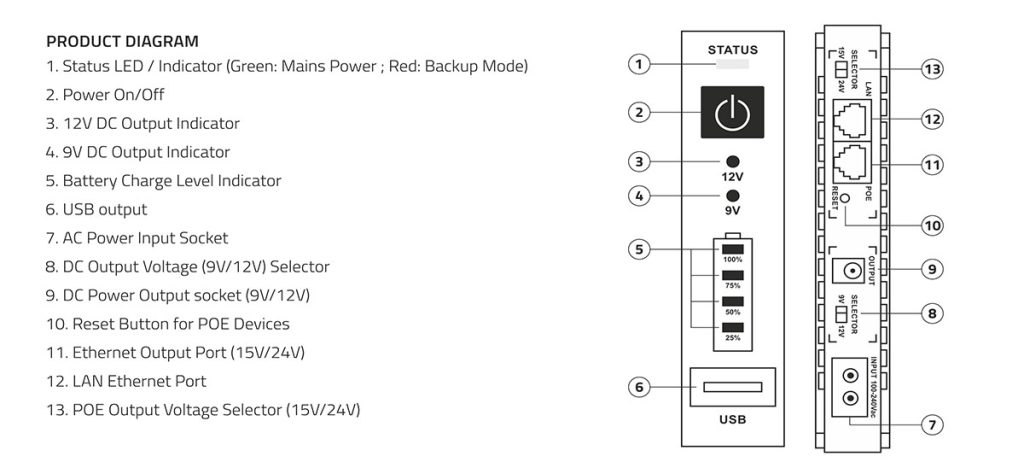
- PoE Port with Switchable Power Supply: The PoE port supports 12V or 24V output, allowing compatibility with various DC PoE-enabled devices like access points or wireless bridges operating within 9V to 24V. The port has a maximum current rating of 1.7A, so ensure your device stays within this limit.
- DC Output for IP Cameras: The UPS includes a DC output socket that delivers 12V DC, perfect for powering most IP cameras during outages.
- Lightweight and Reliable: Its compact design ensures uninterrupted power for your devices, with a battery backup that lasts up to 2 hours.
- Safe Operation: Always turn the UPS OFF before connecting devices to prevent electrical shorts, sparks, or damage.
Step-by-Step Setup Guide
Follow these steps to set up your Mini DC UPS for a wireless CPE and IP camera. For this example, we’re using a DC 9V PoE-supported wireless CPE with the PoE output set to 12V.
1. Connect the Wireless CPE
- Step 1: Connect an Ethernet cable to the Poapproval UPS PoE port.
- Step 2: Attach the other end to the PoE port of your wireless device. This setup provides both power and data to the device.
- Note: The maximum cable length is 30 meters to ensure proper power delivery and data transmission.
- Safety Tip: Ensure the UPS is OFF during connection to avoid damage.


2. Connect the IP Camera
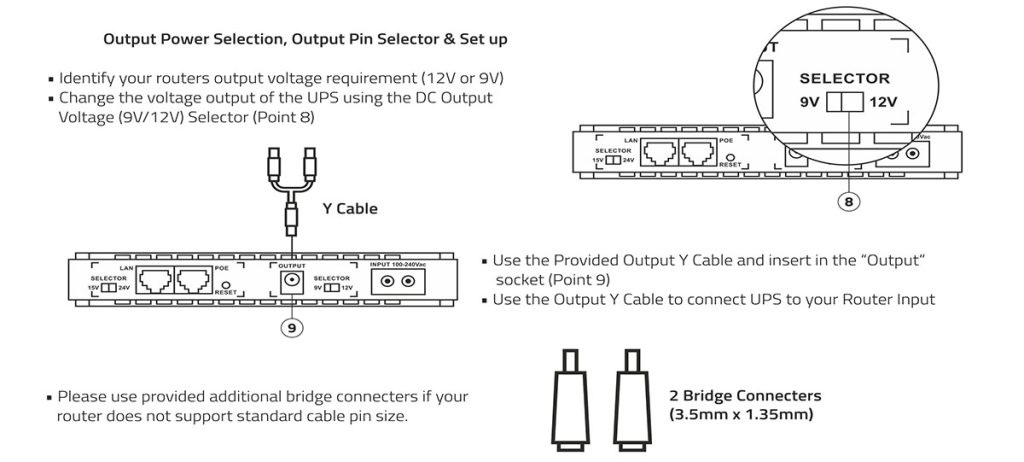
- Step 1: Verify that the DC output voltage is set to 12V using the selector switch.
- Step 2: Use the included DC power cable to connect the IP camera to the UPS DC output port.
- Step 3: Connect an Ethernet cable between the UPS LAN port and the LAN port on the IP camera for stable data transmission.
- Safety Tip: Double-check connections and keep the UPS OFF during setup.


3. Power On and Test
- Once all connections are secure, turn ON the UPS.
- The wireless CPE will detect the Wi-Fi signal from the Access Point and establish a network connection.
- The IP camera will power up and maintain network connectivity, transmitting video and data seamlessly.
- During a power outage, the UPS’s battery backup ensures up to 2 hours of uninterrupted operation for both devices.
Connection Diagram
Here’s a quick overview of the setup:
- Wireless CPE:
- Ethernet cable: UPS PoE port → CPE PoE port.
- PoE output: Set to 12V (or 24V based on device requirements).
- IP Camera:
- DC power cable: UPS DC output port → IP camera.
- Ethernet cable: UPS LAN port → IP camera LAN port.
- DC output: Set to 12V.
This configuration ensures that both the CPE and IP camera remain powered and connected, even during outages, enabling reliable remote monitoring.

Why Choose the Mini DC UPS?
The Mini DC UPS is a game-changer for scenarios requiring uninterrupted power and connectivity:
- Versatility: Powers PoE devices (9V–24V) and IP cameras (12V) simultaneously.
- Reliability: Provides up to 2 hours of backup power, ideal for elevators, surveillance systems, or remote locations.
- Ease of Use: Simple setup with switchable voltage options and included cables.
- Compact Design: Lightweight and portable, perfect for various applications.

Final Thoughts
The Mini DC UPS is a reliable and flexible solution for keeping your wireless devices and IP cameras operational during power outages. Whether you’re managing a surveillance system or ensuring network connectivity in challenging environments, this UPS has you covered.
If you found this guide helpful, please consider liking, sharing, or subscribing to our content. Your support helps us create more informative resources for our community. Have questions or need further assistance? Drop a comment below, and we’ll be happy to help!
Thank you for being part of TECH LOGICS!


