Welcome to TECH LOGICS! In this guide, we’ll walk you through the process of integrating a TP-Link TL-POE10R POE Splitter to power and connect a WiFi router, modem, or access point to a CCTV system’s POE switch. This powerful device simplifies your network setup by delivering both power and data through a single Ethernet cable, making it ideal for locations without nearby power outlets.
Why Use a TP-Link POE Splitter?
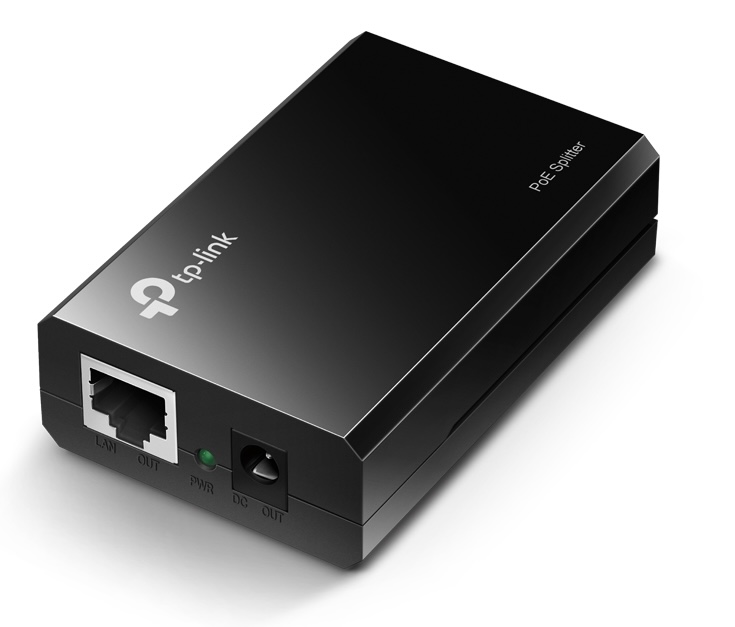
The TP-Link TL-POE10R is a versatile tool that separates power and data from a single Ethernet cable connected to a POE-enabled switch or injector. It converts the incoming 48V POE power to selectable lower voltages—12V 1A, 9V 1A, or 5V 2A—and provides two key outputs:
- An Ethernet port for data connectivity.
- A DC output jack for powering your device.
This allows you to connect non-POE devices, such as WiFi routers or modems, over a distance of up to 100 meters using just one cable. By eliminating the need for separate power outlets, the splitter enables flexible device placement for optimal signal strength and coverage.
Unlike some POE splitters that offer a fixed 12V output, the TP-Link TL-POE10R stands out with its selectable voltage options. This flexibility ensures compatibility with a wide range of devices, protecting them from over- or under-voltage issues and making it a versatile solution for networking and security applications.

Understanding the POE Setup
In a typical IP CCTV system, cameras and a Network Video Recorder (NVR) connect to a POE switch, which supplies both power and data through a single Ethernet cable. This setup reduces cable clutter and eliminates the need for multiple power outlets, ensuring seamless surveillance operation. The POE switch acts as a central hub, efficiently managing these connections.
To extend this network to a non-POE device, such as a WiFi router or modem, the TP-Link POE splitter comes into play. It connects to the POE switch via an Ethernet cable, extracts power and data, and converts the POE voltage to a suitable level (12V, 9V, or 5V) for the device. This allows you to power and connect your router or access point using a single cable, creating a clean and organized network infrastructure.

Step-by-Step Guide to Connecting Your WiFi Router
Follow these steps to connect your WiFi router or modem using the TP-Link TL-POE10R POE Splitter:
What You’ll Need:
- TP-Link TL-POE10R POE Splitter
- Cat6 Ethernet cable
- POE switch
- WiFi router, modem, or access point
- Device power specifications (check voltage and current requirements)
Steps:
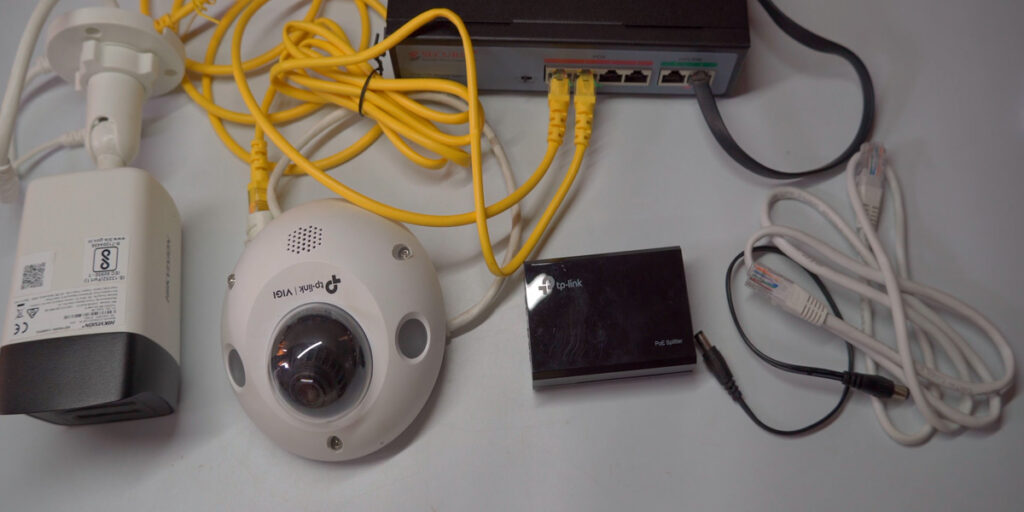
- Connect the POE Switch to the Splitter
Plug one end of a Cat6 Ethernet cable into a POE port on the POE switch. This cable will carry both data and power. Connect the other end to the Ethernet input port of the TP-Link POE splitter. The splitter will separate the incoming power and data signals for use with non-POE devices. - Connect the Splitter to Your Device
- Data Connection: Attach an Ethernet cable from the splitter’s LAN port to the Ethernet port of your WiFi router or access point to enable data transfer.
- Power Connection: Connect the splitter’s DC output to the power input of your device. Ensure the splitter’s voltage switch is set to match your device’s requirements (12V, 9V, or 5V). Check the device’s voltage and current specifications (usually listed on its panel) to avoid damage.
- Verify the Connection
When the POE switch is connected to the splitter, a green LED on the splitter will blink slowly, indicating it’s receiving power. Once the LAN and DC connections are made to your device, the LED should become steady, confirming that the splitter is supplying both power and data correctly. - Test Your Setup
Power on your WiFi router or modem and verify that it’s receiving both network connectivity and power. The device should now transmit or receive internet data based on your configuration, providing a reliable connection through the POE switch.


Visual Guide
To make the process even easier, refer to the diagram included in our video tutorial (link below). It illustrates how the Ethernet cable connects from the POE switch to the splitter, which then separates power and data for your non-POE device. This visual aid simplifies the installation process, ensuring you connect each component correctly.

Benefits of Using a POE Splitter
- Simplified Setup: Deliver power and data through a single Ethernet cable, reducing cable clutter.
- Flexible Placement: Install devices up to 100 meters away from the POE switch, even without nearby power outlets.
- Device Compatibility: Selectable voltage outputs (12V, 9V, 5V) support a wide range of non-POE devices.
- Reliable Performance: The POE switch and splitter ensure stable power and data delivery for seamless operation.
This setup is particularly useful for optimizing WiFi signal strength by placing routers or access points in ideal locations, free from the constraints of power outlet availability.
Conclusion
By using the TP-Link TL-POE10R POE Splitter, you can easily connect a WiFi router, modem, or access point to a POE switch, streamlining your network setup and enhancing flexibility. This solution is perfect for both home and professional environments, especially in CCTV systems or areas with limited power access.
If you found this guide helpful, please share it with others and check out our video tutorial for a visual walkthrough: [Insert Video Link]. Your support helps us create more informative content! Stay tuned to TECH LOGICS for more tech tips and tutorials.


