Welcome! Today, we’re diving into the essential process of setting up a 2 HD analog CCTV camera system. This guide will walk you through the wiring connections for the DVR, two cameras, a DC SMPS (Switched-Mode Power Supply), and a display screen. We’ll use simple animated diagrams to enhance your learning experience.
Understanding the Components
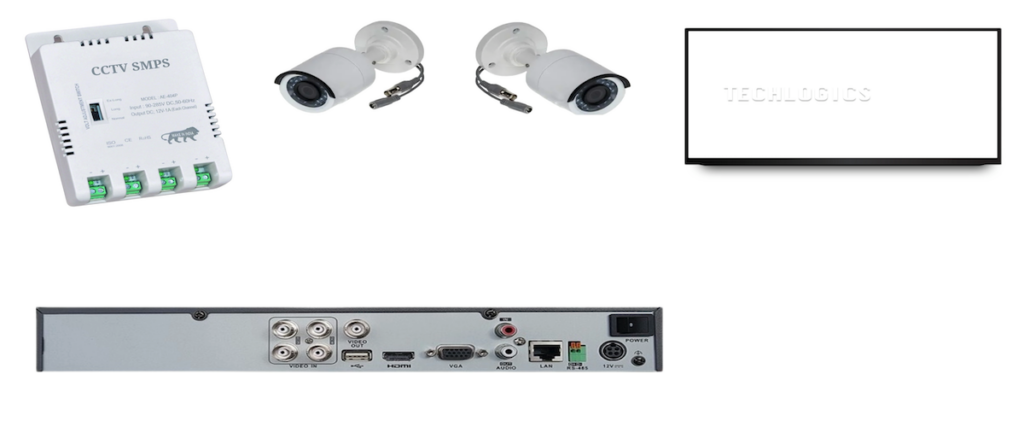
Before we start the installation process, let’s familiarize ourselves with the key components of this CCTV setup:
- Digital Video Recorder (DVR): The main hub for collecting and recording video feeds from the cameras.
- Cameras: Two HD analog cameras that capture live video footage.
- DC SMPS: The power supply unit that provides the necessary voltage and current to the cameras.
- Display Screen: A monitor that displays the camera feeds.
- 3+1 CCTV Cables with BNC Connectors: Special cables used to transmit video and power. The “3+1” indicates three wires for power and one for video.
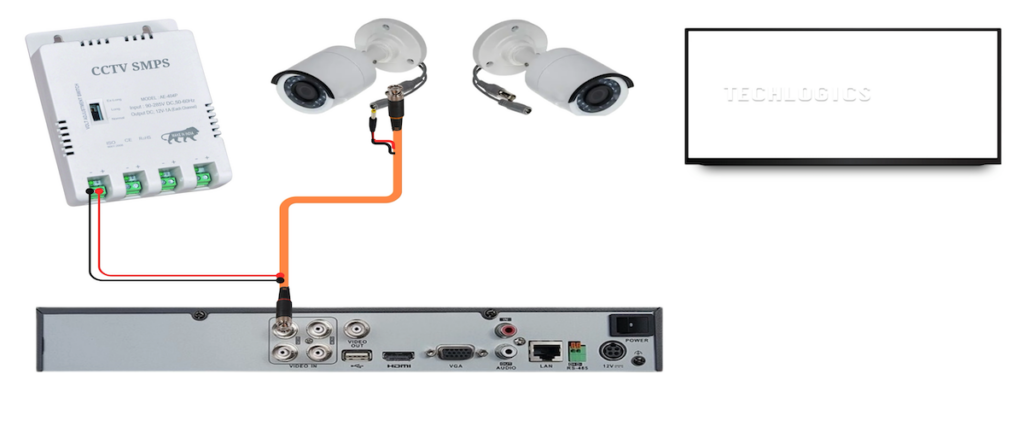
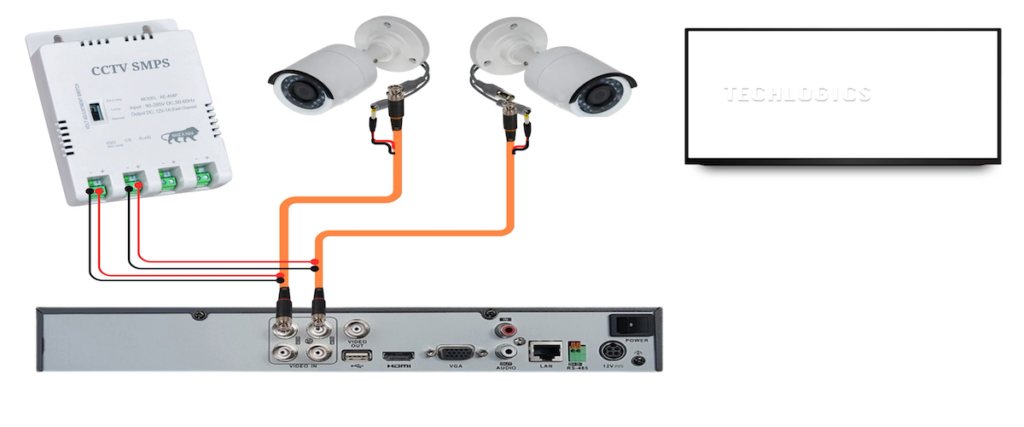
Step 1: Connecting the Cameras to the DVR
To begin, we must connect each camera to the DVR:
- Using BNC Connectors: Take the 3+1 CCTV cable and identify the BNC connectors, ensuring they fit snugly into the camera’s video output port. Connect one end of the cable to the camera and the other end into the corresponding video input on the DVR. This establishes a video signal path from the camera to the DVR.
Step 2: Powering the Cameras
Next, we’ll set up the DC SMPS to provide power to the cameras:
- Connect Power Cables: Inside the 3+1 cable, you will find three wires meant for power. Connect these power wires from the DC SMPS to each camera:
- Red Wire: This is typically designated as the positive wire.
- Black Wire: This represents the negative wire.
Step 3: Wiring Connections at the DVR Side
Now, let’s prepare the DVR side of the 3+1 cable:
- Strip the Wires: Carefully strip the ends of the power wires that are attached to the DVR.
- Maintaining the Color Code: It’s crucial to maintain the same color scheme throughout the wires—red for positive and black for negative. Connect the stripped ends of the red wire to the appropriate power input terminal on the DVR and do the same for the black wire. Proper color coding ensures that you consistently provide power in the correct polarity, which reduces the risk of errors.
Step 4: Preparing the Camera’s Power Supply Connection
Now we’ll work on connecting the other end of the cable (the one that goes to the camera’s power supply):
- DC Pin Connection: Locate the male DC pin on each camera where you need to supply power. Connect the red wire (positive) to the appropriate terminal on the DC pin and the black wire (negative) to its corresponding terminal.
- Consistency is Key: It’s essential to apply the same color scheme here as used on the SMPS side. By doing so, you minimize the risk of mistakes that could lead to reversed polarity.
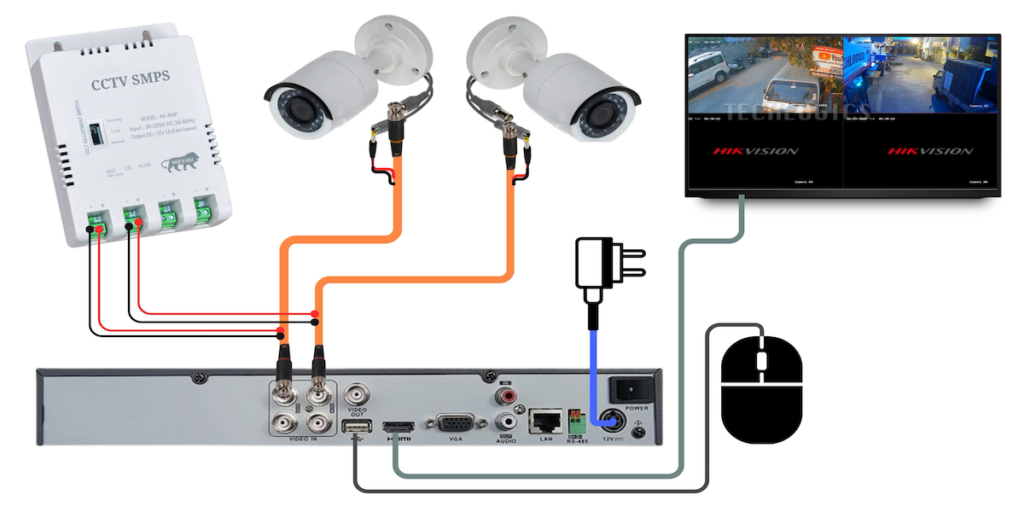
Step 5: Setting Up the Second Camera and Accessories
Repeat the same wiring process for the second camera:
- Mirror the Steps: Ensure that both cameras are wired identically to maintain consistency.
Next, connect any additional accessories to the DVR:
- Connect the DVR Power Adapter: This is vital to ensure the DVR operates smoothly.
- Connect the Mouse and Display Screen: Using appropriate cables, link your mouse and display to the DVR. This will allow you to control the DVR and view the camera feeds.
Final Step: Powering On the CCTV System
After all connections are securely made, it’s time to turn on your CCTV system:
- Double-Check Connections: Before powering up, do a thorough check of all connections for any loose wires or incorrect placements.
- Power On: Switch on the DC SMPS, the DVR, and the display screen. You should see your camera feeds appear on the screen.
Conclusion
Thank you for following this detailed guide on connecting a 2 HD analog CCTV camera system! We appreciate your support in creating more informative content like this. If this tutorial was helpful for you, please like, share, and subscribe to our channel for more tech guides and tutorials. Your engagement motivates us to produce high-quality content aimed at enhancing your technology experience!